2.
Clean the appliance with a damp cloth and some detergent.
3.
At the end
rub the appliance dry with a clean cloth.
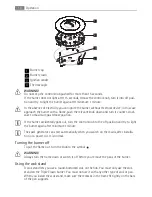
To make burners work properly, make sure that pan supports are placed in the way that the
arms are centred upon the burner.
In order to avoid damaging the hob top pay attention when replacing the pan support.
Cleaning of the spark plug
This feature is obtained through a ceramic ignition candle with a metal electrode. Keep
these components well clean to prevent difficult lighting and check that the burner crown
holes are not obstructed.
Periodic maintenance
Periodically speak your local Service Force Centre to check the conditions of the gas supply
pipe and the pressure adjuster, if fitted.
WHAT TO DO IF…
Problem
Possible cause
Remedy
There is no spark when lighting
the gas
• There is no electrical supply
• Make sure that the unit is
connected and the electrical
supply is switched on.
• Control the fuse. If the fuse
is released more than one
time, refer to a qualified
electrician.
• Burner cap and crown are
placed uneven
• Make sure that the burner
cap and crown are in correct
positions.
The flame is blow out immedi-
ately after ignition
• Thermocouple is not heated
sufficient
• After lightning the flame,
keep the knob pushed for
approximately 5 seconds.
The gas ring burns unevenly
• Burner crown is blocked
with food residues
• Make sure that the injector
is not blocked and the burn-
er crown is clear of food
particles.
If there is a fault, first try to find a solution to the problem yourself. If you cannot find a
solution to the problem yourself, speak your dealer or the local Service Force Centre.
If you operated the appliance incorrectly, or the installation was not carried out by a regis-
tered engineer, the visit from the customer service technician or dealer may not take place
free of charge, even during the warranty period.
Labels supplied with the accessories bag
Stick the adhesive labels as indicated below:
What to do if…
17
Summary of Contents for HG795440XB
Page 1: ...HG795440XB EN GAS HOB USER MANUAL ...
Page 21: ...21 ...
Page 22: ...22 ...
Page 23: ...23 ...

