background image

2.

Use special fabric conditioner for

tumble dryers.

When the drying programme is

completed remove the laundry promptly.

15. 

CARE AND CLEANING

WARNING!

Refer to Safety chapters.

15.1 

External cleaning

Clean the appliance with mild soap and

warm water only. Fully dry all the

surfaces.

CAUTION!

Do not use alcohol, solvents

or chemical products.

CAUTION!

Do not clean the metal

surfaces with chlorine-based

detergent.

15.2 

Descaling

If the water hardness in your

area is high or moderate, we

recommend that you use a

water descaling product for

washing machines.

Regularly examine the drum to check for

limescale.
The regular detergents already contain

water softening agents, but we

recommend to run a cycle with empty

drum and a descaling product

occasionally.

Always follow the

instructions that you find on

the packaging of the

product.

15.3 

Maintenance wash

The repeated and prolonged use of low

temperature programmes can cause

detergent deposits, fluff residues,

bacterial growth inside the drum and the

tub. This could generate bad odours and

mildew.
To eliminate these deposits and

hygienize the inner part of the appliance,

run a maintenance wash regularly (at

least once a month):

1.

Remove all laundry from the drum.

2.

Run a cotton programme with the

highest temperature with a small

quantity of powder detergent.

15.4 

Door seal

Regularly examine the seal and remove

all objects from the inner part.

15.5 

Cleaning the drum

Regularly examine the drum to prevent

rust particles.
For a complete cleaning:

1.

Clean the drum with special products

for stainless steel.

Always follow the

instructions that you find on

the packaging of the

product.

2.

Run a short cotton programme at

high temperature with empty drum

and with a small quantity of powder

detergent , in order to rinse out any

left residues.

15.6 

Cleaning the detergent

dispenser

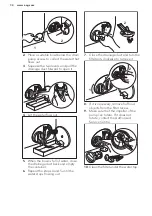
To prevent possible deposits of dried

detergent or clotted fabric softener

and/or formation of mould in the

detergent dispenser drawer, once in a

while carry out the following cleaning

procedure:

www.aeg.com

32

Summary of Contents for L7WEE861R

Page 1: ...USER MANUAL EN User Manual Washer Dryer L7WEE861R ...

Page 2: ... technologies that help make life simpler features you might not find on ordinary appliances Please spend a few minutes reading to get the very best from it Visit our website for Get usage advice brochures trouble shooter service information www aeg com webselfservice Register your product for better service www registeraeg com Buy Accessories Consumables and Original spare parts for your applianc...

Page 3: ...n given supervision or instruction concerning the use of the appliance in a safe way and understand the hazards involved Do not let children play with the appliance Children aged 3 years and under must be kept away from this appliance when it is in operation at all times Keep all packaging away from children and dispose of it appropriately Keep detergents away from children Keep children and pets ...

Page 4: ...ing gas or other fuels including open fires Exhaust air must not be discharged into a flue which is used for exhausting fumes from any appliances burning gas or other fuels The operating water pressure at the water entry point from the outlet connection must be between 0 5 bar 0 05 MPa and 8 bar 0 8 MPa Do not exceed the maximum load of 8 kg refer to the Programme chart chapter The appliance must ...

Page 5: ...ng cycle unless all items are quickly removed and separated so that residual heat can dissipate The final part of the washer dryer cycle takes place without heat cool down cycle to ensure that items reach a temperature that will not cause damage to them Do not use high pressure water sprays and or steam to clean the appliance Clean the appliance with a moist cloth Use only neutral detergents Do no...

Page 6: ...ge to the water hoses Before connection to new pipes pipes not used for a long time where repair work has been carried out or new devices fitted water meters etc let the water flow until it is clean and clear Ensure that there are no visible water leaks during and after the first use of the appliance 2 4 Use WARNING Risk of injury electrical shock fire burns or damage to the appliance This applian...

Page 7: ... the gloves 1 Remove the external film If necessary use a cutter 2 Remove the cardboard top and the polystyrene packaging materials 3 Remove the internal film 4 Open the door and remove the polystyrene piece from the door seal and all the items from the drum 5 Carefully put down the appliance with the rear side on it 6 Put the front polystyrene packaging element on the floor under the appliance Ma...

Page 8: ...aging and the transit bolts for any movement of the appliance 3 2 Installation on suspended flooring Suspended wooden floors are particularly susceptible to vibration To limit vibration we recommend placing a waterproof wooden panel at least 15 mm thick under the appliance It should be screwed to at least 2 floor beams and should extend beyond the front feet If possible install the appliance where...

Page 9: ...epending on the position of the water tap 20 O 20 O 45 O 45 O Make sure that the inlet hose is not in vertical position 3 If necessary loose the ring nut to set it in the correct position 4 Connect the water inlet hose to the cold water tap with 3 4 thread CAUTION Make sure that there are no leaks from the couplings Do not use an extension hose if the inlet hose is too short Contact the service ce...

Page 10: ...ide 2 On the edge of a sink Fasten the guide to the water tap or to the wall Make sure that the plastic guide cannot move when the appliance drains Make sure that the drain hose end is not immersed in the water There may be a return of dirty water into the appliance 3 To a stand pipe with vent hole Insert the drain hose directly into a drain pipe Refer to the illustration The end of the drain hose...

Page 11: ...pliance from the sink 6 Position the hose directly to a built in drain pipe in the room wall and tighten it with a clamp 4 PRODUCT DESCRIPTION 4 1 Appliance overview 1 2 3 9 5 6 7 4 10 8 11 12 1 Worktop 2 Detergent dispenser 3 Control panel 4 Door handle 5 Rating plate 6 Drain pump filter 7 Feet for levelling the appliance 8 Drain hose 9 Inlet hose connection 10 Mains cable 11 Transit bolts 12 Hos...

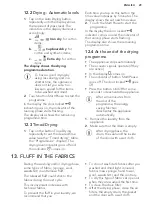
Page 12: ...0 8 1 4 5 7 9 1 Programme dial 2 Display 3 Drying time touch button Time Drying 4 Drying level touch button Auto Drying 5 Washing and drying mode touch button Mode Wash Dry 6 Start and pause touch button Start Pause 7 Anti stain and prewash touch button Stains Prewash Stains Prewash 8 Delay Start touch button Delay Start 9 Time Saving touch button Quick Wash 10 Spin reduction touch button Spin Dra...

Page 13: ...rogramme duration e g washing and or drying phase Delay time e g or Cycle end Warning code e g Washing phase indicator it flashes during prewash and wash phase Rinsing phase indicator It flashes during rinse phase The permanent Extra Rinse option one additional rinse two additional rinses Spin and drain phase indicator It flashes during spin and drain phase Steam phase indicator Drying phase indic...

Page 14: ...eed allowed Touch repeatedly this button to Decrease the spin speed The display shows only the spin speeds available for the set programme Set the Drain option Skipping the wash rinse and spin phases The appliance performs the only draining phase of the selected washing programme The display shows the indicator cold and the indicator no spin and the indicator Set the Spin option Skipping the wash ...

Page 15: ...d above the button is on This option can also be used to shorten the Steam programme duration 6 8 Time Drying Touch this button to set the time that suits the fabrics you have to dry refer to Timed drying table The display shows the set value Each time you touch this button the time value increases by 5 minutes You cannot set all time values for different types of fabrics 6 9 Auto Drying Touch thi...

Page 16: ...oftener and make sure that there is no softener residue in the detergent dispenser Outdoor clothing technical sport fabrics waterproof and breathable jackets shell jackets with a removable fleece or inner insulation By performing a non stop wash and dry pro gramme the drying phase also acts as water repellent restorer Make sure that the garment care label permits tumble drying Anti Allergy White c...

Page 17: ...type of laundry 1 During this cycle the drum rotates slowly to ensure a gentle wash It can seem that the drum doesn t rotate or doesn t rotate properly but this is normal for this programme 2 If you set a Steam programme with dried laundry at the end of the cycle the laundry could be humid It is better to expose the items to the fresh air for about 10 minutes to let the humidity dry When the progr...

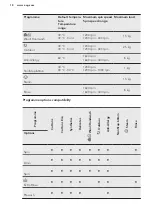
Page 18: ...rpm 1200 rpm 400 rpm 2 5 kg Anti Allergy 60 C 1600 rpm 1600 rpm 400 rpm 8 kg NonStop 60min 30 C 40 C 30 C 1200 rpm 1200 rpm 1000 rpm 1 kg Steam 1 5 kg Rinse 1600 rpm 1600 rpm 400 rpm 8 kg Programme options compatibility Programme Cottons Cottons Eco Synthetics Delicates Wool Handwash Outdoor Anti Allergy NonStop 60min Steam Rinse Options Spin Drain Spin Extra Rinse Prewash www aeg com 18 ...

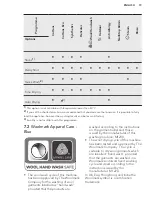
Page 19: ...e The wool wash cycle of this machine has been approved by The Woolmark Company for the washing of wool garments labelled as hand wash provided that the products are washed according to the instructions on the garment label and those issued by the manufacturer of this washing machine M1230 The wool drying cycle of this machine has been tested and approved by The Woolmark Company The cycle is suita...

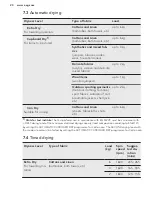
Page 20: ...pboard Dry1 For items to be stored Cottons and Linen bathrobes bath towels etc up to 6 kg Synthetics and mixed fab rics jumpers blouses under wear household linen up to 4 kg Delicate fabrics acrylics viscose and delicate mixed fabrics up to 2 kg Wool items woollen jumpers up to 1 kg Outdoor sporting garments Outdoor clothing technical sport fabrics waterproof and breathable jackets shell jack ets ...

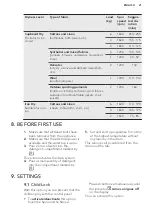
Page 21: ...190 4 1600 105 125 2 1600 75 85 8 BEFORE FIRST USE 1 Make sure that all transit bolts have been removed from the appliance 2 Make sure that the electrical power is available and the water tap is open 3 Pour 2 litres of water into the detergent compartment marked by This action activates the drain system 4 Pour a small quantity of detergent into the compartment marked by 5 Set and start a programme...

Page 22: ...y have one or two extra rinses when you set a new programme Simultaneously touch the Temp button and the Spin button once to add one extra rinse appears on the display Simultaneously touch the Temp button and the Spin button twice to add two extra rinses appears on the display Simultaneously touch the Temp button and the Spin button three times to remove extra rinses The display only shows 10 DAIL...

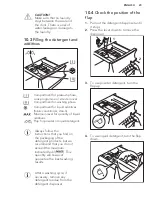
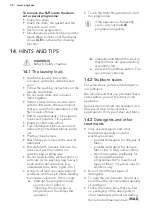
Page 23: ...r powder or liquid detergent Always follow the instructions that you find on the packaging of the detergent products but we recommend that you do not exceed the maximum indicated level This quantity will however guarantee the best washing results After a washing cycle if necessary remove any detergent residue from the detergent dispenser 10 4 Check the position of the flap 1 Pull out the detergent...

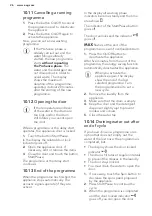
Page 24: ... make sure that only the Wash indicator is on above the Mode button In case a selection is not possible no indicator comes on and an acoustic signal sounds 10 6 Starting a programme Touch the Start Pause button to start the programme The related indicator stops flashing and stays on In the display the indicator of the operating phase starts flashing and the maximum load indicator goes off The prog...

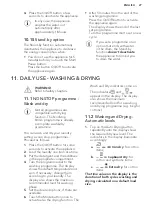
Page 25: ...ed the exceeding garments touch the Start Pause button to start the programme again The ProSense phase can be repeated up to three times see point 1 Important If the laundry amount will not be reduced the washing programme starts anyway despite the overload In this case it will be not possible to guarantee the best washing results About 20 minutes after the programme start the programme duration c...

Page 26: ...if they are active In the display all washing phase indicators become steady and the time area shows The indicator of the Start Pause button goes off The door unlocks and the indicator goes off flashes at the end of the programme in case of overloaded drum 1 Press the On Off button to deactivate the appliance After five minutes from the end of the programme the energy saving function automatically...

Page 27: ...ramme You can wash and dry your laundry setting a non stop programme Proceed as follows 1 Press the On Off button for some seconds to activate the appliance 2 Load the laundry one item at a time 3 Put the detergent and the additives in the appropriate compartment 4 Turn the programme dial to the washing programme The display shows the default temperature and spin If necessary change them according...

Page 28: ...ance stops automatically The acoustic signals operate if they are active In the display comes on The indicator of button Start Pause goes off The door locked goes off Press the button On Off for some seconds to deactivate the appliance After some minutes from the end of the programme the energy saving function deactivates the appliance automatically 1 Remove the laundry from the appliance 2 Make s...

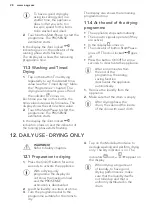
Page 29: ... indicator of the running phase starts flashing The display also shows the remaining programme time 12 4 At the end of the drying programme The appliance stops automatically The acoustic signals operate if they are active In the display comes on The indicator of button Start Pause goes off The door locked goes off Press the button On Off for some seconds to deactivate the appliance After some minu...

Page 30: ...se a washing bag to wash small and or delicate items e g underwired bras belts tights etc A very small load can cause balance problems with the spin phase leading to excessive vibration If this occurs a interrupt the programme and open the door refer to Opening the door when a programme or the delay start operates b manually redistribute the load so that the items are spaced evenly around the tub ...

Page 31: ...m laundry load of the drying programmes refer to the drying programmes table 14 7 Items not suitable for drying Do not set a drying programme for this laundry Very delicate items Synthetic curtains Pieces of clothing with metal inserts Nylon stockings Quilts Bed covers Duvets Anoraks Sleeping bags Fabrics with residue of hair sprays nail solvents or similar Garments with foam rubber or materials s...

Page 32: ... cause detergent deposits fluff residues bacterial growth inside the drum and the tub This could generate bad odours and mildew To eliminate these deposits and hygienize the inner part of the appliance run a maintenance wash regularly at least once a month 1 Remove all laundry from the drum 2 Run a cotton programme with the highest temperature with a small quantity of powder detergent 15 4 Door se...

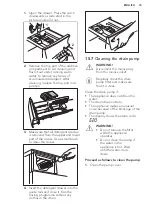
Page 33: ...to the guide rails and close it Run the rinsing programme without any clothes in the drum 15 7 Cleaning the drain pump WARNING Disconnect the mains plug from the mains socket Regularly check the drain pump filter and make sure that it is clean Clean the drain pump if The appliance does not drain the water The drum does not turn The appliance makes an unusual noise because of the blockage of the dr...

Page 34: ...ose the drainage duct back and empty the container 6 Repeat the steps 4 and 5 until the water stops flowing out 1 2 7 Close the drainage duct and turn the filter anti clockwise to remove it 1 2 8 If it is necessary remove fluff and objects from the filter recess 9 Make sure that the impeller of the pump can rotate If it does not rotate contact the Authorised Service Centre 10 Clean the filter unde...

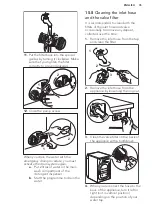
Page 35: ...ramme to drain the water 15 8 Cleaning the inlet hose and the valve filter It is recommended to clean both the filters of the inlet hose and valve occasionally to remove any deposit collected over the time 1 Remove the inlet hose from the tap and clean the filter 1 2 3 2 Remove the inlet hose from the appliance by loosening the ring nut 3 Clean the valve filter on the back of the appliance with a ...

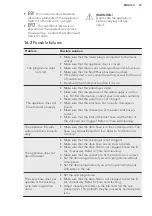
Page 36: ...ain pump is empty install the inlet hose again WARNING Make sure that the temperature is higher than 0 C before you use the appliance again The manufacturer is not responsible for damages caused by low temperatures 16 TROUBLESHOOTING WARNING Refer to Safety chapters 16 1 Introduction The appliance does not start or it stops during operation First try to find a solution to the problem refer to the ...

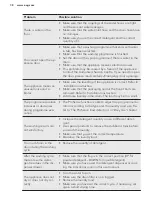
Page 37: ... has no kinks damages or bends Make sure that the connection of the water inlet hose is correct Make sure that the filter of the inlet hose and the filter of the valve are not clogged Refer to Care and cleaning The appliance fills with water and drains immedi ately Make sure that the drain hose is in the correct position The hose may be positioned too low Refer to Installation in struction The app...

Page 38: ...ruction Add more laundry in the drum The load may be too small The programme duration increases or decreases during programme exe cution The ProSense function is able to adjust the programme du ration according to the type and the laundry load size Re fer to The ProSense load detection in Daily Use chapter The washing results are not satisfactory Increase the detergent quantity or use a different ...

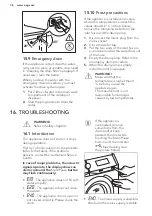
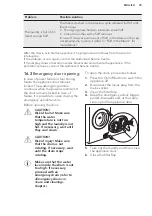
Page 39: ... remains locked The washing programme continues when the power is restored If the door remains locked in case of failure it is possible to open it using the emergency unlock function Before opening the door CAUTION Risk of burns Make sure that the water temperature is not too high and the laundry is not hot If necessary wait until they cool down CAUTION Risk of injury Make sure that the drum is no...

Page 40: ... consump tion kWh Water con sumption li tre Approximate pro gramme duration minutes Cottons 60 C 8 1 65 80 200 Cotton Energy Saving Pro gramme 60 C1 8 0 90 60 250 Cottons 40 C 8 1 25 80 200 Synthetics 40 C 4 0 78 55 130 Delicates 40 C 4 0 60 63 91 Wool Handwash 30 C 1 5 0 35 57 60 1 Cotton Energy Saving programme at 60 C with a load of 8kg is the reference programme for the data entered in the ene...

Page 41: ...priate accessories approved by AEG ensure the safety standards of the appliance If unapproved parts are used any claims will be invalidated 19 2 Fixing plate kit If you install the appliance on a plinth secure the appliance in the fixing plates Read carefully the instructions supplied with the accessory 19 3 Stacking kit The tumble dryer can be stacked on the top of the washing machine only by usi...

Page 42: ...ssory 20 ENVIRONMENTAL CONCERNS Recycle the materials with the symbol Put the packaging in applicable containers to recycle it Help protect the environment and human health and to recycle waste of electrical and electronic appliances Do not dispose appliances marked with the symbol with the household waste Return the product to your local recycling facility or contact your municipal office www aeg...

Page 43: ...ENGLISH 43 ...

Page 44: ...www aeg com shop 157012100 B 222017 ...

Reviews: