background image

10.10 

Interrupting a

programme and changing the

options

When the programme is running, you

can change 

only some

 options:

1.

Touch the button Start/Pause.

The related indicator flashes.

2.

Change the options. The given

information in the display changes

accordingly.

3.

Touch the button Start/Pause again.

The washing programme continues.

10.11 

Cancelling a running

programme

1.

Press the button On/Off to cancel

the programme and to deactivate

the appliance.

2.

Press the button On/Off again to

activate the appliance.

Now, you can set a new washing

programme.

If the ProSense phase is

already carried out and the

water filling is already

started, the new programme

starts 

without repeating

the ProSense phase

. The

water and the detergent are

not drained out in order to

avoid waste. The display

shows the maximum

duration of the programme,

updating it about 20 minutes

after the starting of the new

programme.

10.12 

Opening the door -

Adding garments

While a programme or the delay start

operates, the appliance door is locked.

If the temperature and level

of the water in the drum are

too high and/or the drum

still rotates you cannot open

the door.

1.

Touch the button Start/Pause.

In the display the related door lock

indicator goes off.

2.

Open the appliance door. If

necessary, add or remove the items.

3.

Close the door and touch the button

Start/Pause.

The programme or the delay start

continues.

4.

The door can be opened when the

programme is complete, or set Spin/

Drain programme and than press

Start/Pause button.

10.13 

End of the programme

When the programme has finished, the

appliance stops automatically. The

acoustic signals operate (if they are

active).
In the display all washing phase

indicators become steady and the time
area shows  .
The indicator of the Start/Pause button

goes off.

The door unlocks and the indicator 

goes off.

 flashes at the end of the

programme in case of overloaded drum.

1.

Press the On/Off button to

deactivate the appliance.

After five minutes from the end of the

programme, the energy saving function

automatically deactivates the appliance.

When you activate the

appliance again, the display

show the end of the last

selected programme. Turn

the programme dial to set a

new cycle.

2.

Remove the laundry from the

appliance.

3.

Make sure that the drum is empty.

4.

Keep the door and the detergent

dispenser slightly ajar to prevent

mildew and odours.

5.

Close the water tap.

10.14 

Stand-by option

The Stand-by function automatically

deactivates the appliance to decrease

the energy consumption when:

ENGLISH

27

Summary of Contents for L7WEG841R

Page 1: ...USER MANUAL EN User Manual Washer Dryer L7WEG841R ...

Page 2: ... technologies that help make life simpler features you might not find on ordinary appliances Please spend a few minutes reading to get the very best from it Visit our website for Get usage advice brochures trouble shooter service information www aeg com webselfservice Register your product for better service www registeraeg com Buy Accessories Consumables and Original spare parts for your applianc...

Page 3: ...n supervision or instruction concerning the use of the appliance in a safe way and understand the hazards involved Children between 3 and 8 years of age and persons with very extensive and complex disabilities shall be kept away unless continuously supervised Children of less than 3 years of age should be kept away unless continuously supervised Do not let children play with the appliance Keep all...

Page 4: ...ke sure that the mains plug is accessible after installation The ventilation opening in the base must not be covered by a carpet mat or any floor covering WARNING The appliance must not be supplied through an external switching device such as a timer or connected to a circuit that is regularly switched on and off by a utility Ensure good air ventilation in the room where the appliance is installed...

Page 5: ...e the appliance if items have been soiled with industrial chemicals Do not dry unwashed items in the wash dryer Items such as foam rubber latex foam shower caps waterproof textiles and rubber backed articles and clothes or pillows fitted with foam rubber pads should not be dried in the washer dryer Fabric softeners or similar products should only be used as specified by the product manufacturer s ...

Page 6: ...sed footwear Do not install or use a damaged appliance Do not install the appliance where the appliance door cannot be fully opened Adjust the feet to have the necessary space between the appliance and the flooring When the appliance is in its permanent position check if it is levelled correctly with the aid of a spirit level If it is not adjust the feet accordingly 2 2 Electrical Connection WARNI...

Page 7: ...tergent ball if setting a non stop programme WARNING Risk of injury or damage to the appliance Do not sit or stand on the open door Do not dry dripping wet clothes in the appliance 2 5 Service To repair the appliance contact an Authorised Service Centre Use original spare parts only 2 6 Disposal Disconnect the appliance from the mains electrical and water supplies Cut off the mains electrical cabl...

Page 8: ... under the appliance Make sure not to damage the hoses 7 Remove the polystyrene protection from the bottom 1 2 8 Pull up the appliance in vertical position 9 Remove the power supply cable and the drain hose from the hose holders It is possible to see water flowing from the drain hose This is due to the testing with water of the appliance in factory 10 Remove the three bolts by using the spanner su...

Page 9: ...ppliance on a flat hard floor Make sure that carpets do not stop the air circulation below the appliance Make sure that the appliance does not touch the wall or other units 2 Loosen or tighten the feet to adjust the level WARNING Do not put cardboard wood or equivalent materials below the appliance feet to adjust the level x4 The appliance must be level and stable A correct adjustment of the appli...

Page 10: ...nts water leaks in the hose because of its natural ageing The red sector in the window A shows this fault A If this occurs close the water tap and contact the authorized service centre to replace the hose 3 6 Water drainage The drain hose should be positioned at a height of not less than 60 cm and not more than 100 cm from the floor You can extend the drain hose to maximum 400 cm Contact the autho...

Page 11: ...mm min 1 5 must be larger than the external diameter of the drain hose 4 If the end of the drain hose looks like this see the picture you can push it directly into the stand pipe 5 Without the plastic hose guide to a sink spigot Put the drain hose in the spigot and tighten it with a clamp Refer to the illustration Make sure that the drain hose makes a loop to prevent particles going into the appli...

Page 12: ...9 5 6 7 4 10 8 11 12 1 Worktop 2 Detergent dispenser 3 Control panel 4 Door handle 5 Rating plate 6 Drain pump filter 7 Feet for levelling the appliance 8 Drain hose 9 Inlet hose connection 10 Mains cable 11 Transit bolts 12 Hose support www aeg com 12 ...

Page 13: ...mme dial 2 Display 3 Drying time touch button Time Drying 4 Drying level touch button Auto Drying 5 Washing and drying mode touch button Mode Wash Dry 6 Start and pause touch button Start Pause 7 Option touch button Stains Prewash 8 Delay Start touch button Delay Start 9 Time Saving touch button Quick Wash 10 Spin reduction touch button Spin 11 Temperature touch button Temp 12 On Off push button O...

Page 14: ...cle end Warning code Washing phase indicator It flashes during prewash and wash phase Rinsing phase indicator It flashes during rinse phase The permanent Extra Rinse option one additional rinse two additional rinses Spinning and draining phase indicator It flashes during spin and drain phase Steam phase indicator Drying phase indicator Child safety lock indicator Temperature indicator The indicato...

Page 15: ...lt temperature Touch this button repeatedly until the desired temperature value appears on the display When the display shows the indicators and the appliance does not heat the water 6 5 Spin When you set a programme the appliance automatically sets the maximum spin speed allowed Touch repeatedly this button to Decrease the spin speed The display shows only the spin speeds available for the set pr...

Page 16: ...s option can also be used to shorten the Steam programme duration 6 9 Time Drying Touch this button to set the time that suits the fabrics you have to dry refer to Timed drying table The display shows the set value Each time you touch this button the time value increases by 5 minutes You cannot set all time values for different types of fabrics 6 10 Auto Drying Touch this button to set one of 3 au...

Page 17: ...and mixed fabrics requiring gentler washing Normal soil Wool Handwash Machine washable wool hand washable wool and other fabrics with hand washing care symbol1 Outdoor Do not use fabric softener and make sure that there is no softener residue in the detergent dispenser Outdoor clothing technical sport fabrics waterproof and breathable jackets shell jackets with a removable fleece or inner insulati...

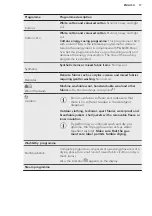
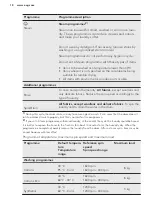
Page 18: ...abrics except woollens and delicate fabrics To spin the laundry and to drain the water in the drum 1 During this cycle the drum rotates slowly to ensure a gentle wash It can seem that the drum doesn t rotate or doesn t rotate properly but this is normal for this programme 2 If you set a Steam programme with dried laundry at the end of the cycle the laundry could be humid It is better to expose the...

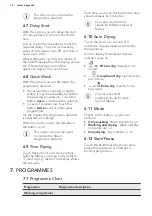
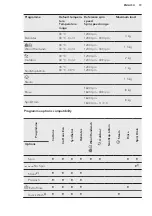
Page 19: ...1 5 kg Outdoor 30 C 40 C Cold 1200 rpm 1200 rpm 400 rpm 2 kg NonStop 60min 30 C 40 C 30 C 1200 rpm 1200 rpm 1 kg Steam 1 5 kg Rinse 1600 rpm 1600 rpm 400 rpm 8 kg Spin Drain 1600 rpm 1600 rpm 8 kg Programme options compatibility Programme Cottons Cottons Eco Synthetics Delicates Wool Handwash Outdoor NonStop 60min Steam Rinse Spin Drain Options Spin No Spin 1 Stains2 Prewash Extra Rinse Quick Wash...

Page 20: ...ed by The Woolmark Company for the washing of wool garments labelled as hand wash provided that the products are washed according to the instructions on the garment label and those issued by the manufacturer of this washing machine M1664 The wool drying cycle of this machine has been tested and approved by The Woolmark Company The cycle is suitable to dry wool garments which are labelled hand wash...

Page 21: ...ironing Cottons and Linen sheets tablecloths shirts etc up to 4 kg 1 Hints for test institute The test performance in accordance with EN 50229 must be carried out with a FIRST drying load of the maximum declared drying capacity load composition according to EN61121 by setting the AUTOMATIC CUPBOARD DRY for Cottons Eco programme The SECOND drying load with the residual load must be tested by settin...

Page 22: ...do not tilt your fingers downwards The sensors of the underneath buttons are sensitive and may interfere with Your choice 8 2 Child Lock With this option you can prevent children from playing with the control panel To activate deactivate this option touch the Spin and the Stains Prewash buttons simultaneously until the indicator comes on goes off on the display You can activate this option After y...

Page 23: ...is available and the water tap is open 3 Pour 2 litres of water into the detergent compartment marked by This action activates the drain system 4 Pour a small quantity of detergent into the compartment marked by 5 Set and start a programme for cotton at the highest temperature without any laundry in the drum This removes all possible dirt from the drum and the tub 10 DAILY USE WASHING ONLY WARNING...

Page 24: ...quid additives Flap for powder or liquid detergent Always follow the instructions that you find on the packaging of the detergent products but we recommend that you do not exceed the maximum indicated level This quantity will however guarantee the best washing results After a washing cycle if necessary remove any detergent residue from the detergent dispenser 10 4 Check the position of the flap 1 ...

Page 25: ...uch the related buttons 3 If desired set one or more options by touching the related buttons The related indicators come on in the display and the given information changes accordingly To perform washing only make sure that only the Wash indicator is on above the Mode button In case a selection is not possible no indicator comes on and an acoustic signal sounds 10 6 Starting a programme Touch the ...

Page 26: ...g The programme duration will be adjusted accordingly and could increase or decrease After further 30 seconds the water filling starts At the end of the load detection in case of drum overload the indicator is flashing in the display In this case for 30 seconds it is possible to pause the appliance and remove the exceeding garments Once removed the exceeding garments touch the Start Pause button t...

Page 27: ...Start Pause In the display the related door lock indicator goes off 2 Open the appliance door If necessary add or remove the items 3 Close the door and touch the button Start Pause The programme or the delay start continues 4 The door can be opened when the programme is complete or set Spin Drain programme and than press Start Pause button 10 13 End of the programme When the programme has finished...

Page 28: ... Start Pause button to start the programme Non automatic wash dry programmes In some washing programmes you can combine Wash and Dry mode for running a complete wash dry programme Proceed as follows 1 Press the On Off button for some seconds to activate the appliance 2 Load the laundry one item at a time 3 Put the detergent and the additives in the appropriate compartment 4 Turn the programme dial...

Page 29: ...running phase starts flashing The display also shows the remaining programme time 11 4 At the end of the drying programme The appliance stops automatically The acoustic signals operate if they are active In the display comes on The indicator of button Start Pause goes off The door locked goes off Press the button On Off for some seconds to deactivate the appliance After some minutes from the end o...

Page 30: ...n the time value increases by 5 minutes The display shows the set new time value 2 Touch the Start Pause to start the programme In the display the door locked indicator comes on and the indicator of the running phase starts flashing The display also shows the remaining programme time 12 4 At the end of the drying programme The appliance stops automatically The acoustic signals operate if they are ...

Page 31: ... with curtains Remove the hooks and put the curtains in a washing bag or pillowcase Do not wash laundry without hems or with cuts Use a washing bag to wash small and or delicate items e g underwired bras belts tights etc A very small load can cause balance problems with the spin phase leading to excessive vibration If this occurs a interrupt the programme and open the door refer to Daily Use chapt...

Page 32: ...nformation For the maximum laundry load of the drying programmes refer to the drying programmes table 14 7 Items not suitable for drying Do not set a drying programme for this laundry Synthetic curtains Pieces of clothing with metal inserts Nylon stockings Quilts Bed covers Duvets Anoraks Sleeping bags Fabrics with residue of hair sprays nail solvents or similar Garments with foam rubber or materi...

Page 33: ... of low temperature programmes can cause detergent deposits fluff residues bacterial growth inside the drum and the tub This could generate bad odours and mildew To eliminate these deposits and hygienize the inner part of the appliance run a maintenance wash regularly at least once a month 1 Remove all laundry from the drum 2 Run a cotton programme with the highest temperature with a small quantit...

Page 34: ...ditive compartment to aid cleaning and flush it out under running warm water to remove any traces of accumulated detergent After cleaning replace the top part in its position 3 Make sure that all detergent residue is removed from the upper and lower part of the recess Use a small brush to clean the recess 4 Insert the detergent drawer into the guide rails and close it Run the rinsing programme wit...

Page 35: ...water spillages when removing the filter 4 Turn the filter 180 degrees in anti clockwise direction to open it without removing Let the water flow out 5 When the bowl is full of water turn the filter back and empty the container 6 Repeat the steps 4 and 5 until the water stops to flow out 7 Turn the filter anti clockwise to remove it 1 2 8 If it is necessary remove fluff and objects from the filter...

Page 36: ...me to drain the water 15 8 Cleaning the inlet hose and the valve filter It is recommended to clean both the filters of the inlet hose and valve occasionally to remove any deposit collected over the time 1 Remove the inlet hose from the tap and clean the filter 1 2 3 2 Remove the inlet hose from the appliance by loosening the ring nut 3 Clean the valve filter on the back of the appliance with a too...

Page 37: ...ty install the inlet hose again WARNING Make sure that the temperature is higher than 0 C before you use the appliance again The manufacturer is not responsible for damages caused by low temperatures 16 TROUBLESHOOTING WARNING Refer to Safety chapters 16 1 Introduction The appliance does not start or it stops during operation First try to find a solution to the problem refer to the table If the pr...

Page 38: ... is no damaged fuse in the fuse box Make sure that the Start Pause has been touched If the delay start is set cancel the setting or wait for the end of countdown Deactivate the Child Lock function if it is on The appliance does not fill with water properly Make sure that the water tap is open Make sure that the pressure of the water supply is not too low For this information contact your local wat...

Page 39: ...e water inlet hose and the drain hose have no damages Make sure you use the correct detergent and the correct quantity of it You cannot open the ap pliance door Make sure that a washing programme that ends with water in tub has been selected Make sure that the washing programme is finished Set the drain or the spin programme if there is water in the drum Make sure that the appliance receives elect...

Page 40: ...the previous cycle released fluff of a dif ferent colour The drying phase helps to eliminate some fluff Clean the clothes with a fluff remover In case of an excessive amount of fluff in the drum run the spe cial programme to clean it refer to Fluff in the fabrics for more details After the check activate the appliance The programme continues from the point of interruption If the problem occurs aga...

Page 41: ... with relevant stand ards Different causes can change the data the quantity and type of laundry and ambient temperature Water pressure the supply voltage and the temperature of inlet water may also affect the washing pro gramme duration Technical specifications may be changed without prior notice to improve the quality of product During the washing programme the ProSense technology can vary the wa...

Page 42: ...by the protective cover ex cept where the low voltage equipment has no pro tection against moisture IPX4 Water supply 1 Cold water Water supply pressure 2 Minimum Maximum 0 5 bar 0 05 MPa 8 bar 0 8 MPa Maximum wash load Cotton 8 kg Maximum dry load Cotton Synthetics 4 kg 3 kg Spin Speed Maximum spin speed 1550 rpm 1 Connect the water inlet hose to a water tap with a 3 4 thread 2 The appliance work...

Page 43: ...ure the appliance with the fixing plates Read carefully the instructions supplied with the accessory 20 ENVIRONMENTAL CONCERNS Recycle materials with the symbol Put the packaging in relevant containers to recycle it Help protect the environment and human health by recycling waste of electrical and electronic appliances Do not dispose of appliances marked with the symbol with the household waste Re...

Page 44: ...www aeg com shop 157024430 A 372018 ...

Reviews: