background image

English

57

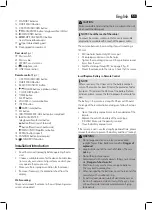
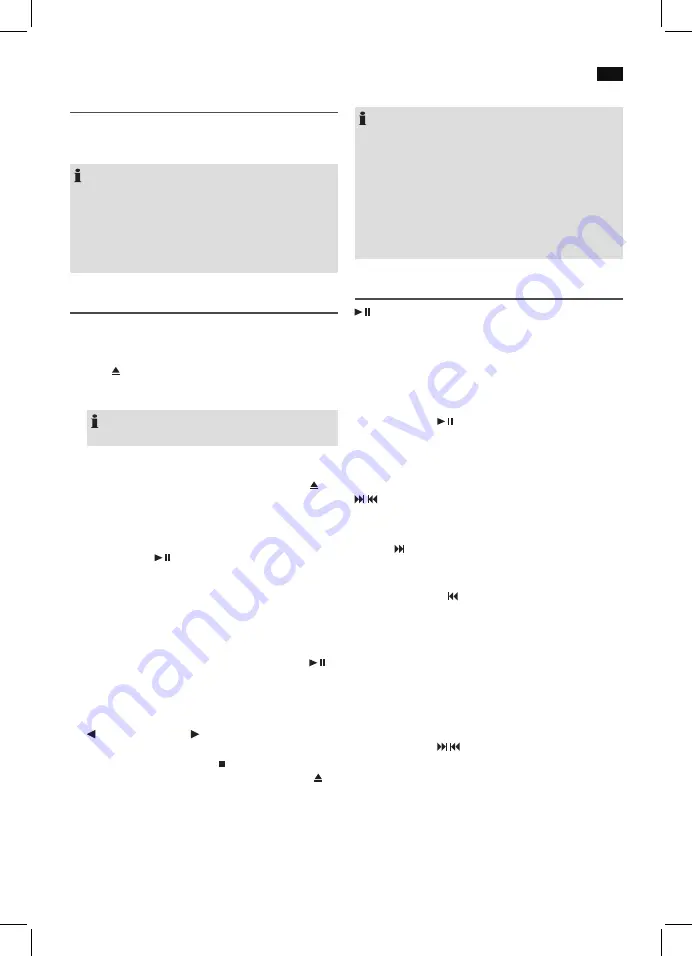
iPod/iPhone Charging

Your iPod/iPhone battery is charged as soon as the iPod/ 
iPhone is docked. To do this, the unit must be connected to 
the mains.

 NOTE: 

•  If the slot adapter has been supplied with your iPod, 

use it to ensure that your iPod fits correctly.

•  Not all iPod/iPhone generations support the charge 

mode. 

•  The duration of the charging process depends on the 

iPod/iPhone which is used and its operating condition.

Playing CDs/MP3

This is how to play a CD

1.  Repeatedly press CD/iPOD/USB/CARD button (13/1) 

until the display shows “CD MODE”.

2.  Press   CD OPEN/CLOSE (open/close) button (2 on the 

device) to open the CD compartment (8). The CD drawer 
opens up to the right.

 NOTE: 

The CD drawer cannot be opened in iPOD mode.

3.  Place an audio CD with the label side facing to the front 

on the spindle in the center, so that the CD locks me-
chanically. Then close the CD door by pressing the   CD 
OPEN/CLOSE button again.

4. 

AUDIO CD:


The display will show “DISC CD”, the number of tracks 
and total playback time. If playback does not begin auto-
matically: Press 


SCAN/ENTER button (14/13) to start 

playback of the CD. The playback starts from the first title 
on the CD. The display will show the current track and the 
lapsed playback time.

For MP3 or a CD in MP3 format:

The display will show “STOP”, the number of folder, 
e.g. F--04, and the total number of tracks (e.g. T--126). 
If playback does not begin automatically: Press the 


SCAN/ENTER button to start CD playback. The play

-

back starts from the first track and from the first folder 

The current song, the current folder, the expired playing 

time, and “DISC MP3” are shown in the display. Use the 

 FOLDER or FOLDER 

 buttons (5 on the remote) to 

select the individual folders.

5.  To remove a CD, please press   MENU/INFO button (15) 

(13 on the remote), open the CD compartment with   
CD OPEN/CLOSE (open/close) button and carefully lift 
the CD.

Always keep the CD door closed.

 NOTE: 

•  For CDs in MP3 format with a folder, 001 appears for 

the first track of the new folder when switching to 
another folder.

•  If a disc is not properly or not at all inserted, “CD--

READING” will light up and the display will show “NO 

DISC” (no disc).

•  Playback of CDs created by the user cannot be guar

-

anteed due to the variety of available software and CD 
media equipments.

Description of the control buttons


SCAN/ENTER (9/14) 

You may temporarily stop playback and start again. The 

lapsed playback time will flash in the display. Pressing the 

button again will continue playback from the same position.

In iPOD mode:

•  First press the ID3/iPOD/MEM/C-ADJ. button to activate 

the iPod-Menu. iPOD MENU appears in the display.

•  Now press the 


SCAN/ENTER button to activate a 

function or to display the next menu.

In DAB Mode:

Starts the automatic station scan (AUTOTUNE FULL SCAN).

/  SKIP/TUNE SEARCH (16/14)

If an Audio CD, MP3, a CD is running in MP3 Format or in 

iPOD mode:

With the 

 SKIP/TUNE SEARCH button you may skip to the 

next or next but one track, etc. Press and hold this button to 

quickly search music.
You may operate the 

 SKIP/TUNE SEARCH button as fol

-

lowed:

Press 1 x = 

Starts current track again from the begin

-

ning.

Press 2 x = 

Skips back to previous track. 

Press 3 x = 

Plays track prior to that, etc. Press and hold 

this button to quickly search music.

In iPOD mode:

•  First press the ID3/iPOD/MEM/C-ADJ. button to activate 

the iPod-Menu. iPOD MENU appears in the display.

•  Now press the 

/  

SKIP/TUNE SEARCH buttons to 

scroll up or down the iPod/iPhone menu.

During radio mode:

Tune the desired radio station and in connection with the 
previously pressed button ID3/iPOD/MEM/C-ADJ. to select 
the preset station.

Summary of Contents for MC 4456 iP

Page 1: ...ziekcentrum voor iPhone iPod F Station d accueil pour iPhone iPod E Centro de música para iPhone iPod I Centro musicale per iPhone iPod GB Music Center for iPhone iPod iPhone und iPod sind Schutzmarken der Apple Inc registriert in den USA und anderen Ländern iPhone and iPod are trademarks of Apple Inc registered in the USA and other countries MUSIK CENTER FÜR iPHONE iPOD MC 4456 iP ...

Page 2: ...ommande Page 3 4 Montage mural Page 4 Mode d emploi Page 25 Données techniques Page 33 Élimination Page 33 Español Contenidos Indicación de los elementos demanejo Página 3 4 Montaje en pared Página 4 Manual del usuario Página 34 Especificaciones técnicas Página 42 Eliminación Página 42 Italiano Contenuto Elementi di comando Pagina 3 4 Installazione a parete Pagina 4 Manuale dell utente Pagina 43 S...

Page 3: ...icht der Bedienelemente 3 Overzicht van de bedieningselementen Liste des différents éléments de commande Indicación de los elementos demanejo Elementi di comando Location of Controls Abb 1 Fig 1 Abb 2 Fig 2 ...

Page 4: ...ieningselementen Liste des différents éléments de commande Indicación de los elementos demanejo Elementi di comando Location of Controls Abb 3 Fig 3 Abb 4 Fig 4 Wandmontage Montage mural Montaje en pared Installazione a parete Wall mounting Wandmontage ...

Page 5: ...cker aus der Steckdose bzw entnehmen Sie die Batterien Diese Symbole können sich ggf auf dem Gerät befinden und sollen Sie auf folgendes hinweisen Das Blitz Symbol soll den Benutzer auf Teile im In neren des Gerätes hinweisen die gefährlich hohe Spannungen führen Das Symbol mit Ausrufezeichen soll den Benutzer auf wichtige Bedienungs oder Wartungs Hinwei se in den Begleitpapieren hinweisen Geräte ...

Page 6: ...ebene rutschfeste Fläche auf der Sie das Gerät gut bedienen können Achten Sie darauf dass das Gerät ausreichend belüftet wird Entfernen Sie falls vorhanden die Schutzfolie vom Display Wandmontage Sie können das Gerät auch wahlweise an die Wand montie ren Montagezubehör nicht im Lieferumfang enthalten ACHTUNG Vergewissern Sie sich vorher ob sich Leitungen in der Wand verbergen die Sie beschädigen k...

Page 7: ...g im Standby Modus 1 Halten Sie die ID3 iPOD MEM C ADJ Taste 5 12 gedrückt Im Display erscheint die Anzeige 24 HOUR 2 Wählen Sie mit den SKIP TUNE SEARCH Tasten 16 13 zwischen der 24 Stunden und 12 Stunden Anzei ge Drücken Sie die ID3 iPOD MEM C ADJ Taste zum Bestätigen HINWEIS Bei der 12 Stunden Anzeige erscheint AM Vormittags PM Nachmittags 3 Drücken Sie die SKIP TUNE SEARCH Tasten um die Stunde...

Page 8: ...ie Wiedergabe nicht automatisch startet Drücken Sie die Taste SCAN ENTER 14 13 um die Musik daten wiederzugeben Für die Bedienung richten Sie sich bitte nach dem Abschnitt CDs MP3 abspielen ACHTUNG Bevor Sie das USB Speichermedium entfernen schalten Sie das Gerät mit der DAB FM AUX Taste in den RADIO Betrieb SD MMC Kartenschlitz 1 Öffnen Sie die Abdeckklappe 3 an der Oberseite des Gerätes 2 Wollen...

Page 9: ...llen halten Sie die SELECT MONO ST Taste gedrückt Im Display erscheint kurz die Meldung MANUAL TUNE Stellen Sie mit den SKIP TUNE SEARCH die gewünschte Frequenz ein Bestätigen Sie anschließend mit der SELECT MONO ST Taste DAB Zusatzinformationen anzeigen Im DAB Modus können Sie sich die folgenden Zusatzinfor mationen anzeigen lassen sofern vom Radiosender ausge strahlt Drücken Sie dazu die MENU IN...

Page 10: ...defunktion Haben Sie einen iPod iPhone auf dem Dock Anschluss auf gesteckt so wird der Akku des iPod iPhone geladen Hierfür muss das Gerät ans Stromnetz angeschlossen sein HINWEIS Sofern mit Ihrem iPod mitgeliefert verwenden Sie den Steckplatzadapter um den korrekten Sitz des iPod zu gewährleisten Nicht alle iPod iPhone Generationen unterstützen die Ladefunktion Die Dauer des Ladevorgangs ist abhä...

Page 11: ...odus Drücken Sie zuerst die ID3 iPOD MEM C ADJ Taste um das iPod Menü zu aktivieren iPOD MENU erscheint im Display Drücken Sie nun die SKIP TUNE SEARCH Tasten um sich im iPod iPhone Menü hoch bzw runter zu bewegen Im Radiobetrieb Zum Abstimmen des gewünschten Radiosenders Und in Verbindung mit der zuvor gedrückten ID3 iPOD MEM C ADJ Taste zum Anwählen der gespeicherten Radiosender MENU INFO 15 13 ...

Page 12: ...im Display erscheint Sie können nun nacheinander mit den SKIP TUNE SEARCH Tasten 16 13 die Einstellungen für die Einschaltstunden Einschaltminuten Ausschalt stunden Ausschaltminuten den Einschaltmodus und die Einschaltlautstärke vornehmen Bestätigen Sie Ihre Eingabe jeweils mit der TIMER Taste Die aktuell einzustellende Anzeige blinkt im Display HINWEIS Wird innerhalb von ca 5 Sekunden keine Taste...

Page 13: ...ielen beschrieben Die Programmierung von Titeln können Sie wie bereits unter Programmierte Wiedergabe beschrieben durchführen Bitte beachten Sie Es gibt eine Vielzahl von Brenn und Komprimierungsverfah ren sowie Qualitätsunterschiede bei CDs und gebrannten CDs Des Weiteren hält die Musikindustrie keine festen Standards ein Kopierschutz Aus diesen Gründen kann es in seltenen Fällen zu Problemen bei...

Page 14: ...ährleistungsrechte Nacherfüllung Rücktritt Schadensersatz und Minderung werden durch diese Garantie nicht berührt Stand 03 2008 Garantieabwicklung Sollte Ihr Gerät innerhalb der Garantiezeit einen Mangel aufweisen bitten wir Sie uns Ihren Garantieanspruch mitzu teilen Die schnellste und komfortabelste Möglichkeit ist die Anmel dung über unser SLI Service Logistik International Internet Serviceport...

Page 15: ...ktrogeräte ab die Sie nicht mehr benutzen werden Sie helfen damit die potenziellen Auswirkungen durch falsche Entsorgung auf die Umwelt und die menschliche Gesundheit zu vermeiden Sie leisten damit Ihren Beitrag zur Wiederverwertung zum Recycling und zu anderen Formen der Verwertung von Elekt ro und Elektronik Altgeräten Informationen wo die Geräte zu entsorgen sind erhalten Sie über Ihre Kommunen...

Page 16: ... kunnen op het apparaat aangetroffen wor den en zijn bedoeld als waarschuwingen De bliksemschicht dient ervoor om de gebruiker te wijzen op de aanwezigheid van gevaarlijke spanning in het apparaat Het uitroepteken dient ervoor om de gebruiker te wijzen op belangrijke aanwijzingen over de bediening of het onderhoud die horen bij dit apparaat Producten die voorzien zijn van dit symbool zijn voorzien...

Page 17: ...ad te zijn voor een gemakkelijke bediening Zorg dat het apparaat voldoende geventileerd wordt Verwijder indien nodig het beschermende plastic van het scherm Muurmontage U kunt het apparaat ook op de muur monteren montage toebehoren niet inbegrepen LET OP Controleer eerst of er geen kabels in de muur zitten die beschadigd kunnen raken OPMERKING Controleer het bereik van de kabel Zorg ervoor het app...

Page 18: ...batterijen niet bloot aan hoge temperaturen of direct zonlicht Gooi de batterijen nooit in het vuur Ontploffingsgevaar Houd de batterijen buiten bereik van kinderen Bat terijen zijn geen speelgoed Probeer de batterijen niet open te maken Vermijd contact met metalen voorwerpen Ringen spijkers schroeven enz Kortsluitingsgevaar Door kortsluiting kunnen de batterijen oververhitten of zelfs in brand vl...

Page 19: ...ET OP Gebruik voor het verwijderen van het USB opslagmiddel de DAB FM AUX toets om te wisselen naar de RADIO stand SD MMC kaartsleuf 1 Open het klepje 3 bovenop het apparaat 2 Als u bestanden af wilt spelen van een SD MMC kaart plaats de kaart dan in de overeenkomstige sleuf 3 Gebruik nu de CD iPOD USB CARD toets 13 1 om de CARD stand te selecteren Op het scherm wordt CARD MODE weergegeven Vervolg...

Page 20: ...h storing bevindt op het ontvangen station kunt u de ontvangst probe ren te verbeteren door aan de antenne te draaien of door deze in of uit te schuiven Voor FM stations kunt u tussen volgende AUDIO MODE schakelen MONO en AUTO stereo ontvangst Maak hiervoor gebruik van de SELECT MONO ST toets 3 op de afstandsbediening Bij slecht ontvangst raden wij aan om naar MONO te schakelen DAB stations scanne...

Page 21: ...et worden geopend in iPOD modus 3 Plaats een audio CD met het label naar voren op de spin del in het midden zodat de CD vast klikt Sluit dan de CD deur door nogmaals de CD OPEN CLOSE toets te drukken 4 AUDIO CD Het scherm geeft DISC CD het aantal nummers en de totale speeltijd weer Als het afspelen niet automatisch begint Druk de SCAN ENTER toets 14 13 om het afspelen van de CD te starten Het afsp...

Page 22: ...oetsen worden gedrukt in de stop stand wordt het bericht ook kort weergegeven op het scherm Druk dan SCAN ENTER om het afspelen te starten Druk nu op de SCAN ENTER toets om een functie te activeren of het volgende menu te openen In DAB modus Start het automatisch scannen naar stations AUTOTUNE FULL SCAN SKIP TUNE SEARCH 16 14 Als een Audio CD MP3 een CD MP3 Formaat of in iPOD modus wordt afgespeel...

Page 23: ...n het programmeren van stations en afspelen Voor MP3 bestanden of een CD in MP3 formaat Als er ID 3 Tag informatie is opgeslagen verschijnt deze informatie op het scherm als een ticker Druk nogmaals op de toets om de functie te activeren CLOCK DISP 5 op de afstandsbediening Druk op deze toets om de tijd voor 10 seconden weer te geven Programmeren van het afspelen Programmeren van het afspelen in e...

Page 24: ... nummers kunnen bevatten Het apparaat herkent automatisch MP3 discs het scherm toont het totale aantal nummers en mappen Zie hoofdstuk Afspelen van CD MP3 voor het afspelen van zulke CD s U kunt nummers programmeren zoals beschreven onder Programmeren van het afspelen Opmerking Er zijn vele methoden voor het comprimeren en branden van CD s Er zijn ook grote verschillen in kwaliteit van CD s en geb...

Page 25: ... intérieur de l appareil Le point d exclamation est destiné à prévenir l uti lisateur de la présence d instructions d utilisation importantes accompagnant l appareil Les équipements avec ce symbole utilisent un Rayon laser de Classe 1 pour lire le CD Les interrupteurs de sécurité intégrées sont destinés à éviter que l utilisateur ne puisse être exposé à au faisceau laser dangereux bien qu invisibl...

Page 26: ...ique à portée du câble d alimentation La distance entre les points de fixation pour un montage mural est de 140 mm Perçez deux trous horizontallement à 140 mm de dis tance l un de l autre Installez des chevilles et vissez dans les trous Serrez les vis de montage jusqu à ce qu elles dépassent d environ 4 mm du mur Pliez le socle jusqu à 90 voir page 4 fig 4 Installez l appareil sur les vis Vérifiez...

Page 27: ...as d obstacles entre la télécommande et le capteur 10 situé sur l appareil ATTENTION Les piles ne doivent pas être jetées avec les ordures ménagères Les déposer dans un centre de récupération compétent ou les rendre au vendeur Alimentation Branchez la fiche d alimentation sur une prise standard 230 V 50 Hz Assurez vous que la tension corresponde à celle indiquée sur la plaque indicatrice Le réglag...

Page 28: ... AUX 12 2 pour sélec tionner le mode AUX AUX MODE apparaît sur l écran 3 Vous écouterez le son de l appareil externe par les en ceintes utilisez les touches VOLUME 4 8 pour régler le volume Les touches du CD ne sont plus actives 4 Pour les autres fonctions veuillez consulter le manuel de l utilisateur de l appareil audio externe NOTE Réglez le volume de l appareil audio externe sur un niveau audib...

Page 29: ...ssage DOOR KEY LOCK apparaît sur l écran 7 Selon le modèle d iPod iPhone relâcher d abord le ver rouillage des touches et démarrer la lecture si nécessaire avec la touche SCAN ENTER 14 13 3 Vous pouvez sélectionner la station suivante ou précé dente à l aide des boutons SKIP TUNE SEARCH 16 13 4 Si la réception est trop faible et que la station reçue est fragile essayez d améliorer la réception en ...

Page 30: ...coulé Pour un MP3 ou un CD au format MP3 L écran va afficher STOP le numéro du répertoire par exemple F 04 et le nombre total de pistes par ex T 126 Si la lecture ne commence pas automatiquement Ap puyez sur la touche SCAN ENTER pour commencer la lecture du CD La lecture débute à partir de la première piste et du premier répertoire La piste actuelle le fichier actuel le temps de lecture expiré et ...

Page 31: ... pendant environ 10 secon des L appareil va automatiquement s éteindre au temps indiqué Pour éteindre à nouveau la fonction appuyez sur le bouton SLEEP plusieurs fois jusqu à ce que l écran n affiche plus rien TIMER 6 sur la télécommande Vous pouvez programmer l appareil pour qu il s éteigne et se rallume à un moment prédéterminé Vous pouvez utiliser la touche SKIP TUNE SEARCH de la façon suivante...

Page 32: ...émoire P 02 Pour les MP3 ou les CD au format MP3 L affichage de fichier F 000 clignotte sur l écran ainsi que le bouton MEMORY Sélectionnez d abord le fichier voulu à l aide des boutons FOLDER 12 5 4 de la télécommande Confirmez la sélection du dossier à l aide du bouton ID3 iPOD MEM C ADJ 3 Utilisez les touches SKIP TUNE SEARCH pour sélec tionner la piste suivante et appuyez à nouveau sur ID3 iPO...

Page 33: ...récep tion radio DAB L antenne filaire n est pas correcte ment positionnée Positionnez l antenne filaire de manière verticale Aucune radio numérique ne peut être reçue dans votre région Données techniques Modèle MC 4456 iP Tension d alimentation 230 240 V 50 Hz Puissance de sortie 100 W PMPO Consommation électrique 23 W Classe de protection II Poids net 2 40 kg Radio Gamme de fréquences VHF FM 87 ...

Page 34: ...ia de tensión peligrosa dentro del dispositivo El símbolo de exclamación pretende alertar al usuario de la presencia de instrucciones impor tantes de uso y mantenimiento que acompañan a este dispositivo Los productos con este símbolo funcionan con un Láser de Clase 1 para explorar el CD Los conmutadores de seguridad integrados están pensados para evitar que el usuario se vea expuesto al peligroso ...

Page 35: ...e pueda llegar el cable de alimentación La distancia entre los tornillos para el montaje en la pared es de 140 mm Taladre dos orificios de manera horizontal con una sepa ración entre sí de 140 mm Introduzca tacos y tornillos en los orificios Apriete los tornillos de montaje hasta que sobresalgan alrededor de 4 mm de la pared Pliegue el soporte hasta 90 ver página 4 fig 4 Monte el dispositivo sobre...

Page 36: ...a pantalla mostrará VOL SETTING VOL y un número Equivaldrá al volumen establecido entre VOL MAX o VOL MIN AVISO Si se producen fugas en una batería no permita que el fluido entre en contacto con los ojos o con la piel Si el ácido entra en contacto con los ojos lávelos con agua depurada y consulte con un médico si no desaparecen los síntomas ATENCIÓN Las baterías no se deben desechar en la basura L...

Page 37: ...a iniciar la reproducción de los archivos de música Consulte el capítulo Reproducir CD MP3 para saber el funcionamiento Toma LINE IN Conexión de dispositivos de reproducción analógicos Cuando conecte con esta toma también puede escuchar el sonido de otros dispositivos como reproductores MP3 o CD etc por los altavoces 1 Conecte el dispositivo externo por la toma de 3 5 mm a la toma LINE IN 23 2 Use...

Page 38: ... cerrar el compartimiento Aparecerá el mensaje DOOR KEY LOCK en pantalla 7 En función del modelo de iPod iPhone es posible que sea necesario desbloquear los botones y comenzar la reproducción con el botón SCAN ENTER 14 13 1 Pulse el botón DAB FM AUX 12 2 repetidamente hasta que se muestre WELCOME TO DIGITAL RADIO en pantalla 2 Pulse el botón SCAN ENTER 14 13 para iniciar la exploración automática ...

Page 39: ...ostrará la pista actual y el tiempo de reproduc ción transcurrido Para MP3 o CD en formato MP3 La pantalla mostrará STOP el número de carpeta como F 04 y el número total de pistas como T 126 Si la reproducción no comienza automáticamente Pulse el botón SCAN ENTER para iniciar la reproducción de CD La reproducción comenzará por la primera pista y la primera carpeta En la pantalla se muestra la canc...

Page 40: ...tablezca el tiempo en intervalos de 10 minutos de 90 a 10 minutos Pulse repetidamente este botón hasta que la pantalla muestre el tiempo deseado Cuando la función está activada se muestra el tiempo restante aproximadamente cada 10 segundos El dispositivo se apagará automáticamen te pasado el tiempo preestablecido Puede usar el botón SKIP TUNE SEARCH del modo siguiente Pulsar x 1 Inicia de nuevo la...

Page 41: ...a secuencia deseada Sólo en el modo CD USB CARD 1 Pulse el botón MENU INFO 15 13 2 Pulse el botón ID3 iPOD MEM C ADJ 5 12 Parpa deará MEMORY P 01 ubicación preestablecida y T 000 título en pantalla Use los botones SKIP TUNE SEARCH 16 13 para elegir la pista deseada y pulse el botón ID3 iPOD MEM C ADJ de nuevo La pantalla cambiará a la posición de memoria P 02 Para MP3 o CD en formato MP3 La carpet...

Page 42: ...ión así como diferencias de calidad de los CD y los CD grabados Además la industria musical no aplica estándares fijos pro tección de copia Por este motivo pueden en algunos casos producirse problemas cuando reproduzca discos CD y MP3 No es una avería del dispositivo Limpieza y mantenimiento Desconecte el enchufe de corriente antes de limpiar Puede limpiar las manchas externas usando un trapo lige...

Page 43: ...ne pericolosa nell apparecchio Il punto esclamativo ha lo scopo di avvertire l utente della presenza di importanti istruzioni di funzionamento e manutenzione fornite con l apparecchio I prodotti con questo simbolo funzionano con laser di classe 1 per la scansione del CD I com mutatori di sicurezza integrati hanno lo scopo di impedire che l utente venga esposto al pericolo so fascio di luce laser i...

Page 44: ...o La distanza tra i montaggi per il montaggio a parete è di 140 mm Perforare due fori orizzontalmente a distanza di 140 mm Montare i tasselli a espansione e le viti nei fori Avvitare le viti di montaggio fino a farle fuoriuscire di circa 4 mm dalla parete Piegare il sostegno in alto di 90 vedi pagina 4 fig 4 Montare il dispositivo sulle viti Controllare che sia fermo Inserimento Sostituzione della...

Page 45: ... tra telecomando e sensore 10 dell apparec chio durante il funzionamento ATTENZIONE Le pile non devono essere smaltite nei rifi uti Consegnare le pile usate presso centri di raccolta competenti o al riven ditore stesso Alimentazione Collegare la spina a una presa 230 V 50 Hz Controllare che la tensione corrisponda alla tensione nominale riportata sull etichetta L impostazione dell ora andrà persa ...

Page 46: ... mezzo degli altoparlanti è possible ascoltare l audio dei dispositivi esterni utilizzare I tasti VOLUME 4 8 per regolare il volume I tasti CD non sono attivi 4 Per ulteriori funzioni fare riferimento al manuale utente del dispositivo audio esterno NOTA Impostare il volume dl dispositivo esterno a un livello corretto Ripristinare i valori predefiniti Tutte le stazioni radio preimpostate e l ora so...

Page 47: ... di musica di fondo con l iPhone in dock la riproduzione si interrompe e si sente il suono di chiamata NOTA Per una migliore ricezione DAB si consiglia di posizio nare l antenna cavo verticalmente Non è possibile selezionare Mono e Stereo durante la ricezione DAB Per impostare manualmente una frequenza DAB tene re premuto il tasto SELECT MONO ST Il messaggio MANUAL TUNE compare sul display Usare i...

Page 48: ...D premere il tasto MENU INFO 15 13 sul telecomando aprire il vano CD con il tasto CD OPEN CLOSE aperture chiusura ed estrarre il CD con attenzione Tenere sempre chiuso lo sportello del CD NOTA Per CD in formato MP3 con una cartella 001 compare per la prima traccia della nuova cartella quando si passa ad un altra cartella Se il disco non è inserito completamente oppure non è inserito correttamente ...

Page 49: ...asti SKIP TUNE SEARCH 16 13 è ora possibile impostare le ore di accensione i minuti di accensione le ore di spegnimento i minuti di spegnimento la modalità di accensione e il volume di accensione Confermare l immissione ogni volta con il tasto TIMER La visualizzazione corrente da impostare lampeggia sul display NOTA Se non viene premuto alcun tasto entro 5 secondi il dispositivo ritorna in modalit...

Page 50: ...l numero del primo brano selezionato 5 Premere una volta il tasto MENU INFO per interrompe re la riproduzione La memoria viene mantenuta 6 Per riprodurre nuovamente il programma premere il tasto SCAN ENTER 7 Per cancellare la memoria premere due volte il tasto MENU INFO Il display MEM si spegne L apparecchio si spegne automaticamente dopo aver riprodotto tutti i brani memorizzati La sequenza progr...

Page 51: ...ertificato dallo sviluppatore al fine di rispettare gli standard di prestazione Apple Apple non è responsabile del funzionamento di questo dispositivo o del suo rispetto degli standard di sicurezza e regolamentativi L utilizzo di questo accessorio con l iPod o iPhone potrebbe influenzare la prestazione wireless Smaltimento Significato del simbolo Cassonetto con ruote Rispettare l ambiente non smal...

Page 52: ...ltage within the device The exclamation mark is intended to alert the user to the presence of important operating and maintenance instruction accompanying this device Products with this symbol operate with a Class 1 Laser for scanning the CD The built in safety switches are intended to prevent the user from being exposed to the dangerous laser beam not visible to the eye when opening the CD compar...

Page 53: ...he power cable The distance between the mountings for wall mounting is 140 mm Drill two holes horizontally 140 mm apart Fit rawlplugs and screws into the holes Tighten the mounting screws until they protrude around 4 mm from the wall Fold the stand up through 90 see page 4 fig 4 Mount the device onto the screws Check that it is secure Insert Replace Battery in Remote Control NOTE Where necessary t...

Page 54: ...ween the remote control and the sensor 10 on the device during operation CAUTION Batteries must not be disposed of in the garbage Please bring used batteries to competent collection centers or back to the dealer Power supply Connect the mains plug to a standard outlet 230 V 50 Hz Make sure the voltage is in conformity with the rating plate The time settings will be lost as soon as the power supply...

Page 55: ... use VOLUME buttons 4 8 to adjust the volume The CD buttons are not active 4 For further functions please refer to the user manual of the external audio device NOTE Set the volume of the external device to a proper audible level Restore factory defaults All preset radio stations and the time are deleted 1 Switch the device to Standby mode 2 Hold down the MENU INFO button 15 13 for around 3 seconds...

Page 56: ...you have an incoming call when playing back music with the iPhone docked then playback stops and you can hear the ring tone NOTE For optimum DAB reception we recommend that you position the wire antenna vertically You cannot toggle between Mono and Stereo during DAB reception To set a DAB frequency manually hold down the SELECT MONO ST button The message MANUAL TUNE briefly appears on the display ...

Page 57: ...dividual folders 5 To remove a CD please press MENU INFO button 15 13 on the remote open the CD compartment with CD OPEN CLOSE open close button and carefully lift the CD Always keep the CD door closed NOTE For CDs in MP3 format with a folder 001 appears for the first track of the new folder when switching to another folder If a disc is not properly or not at all inserted CD READING will light up ...

Page 58: ...er the other on the display The device will switch into standby mode will be displayed and the timer is activated After the set time has been reached the device switches to the selected mode The volume increases slowly to the selected volume Press TIMER to deactivate the timer function TIME OFF is shown briefly on the display will disappear from the display MENU INFO 15 13 Pauses the CD or piece o...

Page 59: ...sequence will be kept in the memory until you switch to another mode remove the CD from the compartment or switch off the device It is possible to combine program playback with the REPEAT function After programming and starting playback please press REPEAT button 14 on the remote up to three times the functions can be applied as described under REPEAT Playback of music files in MP3 format This dev...

Page 60: ...vice or its compliance with safety and regulators standards Please note that the use of this ac cessory with iPod or iPhone may affect wireless performance Disposal Meaning of the Wheelie Bin Symbol Take care of our environment do not dispose of electrical applicances via the household waste Dispose of obsolete or defective electrical appliances via municipal collection points Please help to avoid...

Page 61: ......

Page 62: ...Stand 10 11 Elektro technische Vertriebsges mbH Industriering Ost 40 47906 Kempen MC 4456 iP ...

Reviews: