background image

2

4

5

6

22

7

13

19

14

15

12

10

11

9

21

20

8

1

17

18

16

3

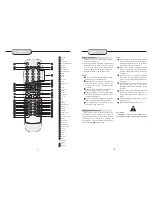
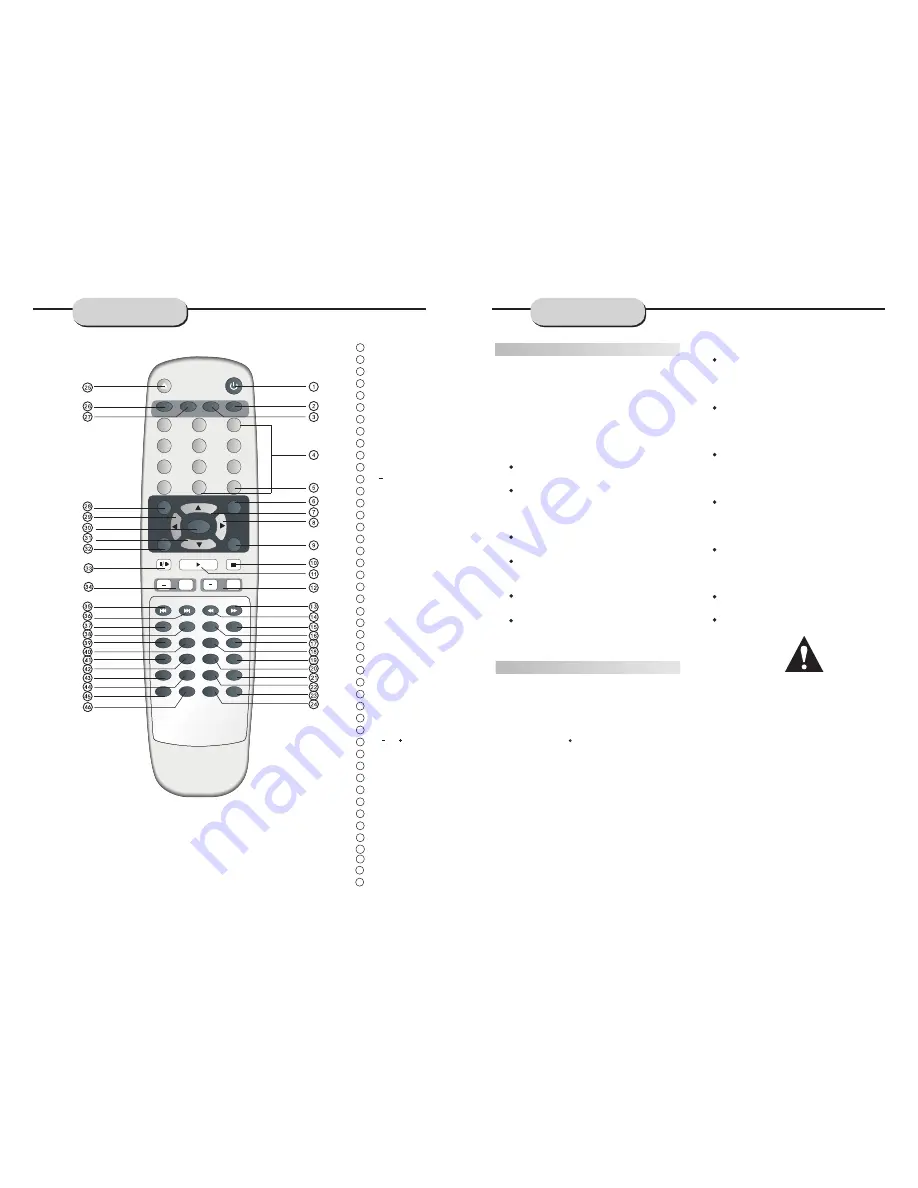
MUTE 

0-9 NUMBER  KEYS 

SETUP 

PRE/TUN 

SCROLL UP

SCROLL RIGHT

AUTO 

STOP 

PLAY 

CH

CH

+

F W D

REV BUTTON

A-B 

SLOW 

MENU 

ANGLE 

LANGUAGE 

4:3/16:9

R/L

23

EQ

STANDBY

TFT ON/OFF 

DISPLAY

38

37

36

27

25

26

28

29

32

31

30

33

35

34

39

42

40

41

SCROLL DOWN

SCROLL LEFT

ENTER 

MEMO 

PAUSE/STEP 

PREV BUTTON

NEXT BUTTON

ZOOM 

PROG 

GOTO 

TITLE 

SUBTITLE 

N/P 

RESUME 

REPEAT 

OPEN/CLOSE

SOURCE

FUNCTION 

RETURN

46

45

EPG

TV/RADIO

VOL

VOL

0

SETUP 

RETURN

PRE/TUN 

MEMO 

ENTER 

AUTO 

STOP 

VOL

+10

PAUSE/STEP 

PLAY 

+

CH

ZOOM 

PROG 

SLOW 

REPEAT 

FUNCTION  TFT ON/OFF 

N/P 

SUBTITLE 

LANGUAGE  ANGLE 

RESUME  

A-B 

+

R/L

MUTE 

STANDBY

SOURCE

TITLE 

MENU 

GOTO

DISPLAY 

4:3/16:9

EPG 

TV/RADIO

EQ

VIDEO

REMOTE 

CONTROLLER

-7-

Notes:

         Do  not  direct  the  remote  sensor toward 

         any light source, such as direct sunlight or 

         a strong fluorescent light, as it may cause 

         the unit to not operate correctly. 

         When  other   remote   controls   are  used 

         nearby  or  when  the  remote is used near 


equipment using infrared rays, interference


         may occur.

         Placing  an  object  on  the remote control 

         may  cause  it  to  inadvertently depress a 


button, changing a function and shortening


         battery life.

         Do not glaze the front of the DVD receiver 

         with   colored   glass,   as   it   may   cause 

         interference with normal operation  of  the 

         controller.

         Make sure there is no barrier between the 

         remote control and  remote  sensor,  as  it 

         could prevent the unit from  receiving  the 

         signal.

         Do not spill water or put wet items  on  the 

         remote control. 

         Never disassemble remote control.

BATTERIES

    INCORRECT USE    OF   BATTERIES   MAY 

CAUSE THEM TO LEAK, CORRODE  OR  EXPLODE.

Battery Installation

1. Push down and out on  the  battery  Compart-

    ment cover to remove it.

2. Insert the two  AAA b atteries into the battery 

    compartment of the  remote  control,  making 

    sure  the + and - signs  on  the  batteries  and 

    inside  the batteries compartment match up.

3. Replace the battery compartment cover.

Notes:

         Do  not  mix batteries from different manu-

         facturers, nor old ones with new.

         If the remote control will not be used for an 

         extended   period   of   time,   remove   the 

         batteries    to    prevent    damage-causing 

         corrosion.

         Remove  dead   batteries  immediately   to 

         prevent damage-causing corrosion. 

         If battery leakage occurs, wipe the battery 

         liquid from the battery compartment,  then 

         replace both batteries.

         Always replace both batteries at the same 

         time, using new, fully charged batteries.

         Life   expectancy  of   batteries   may  vary 

         depending on amount of use.

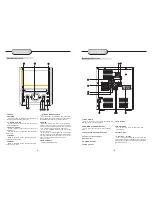
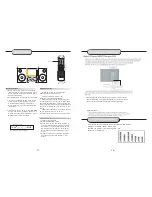
Using the Remote Control

    Point the remote control at the remote sensor 

on  the  DVD  receiver.    When    the    signal  is 

received from the remote,  the unit will  function 

accordingly.    The    remote    will    operate    to 

approximately 16' from the remote sensor at an 

angle of around 30  each direction.

"

"

OPERATING THE 

REMOTE CONTROL

-8-

24

VIDEO

43

44

Summary of Contents for MMC 4418 DVB-T

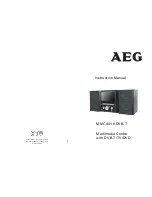
Page 1: ...Instruction Manual MMC 4418 DVB T Multimedia Centre with DVB T TV DVD Elektro technische Vertriebsges mbH Industriering Ost 40 47906 Kempen Hotline etv de Stand 2 08 ...

Page 2: ...Entry Never push objects of any kind into this product through openings as they may touch dangerous voltage points or short out parts that could result in a fire or electric shock Never spill liquid of any kind on or into the product Outdoor Antenna Grounding If an outside antenna or cable system is connected to the product be sure the antenna or cable system is grounded so as to provide protectio...

Page 3: ... Handling Do not touch the playback side of the disc Do not attach paper or tape to discs Do not stick or write anything on the surface Protect against fingerprints Always hold a disc by the center and edge portions Cleaning Fingerprints and dirt on the disc may cause picture and or sound deterioration Wipe the disc from the center outward with a soft cloth Always keep the disc clean If you cannot...

Page 4: ... the AC been carefully plug power cord into outlet Press the POWER button on the front panel When the unit is initially powered a brief surge electronic equipment on the same circuit If this occurs connect the unit to an outlet on a different circuit 7 INPUT SIGNAL SOURCE Use this button to select the proper input signal source Note The selected input will correspond to the selected input terminal...

Page 5: ... of the controller Make sure there is no barrier between the remote control and remote sensor as it could prevent the unit from receiving the signal Do not spill water or put wet items on the remote control Never disassemble remote control BATTERIES INCORRECT USE OF BATTERIES MAY CAUSE THEM TO LEAK CORRODE OR EXPLODE Battery Installation 1 Push down and out on the battery Compart ment cover to rem...

Page 6: ...he white terminal marked L is for connecting the left channel The yellow terminal is for video connection Make sure all connections are securely made Improper connections may cause noise poor perfor mance or cause damage to the equipment Do not tie the AV cord with any other cords such as the power cord or speaker wires as it may result in poor picture and or sound quality CONNECTING DEVICES 9 10 ...

Page 7: ...e 75 ohm Coaxial cable 75 ohm Outdoor FM antenna Radio signals may be difficult to receive in some buildings and under certain conditions The provided antenna will help in their reception They are intended for indoor use only FM Indoor Antenna The FM antenna should be fully extended and in a direction that provides the clearest signal Secure the antenna ends in a location where distortion is a min...

Page 8: ...g power cord into outlet Press the POWER button on the front panel to power the unit The display panel will light When the unit is initially powered a brief surge of electricity may cause interference with other electronic equipment on the same circuit If this occurs connect the unit to an outlet on a different circuit CONNECTING POWER SUPPLY 13 BASIC DVD OPERATION 14 ...

Page 9: ...not play unless it and the selected signal button coincide with the active program source signal input Volume Control The volume may be adjusted by either turning the large volume knob on the front panel or using the appropriate volume button on the remote control Mute Pressing the MUTE button temporarily mutes every speaker To resume audio press MUTE button again 16 BASIC DVD OPERATION Press PROG...

Page 10: ...ation s frequency will flash for four seconds in the display 3 When the total number of stations reaches 30 in a particular wave s memory no further station in that wave band will be saved 1 To play preset stations 2 Press the PRE TUN button 3 Press any of the numbered buttons to select the desired station s memory number For example to play the station at memory 5 simply press the 5 button for me...

Page 11: ...DEO SETUP VIDEO SETUP BRIGHTNESS CONTRAST HUE SATURATION EXIT SETUP VIDEO SETUP VIDEO SETUP BRIGHTNESS CONTRAST HUE SATURATION EXIT SETUP SYSTEM SETUP SYSTEM SETUP TV SYSTEM VIDEO TV TYPE PASSWORD RATING DEFAULT EXIT SETUP SCREEN SAVER ...

Page 12: ...M SETUP SYSTEM SETUP TV SYSTEM VIDEO TV TYPE PASSWORD RATING DEFAULT EXIT SETUP OFF ON SCREEN SAVER SYSTEM SETUP SYSTEM SETUP TV SYSTEM VIDEO TV TYPE PASSWORD RATING DEFAULT EXIT SETUP AUTO PAL NTSC SCREEN SAVER SYSTEM SETUP 21 SYSTEM SETUP 22 SYSTEM SETUP SYSTEM SETUP TV SYSTEM VIDEO TV TYPE PASSWORD RATING DEFAULT EXIT SETUP 4 º 3PS 4 º 3LB 16 º 9 4 º 3PS 4 º 3LB 16 º 9 ...

Page 13: ...M SETUP SYSTEM SETUP TV SYSTEM VIDEO TV TYPE PASSWORD RATING DEFAULT EXIT SETUP SYSTEM SETUP SYSTEM SETUP 23 SYSTEM SETUP 24 RESTORE RESTORE SYSTEM SETUP SYSTEM SETUP TV SYSTEM VIDEO TV TYPE PASSWORD RATING DEFAULT EXIT SETUP SYSTEM SETUP SYSTEM SETUP TV SYSTEM VIDEO TV TYPE PASSWORD RATING DEFAULT EXIT SETUP new ...

Page 14: ...G EXIT SETUP ENGLISH ENGLISH FRENCH FRENCH SPANISH SPANISH GERMAN GERMAN PORTUGUESE PORTUGUESE ITALIAN ITALIAN ROMANIAN ROMANIAN HOLAND HOLAND LANGUAGE SETUP LANGUAGE SETUP OSD LANGUAGE AUDIO LANG SUBTITLE LANG MENU LANG EXIT SETUP ENGLISH ENGLISH FRENCH FRENCH SPANISH SPANISH GERMAN GERMAN OFF OFF ITALIAN ITALIAN HOLAND HOLAND ROMANIAN ROMANIAN LANGUAGE SETUP LANGUAGE SETUP OSD LANGUAGE AUDIO LAN...

Page 15: ...UT AUDIO OUT EXIT SETUP AUDIO SETUP 27 48K 96K 192K 48K 96K 192K AUDIO SETUP AUDIO SETUP AUDIO OUT DOWN SAMPLE EXIT SETUP DOWN SAMPLE Select the setting suitable to your amplifier 28 VIDEO SETUP VIDEO SETUP BRIGHTNESS CONTRAST HUE SATURATION EXIT SETUP VIDEO SETUP DOWN SAMPLE 3 ...

Page 16: ...NMIX only Dolby Digital DVD disc DOWNMIX function is used to play analogue audio when the recorded audio channel on the disc does not correspond to the audio output channel configuration If the disc has 5 1 audio channels and the audio output can only receive stereo channels downmix function is necessary to hear all the channels recorded on the disc This function has 2 options LT RT and stereo If ...

Page 17: ... How to switch to DVB T work mode Press the SOURCE key on the remote control until you switched into DVB T work mode 32 DYNAMIC RANGE The requirement of a different dynamic range changes due to the room in which you are and the personal taste The high quality audio programs as movies usually have a wide dynamic range Compared to the dialogue the sound of an explosion result to be 20dB higher and t...

Page 18: ...hannel Figure 9 TV Channels Menu Figure 10 Sort Channels 3 3 Channels Class From the Channels Class Menu shown in Figure 12 each channel can be classified into a group Pressing ENTER will add the row s c hannel to the column s category Use TV RADIO to switch between TV and radio channels Note If there are no channels the user cannot enter this menu Figure 12 Channel Class Menu Channel Guide Channe...

Page 19: ...ee Figure 15 Video YCbCr TV RGB P SCAN YUV PC VGA S VIDEO See Figure 16 TV Type 4 3 Pan and Scan 4 3 Letterbox 16 9 See Figure 17 Figure 14 TV Setting Menu Figure 15 TV System TV Setting TV System TV Setting TV System TV System Video TV Type PAL YCbCr 4 3PS TV Setting TV System TV Setting TV System TV System Video TV Type Auto YCbCr 4 3PS NTSC PAL Auto NTSC PAL Auto The setup menu system DVB PART ...

Page 20: ...lock the channel and TV RADIO to switch between television and radio channels Figure 21 Parent Control Menu Figure 22 Change Pin Figure 23 Enter Pin Figure 24 Channel Lock Parent Control Change pin Parent Control Change pin Change pin Press ENTER Channel Lock Press ENTER Old Pin New Pin Confirm Old Pin New Pin Confirm Parent Control Change pin Parent Control Change pin Change pin Press ENTER Chann...

Page 21: ...requency End Frequency and Bandwidth If the scan type is single channel then only the country and start channel can be set If the scan type is channel range then the country start channel and end channel can be set Use the UP DOWN keys to select an item and the LEFT RIGHT keys to change the settings Once done go to Start Scan and press ENTER The setup menu system DVB PART Advanced Features 5 3Defa...

Page 22: ... to select SWAP to swap two channels F Press UP andDOWN button to select S SYS to display the Audio system I DK BG G Press UP and DOWN button to section SKIPto skip the channel NOTE 1 Notes on Sound system 6 0M stands for I 6 5M stands for DK and 5 5M is BG please set the Sound system at local one 2 Color system all color system are auto setup A While sound system is I color system is PAL I B Whil...

Page 23: ... to factory default F Language Press to button UP and DOWNselect language Press LEFT and RIGHT can select different language BRIGHT 50 CONTRAST 50 COLOR 50 HUE 50 S COLOR AUTO LANG ENGLISH DEFAULT SELECT ADJUST ZOOM 16 9 PICTURE BRIGHT 50 CONTRAST 50 COLOR 50 HUE 50 S COLOR AUTO LANG ENGLISH DEFAULT SELECT ADJUST ZOOM 16 9 PICTURE BRIGHT 50 CONTRAST 50 COLOR 50 HUE 50 S COLOR AUTO LANG ENGLISH DEF...

Page 24: ...se fs 96KHz 24bit 4Hz 44KHz 2dB Audio S N Ratio 95dB Degree of Distortion 0 01 D A Converter 192KHz 24bit Video Out 1Vp p S Video Out Y 1Vp p 75 C 0 3Vp p 75 Audio Out 2 0V 0 1V Coaxial Connections Scart USB CVBS S Video 2 Channel Output FM Tuner Tuning Range 87 5 108MHz S N Ratio 46dB Monophonic 46dB Stereo 50dB DIN Selectance 50dB THD Monophonic 2 Stereo 3 Frequency Response 30Hz 10kHz 1dB Stere...

Reviews: