background image

Appliance design

12

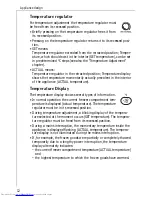
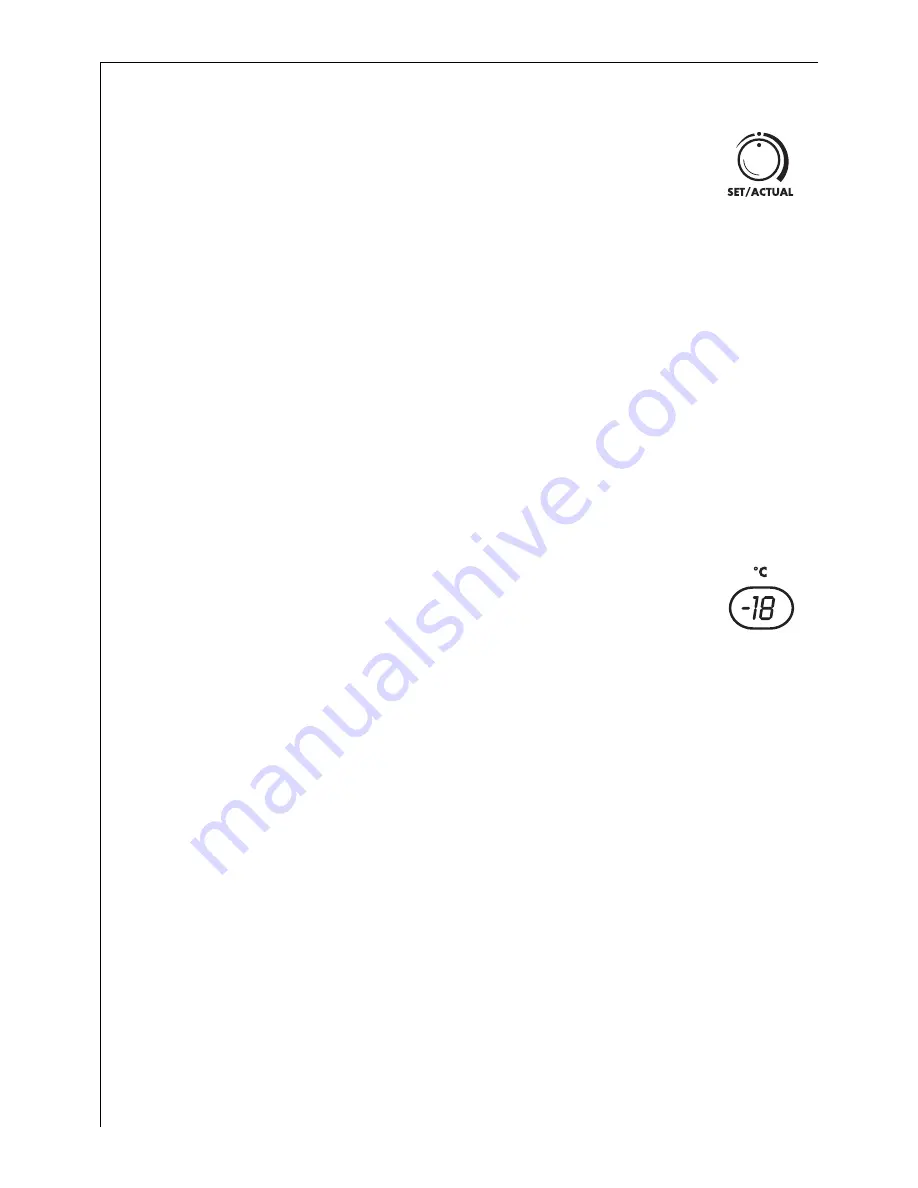
Temperature regulator

For temperature adjustment the temperature regulator must 
be freed from its recessed position.

• Briefly pressing on the temperature regulator frees it from 

its recessed position.

• Pressing on the temperature regulator returns it to its recessed posi-

tion.

• SET means: 

Temperature regulator extended from the retracted position; Temper-
ature, which should exist in the interior (SET temperature), can be set 
in predetermined °C steps (see also the "Temperature Adjustment" 
chapter).

• ACTUAL means: 

Temperature regulator in the retracted position; Temperature display 
shows the temperature momentarily actually prevalent in the interior 
of the appliance (ACTUAL temperature). 

Temperature Display

The temperature display shows several types of information.

• In normal operation the current freezer compartment tem-

perature is displayed (actual temperature). The temperature 
regulator must be in its recessed position.

• During temperature adjustment, a blinking display of the tempera-

ture selected at the moment occurs (SET temperature). The tempera-
ture regulator must be freed from its recessed position.

• During a mains interruption, the momentary temperature inside the 

appliance is displayed flashing (ACTUAL temperature). The tempera-
ture display is not illuminated during the mains interruption. 

• If, for example, the frozen goods were partially or completely thawed 

temporarily due to a lengthy power interruption, the temperature 
display alternately indicates:
– the current freezer compartment temperature (ACTUAL temperature) 

and

– the highest temperature to which the frozen goods have warmed.

Summary of Contents for OKO-ARCTIS 3193-4GA

Page 1: ...ÖKO ARCTIS 3193 4GA frost free Cooling and Freezing appliance Operating Instructions ...

Page 2: ...e 3 Additional information regarding operation and practical use of the appliance appear after this symbol 2 Tips and information concerning economical and environmentally sound use of the appliance are marked with the cloverleaf Explanations of the technical terminology used in the operating instructions can be found at the end in the section Technical Terminology The operating instructions conta...

Page 3: ...Control Panel 11 ON OFF button 11 Temperature regulator 12 Temperature Display 12 FAST CHILL FREEZE button 13 WARNING OFF button 13 Prior to initial start up 13 Initial Start Up 14 Select Freezing or Cooling 14 Temperature Adjustment 15 Switch on FAST CHILL 15 Switch on FAST FREEZE 16 Switching the Appliance Off 17 Control and Information Systems 18 Open Door Warning 18 Power Interruption 18 Tempe...

Page 4: ...recting Malfunctions 25 Replace light bulb 28 Adjust door contacter 28 Noises during Operation 29 Regulations Standards Guidelines 29 Special accessories 30 Technical Terminology 30 Installing and connecting 31 Remove transport safeguard 31 Installation 32 Installation Location 32 The appliance needs ventilation 33 Appliance Alignment 33 Reversing the Door 34 Door Alignment 36 Electrical Connectio...

Page 5: ...ble from your local Service Force Centre Any electrical work required to install this appliance should be carried out by a qualified electrician or competent person Parts which heat up should not be exposed Whenever possible the back of the appliance should be close to a wall but leaving the required distance for ventilation as stated in the installation instruc tions The appliance should be left ...

Page 6: ...frost freezer burns if consumed straight from the freezer compartment Do not remove items from the freezer compartment if your hands are damp wet as this could cause skin abrasions or frost freezer burns Bottles and cans must not be placed in the freezer compartment They can burst when the contents freeze Manufacturers recommended storage times should be adhered to Refer to relevant instructions M...

Page 7: ...dy use an authorised disposal site 2 Energy Saving Tips Do not install the appliance near cookers radiators or other sources of warmth High ambient temperatures cause longer more frequent operation of the compressor Ensure sufficient air circulation and exhaust at the appliance base and at the back wall of the appliance Never cover air vent openings Do not place warm foods into the appliance Allow...

Page 8: ...red the FAST CHILL function is terminated auto matically The FAST FREEZE function caters for quick freezing of fresh food stuffs and protects at the same time the already stored foodstuff against undesired temperature increase in the freezing room The electronics of the appliance recognises automatically when the quick freezing mode can be completed and automatically switches off the FAST FREEZE f...

Page 9: ...9 Appliance design Front view various models 1 Freezer tray 2 Drawers 3 Evaporator 4 Interior Illumination 5 Control Panel 6 Serial plate ...

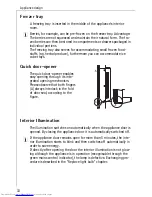
Page 10: ...ing through its inte grated opening mechanism Please observe that both fingers A always interlock in the fold of door seal according to the figure Interior Illumination The illumination switches on automatically when the appliance door is opened By closing the appliance door it is automatically switched off 3 If the appliance door remains open for more than 5 minutes the inte rior illumination sta...

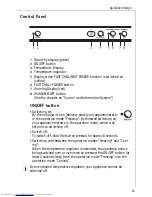
Page 11: ...appliance starts in the operation mode Freezing By renewed switching on your appliance restarts in the operation mode which was set prior to switching off Switch off To switch off hold the button pressed for approx 5 seconds Switching over between the operation modes Freezing and Cool ing When the temperature regulator is extended the appliance allows being switched over or vice versa by pressing ...

Page 12: ...mperature Display The temperature display shows several types of information In normal operation the current freezer compartment tem perature is displayed actual temperature The temperature regulator must be in its recessed position During temperature adjustment a blinking display of the tempera ture selected at the moment occurs SET temperature The tempera ture regulator must be freed from its re...

Page 13: ...AST FREEZE function is switched on the yellow control display near the button illuminates With the FAST CHILL FAST FREEZE button the FAST FREEZE function can be switched on if the appliance is in the Freezing operation mode or in the FAST CHILL function when the appliance is in the Cooling operation mode WARNING OFF button With the WARNING OFF button the acoustic warning signal can be switched off...

Page 14: ...h the following steps between the operating modes Freezing and Cooling 0 Press temperature regulator and free it from its recessed position 0 Hold the ON OFF button pressed for at least 2 seconds A peep tone sounds 3 The operation mode in which your appliance is at the moment is iden tifiable if the temperatures can be set above or below 0 C 0 Return the temperature regulator again to the retracte...

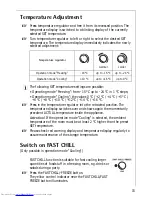
Page 15: ...ture display switches over and shows again the momentarily prevalent ACTUAL temperature inside the appliance Attention If the operation mode Cooling is selected the ambient temperature of the room must be at least 2 C higher than the preset SET temperature 0 Please check red warning display and temperature display regularly to assure maintenance of the storage temperature Switch on FAST CHILL Only...

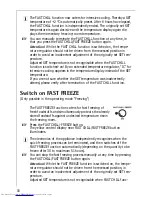
Page 16: ...ether the SET temperature was inadvertently altered please verify after termination of the FAST CHILL function Switch on FAST FREEZE Only possible in the operating mode Freezing The FAST FREEZE function caters for fast freezing of fresh foodstuffs and simultaneously protects the already stored foodstuffs against undesired temperature rise in the freezing room 0 Press the FAST CHILL FREEZE button T...

Page 17: ...ature display goes off 3 If you remove the plug or disconnect the circuit fuse without previ ously switching off the appliance with the ON OFF button an audible warning signal makes you aware of the power interruption The warn ing signal can be temporarily silenced with the WARNING OFF button but it nevertheless sounds again after 2 hours In this case connect the appliance to the mains again and p...

Page 18: ...y is interrupted an audible warning sounds at 20 second intervals In addition the current actual temperature in the freezer compartment is indicated in blinking fashion by the tempera ture display 2 seconds on 2 seconds off After one hour the audible warning only sounds at 40 second intervals The audible warning can be switched off for about 2 hours with the WARNING OFF button In the event of a po...

Page 19: ... In addition the temperature display alternately indicates the highest temperature to which the frozen goods have warmed and the current actual temperature in the freezer compartment If suspicion of partial or complete thawing exists please check the quality of the foods to determine if they can be used As soon as the temperature in the freezer compartment has again fallen below the critical thawi...

Page 20: ...t been processed further cooked into meals may not under any circumstances be frozen a second time 0 For exploitation of maximum freezing capacity press the FAST FREEZE button 24 hours prior to freezing or 4 to 6 hours for smaller quantities Yellow display lights up 3 The FAST FREEZE button need not be pressed for freezing of small quantities of up to 3 kg 0 All foods must be packed air tight prio...

Page 21: ...be requested directly from the manufacturer Frozen Storage Attention Before initial loading of the freezer compartment with pre viously frozen goods the required storage temperature of 18 C must be reached Load freezer only with packaged frozen goods so that they do not dry out or lose their flavour and so that no flavour contamination of other frozen goods can occur Please observe maximum storage...

Page 22: ...ds Whether the upper or lower value of the indi cated storage time is valid depends on the quality of the foods and pre treating before freezing The lower value applies to foods with high fat content By attaching the included index tabs to the compart ment flaps and drawers they can be marked according to which type of foods the indivi dual compartments contain Cooling The appliance is suitable de...

Page 23: ...ts potatoes and tomatoes Fruits and vegetables which should still ripe e g pears Pack all foodstuffs prior to long fresh cooling Thus the aroma the moisture and the colour is retained longer The following are suited for packaging Airtight bags and foils made of polyethylene Closable plastic containers aluminium foil Standard Cooling By selecting the SET temperature in the range of 5 C this applian...

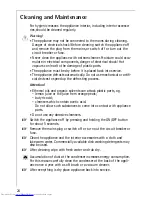
Page 24: ...frosting process Attention Ethereal oils and organic solvents can attack plastic parts e g lemon juice or the juice from orange peals butyric acid cleansers which contain acetic acid Do not allow such substances to come into contact with appliance parts Do not use any abrasive cleansers 0 Switch the appliance off by pressing and holding the ON OFF button for about 5 seconds 0 Remove the mains plug...

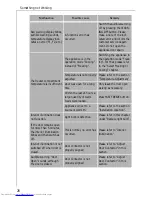
Page 25: ...iance is not switched on Switch appliance on Mains plug is not inserted or is loose Insert mains plug Fuse has blown or is defec tive Check fuse replace if nec essary Mains socket is defective Mains malfunctions are to be corrected by an electri cian Appliance does not func tion green stand by dis play is not lit temperature is indicated as blinking dis play audible warning sounds at regular inter...

Page 26: ...en for a long time Only leave the door open as long as necessary Within the last 24 hours a large quantity of warm foods were loaded Press FAST FREEZE button Appliance is next to a source of warmth Please refer to the section Installation Location Interior illumination does not function Light bulb is defective Please refer in this chapter under Replace light bulb If the door remains open for more ...

Page 27: ...y after pressing the FREEZE but ton or after changing the temperature setting This is normal no error has occurred The compressor starts after a period of time Compressor does not start after appliance is switched on Within the first 5 minutes after switching the appli ance on the electronics initialise a self test The compressor is started automatically after the self test has been com pleted Onl...

Page 28: ...d beneath the operating panel and when the door is opened it becomes accessible from the bottom Adjust door contacter If for example the illumination is not automatically switched off when the door is closed or if the Open Door warning signal sounds the contacter at the top of the door may need to be readjusted 0 Loosen phillips head screw and push contacter towards the inner side of the door 0 Re...

Page 29: ...e emitted Regulations Standards Guidelines This appliance was designed for household use and was manufactured in accordance with the appropriate standards The necessary measures in accordance with appliance safety legislation regulations GSG accident prevention regulations for refrigeration appliances VBG 20 and the regulations of the German Society of Elec trical Engineers VDE were observed in th...

Page 30: ...t is found The refrigerant circuit consists for the most part of an evaporator a com pressor a condenser and tubing Evaporator The refrigerant is evaporated in the evaporator This warmth is with drawn from the appliance interior which is thus cooled Like all flu ids refrigerants require warmth in order to be evaporated For this reason the evaporator is located in the appliance interior Compressor ...

Page 31: ...from left and right of the outside of the door 3 Tape remnants can be removed with benzene Wipe off benzene 0 Remove all tape and pads from the interior of the appliance 0 Peal off the protective film from the control panel 0 Remove door seal safeguards from door seal at the inside of the door 0 With open door remove transport safeguard at door pivot ...

Page 32: ...ation can be found on the serial plate which is located at the left on the inside of the appliance The subsequent table shows which ambient temperature is assigned to which climate class if the operation mode Freezing is selected Attention If the operation mode Cooling is selected the ambient temperature at the installation place must be at least 2 C higher than the preset SET temperature If the r...

Page 33: ...l spacing elements from the plinth and insert them into the sockets at the back side of the appliance according to the figure so that the required wall gap for the necessary ventilation at the back of the appliance is provided for Appliance Alignment 0 In order to push the appliance to the final installation place carefully press at the top on the door and tilt the appliance backwards a bit The we...

Page 34: ...not be connected to the mains Remove plug from the mains beforehand 0 Lay the left side of the appliance onto a soft pad e g rug blanket etc 0 Turn pivot pin out of lower door pivot Keep the spacing washer bet ween the door and the bearing 0 Romove door carefully and set aside 0 Turn the 4 phillips head screws out of the base and remove the base 0 Overturn the plinth s blind bearing from left to t...

Page 35: ... on the top of the door 0 Insert and close the door with the bearing pin carefully in the upper eccentric bush 0 Fit the washer down between the door and bearing and screw in the bearing bolt into the lower door bearing 0 Remove the 3 hole covering pins 0 Loosen the 3 screws on the door handle and move the door handle towards the right 0 Insert the hole covering pins on the left ...

Page 36: ...tom 0 Replace the door see section Re Hanging Door Electrical Connection Any electrical work required to install this appliance should be carried out by a qualified electrician or competent person 1 WARNING THIS APPLIANCE MUST BE EARTHED The manufacturer declines any liability should these safety measures not be observed Before switching on make sure the electricity supply voltage is the same as t...

Page 37: ... over the outer sheat 1 Warning A cut off plug inserted into a 13 amp socket is a serious safety shock hazard Ensure that the cut off plug is disposed of safely Important The mains cable may only be changed by a qualified electrician If your appliance needs repairing please contact your local Service Force Centre Guarantee Conditions AEG offer the following guarantee to the first purchaser of this...

Page 38: ... within Europe then your guarantee moves with you to your new home subject to the following qualifications The guarantee starts from the date you first purchased your product The guarantee is for the same period and to the same extent for labour and parts as exist in the new country of use for this brand or range of products This guarantee relates to you and connot be transferred to another user Y...

Page 39: ...ermine your type of enquiry before telephoning When you contact us we need to know 1 Your name address and post code 2 Your telephone number 3 Clear and concise details of the fault What is the fault When does the fault occur 4 The model production number and product identification number 5 Date of purchase This information can be found on the rating plate so you have these numbers to hand we reco...

Page 40: ...AEG Hausgeräte GmbH Postfach 1036 D 90327 Nürnberg http www aeg hausgeraete de Copyright by AEG H271 282 300 05 0600 ...

Reviews: