background image

14

|

P a g e

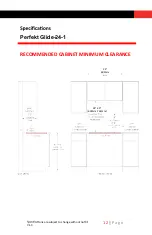
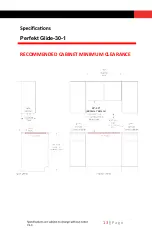
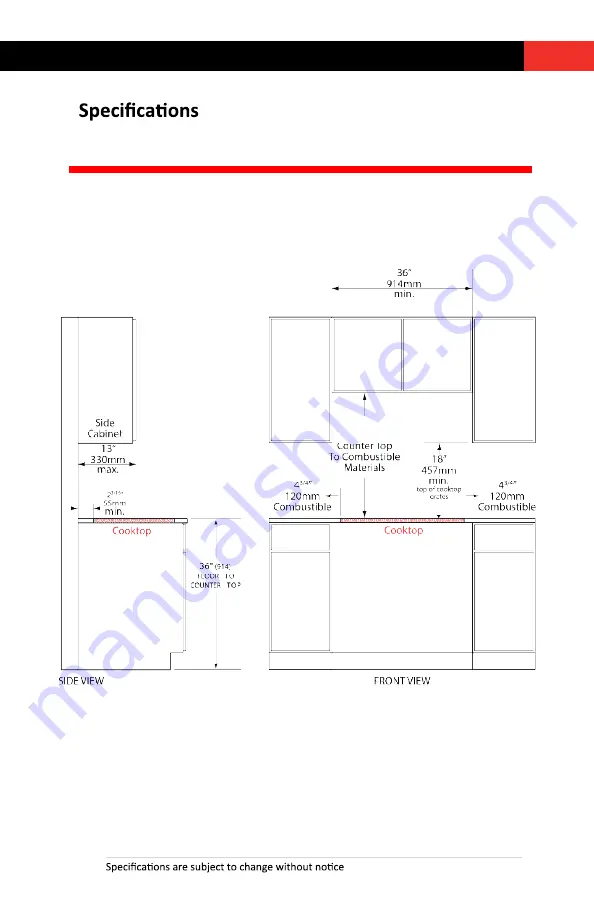
RECOMMENDED CABINET MINIMUM CLEARANCE

V1.3

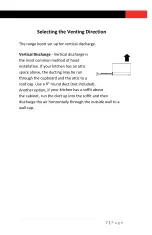
24”-30”

(600mm-762mm)

Perfekt Glide-36-1

Summary of Contents for Perfekt Glide-24-1

Page 1: ...of this product Please read the manual carefully before op g the appliance Cod 0103088729 00 01 Version Number V20191127 V1 1 Perfekt Glide 24 1 Perfekt Glide 30 1 Perfekt Glide 36 1 Built in Range Hood Instru Manual i n perfekt ...

Page 2: ... l l a t s n I g Ven Dire on 7 Cabinet Prep on for Hood Support 10 14 Prepar on for Duct Conne on 14 5 1 n o i t a l l a t s n I d o o H 6 1 s l o r t n o C 6 1 s n o i t a c i f i c e p S 7 1 e r a C d n a e s U 9 1 8 1 g n i t o o h S e l b u o r T 8 9 m a r g a i D n o i t a l l a t s n I 0 2 n o i t a m r o f n I y t n a r r a W ...

Page 3: ...st be grounded o Do not use this appliance for commercial use o Do not use with any solid state speed control device o In work and electrical wiring must be done by o When replacing an exis ge hood with your new AEG Perfekt Glide range hood turn OFF the electrical power to the exis ng unit before removal o Unplug the unit before cleaning or servicing o Note If for any reason this product requires ...

Page 4: ...3 P a g e WARNING to reduce risk of cooktop grease fire element dish cloths off temperatures temperatures the high flame foods can ...

Page 5: ...equipped with a cord that has a grounding wire with a grounding plug The plug must be plugged into an outlet that is properly installed and grounded Improper grounding can result in risk of electric shock are not properly understood or if doubt exists as to whether the appliance is properly grounded Do not use an extension cord If the power supply cord is too short have a qualified electrician inst...

Page 6: ...ly discharge the air back into the room CAUTION o o or other fu should e in use ls no in t applicable to appliances that only discharge the air back into the room There is a risk of fire if the cleaning is not carried out o This appliance is not intended for use by persons or lack of experience and knowledge unless they have been Check to make sure that all parts and accessories are present and or ...

Page 7: ...Duct tape l tape o Connector clamp o This appliance is manufactured from top quality materials and o s superb streamlined e ects o With high on power and low noise it is designed to remove cooking fumes from your kitchen quietly and c vely Installa on Note this procedure will require 2 people for easier in on General Prepara on o Remove range hood from packaging and lay upside down on table covere...

Page 8: ...6 ...

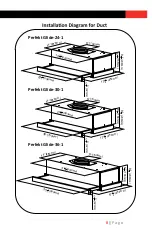
Page 9: ...50mm 11 280mm 11 280mm 11 280mm 30 232 1 352 1 318 5 19 503mm 663mm 758mm 803mm 898mm 598mm 16 13 2632 3 8 m m 8 0 2 6 1 3 8 m m 8 0 2 6 1 3 8 m m 8 0 2 6 1 3 m m 6 6 1 6 2 1 m m 6 6 1 6 2 1 m m 6 6 1 6 2 1 17 4 3 450mm 17 4 3 450mm 17 4 3 450mm 1 4 3 m m 2 4 1 4 3 m m 2 4 1 4 3 m m 2 4 ...

Page 10: ... 7 443mm 172 1 205mm 8 78 5mm 3 190mm 7 2 1 69 5mm 2 4 3 800mm 312 1 285mm 114 1 766mm 3032 5 603mm 234 3 78 5mm 3 76cm 30 69 5mm 2 4 3 190mm 72 1 190mm 7 2 1 16 8mm 5 220mm 8 32 21 286mm 11 4 1 320mm 12 32 19 30mm 1 6 1 940mm 37 906mm 3532 21 743mm 294 1 16 8mm 5 190mm 7 2 1 190mm 72 1 90cm 3516 7 69 5mm 2 4 3 355mm 14 220mm 8 32 21 286mm 11 4 1 320mm 12 32 19 30mm 1 6 1 ...

Page 11: ...0 P a g e The range hood should be mounted at a minimum a minimum distance of 24 from an electric or indu on cooktop and distance of 30 above a gas cooktop for safety and optimum performance 84 210mm 1 443mm 17 2 1 603mm 23 4 3 280mm 11 743mm 29 4 1 6 150mm Diameter 70mm 24 3 503mm 1916 13 663mm 2632 3 803mm 31 8 5 30mm 116 3 88 5 5 220mm 4 x Ø6mm 72 1 190mm 72 1 190mm ...

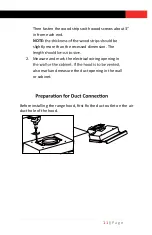
Page 12: ...end NOTE slightly more than the recessed dimension The 2 Measure and mark the electrical wiring opening in also mark and measure the duct opening in the wall or cabinet 11 P a g e Before installing the range hood first fix the duct outlet on the air duct hole of the hood ...

Page 13: ...12 P a g e RECOMMENDED CABINET MINIMUM CLEARANCE ons are subject to change without no V1 3 24 30 600mm 762mm 24 609mm Perfekt Glide 24 1 ...

Page 14: ...13 P a g e RECOMMENDED CABINET MINIMUM CLEARANCE V1 3 24 30 600mm 762mm Perfekt Glide 30 1 ...

Page 15: ...14 P a g e RECOMMENDED CABINET MINIMUM CLEARANCE V1 3 24 30 600mm 762mm Perfekt Glide 36 1 ...

Page 16: ... the hood using duct tape to make Power cord WARNING TO REDUCE THE RISK OF FIRE USE ONLY METAL DUCTWORK AND DUCT CONNECTION DEVICE Your new range hood will operate at the highest the number of elbows and the length of the duct are kept to a if efficiency ...

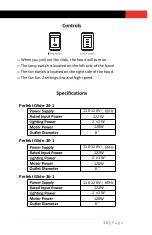
Page 17: ...16 P a g e Perfekt Glide 36 1 122W 120W 6 2 x 1W 122W 110 120V 110 120V 110 120V 120W 6 2 x 1W 122W 120W 6 2 x 1W Perfekt Glide 24 1 Perfekt Glide 30 1 When the hood will turn on of the hood 2 ...

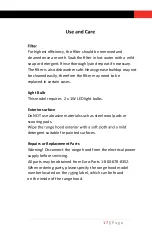
Page 18: ...d in certain cases Light Bulb This model requires 2 x 1W LED light bulbs Exterior surface Do NOT use abrasive materials such as steel wool pads or scouring pads detergent suitable for painted surfaces Repairs or Replacement Parts Warning Disconnect the range hood from the electrical power supply before servicing All parts may be obtained from Euro Parts 1 800 678 8352 When ordering parts please sp...

Page 19: ... or an authorized servicer to fix this problems ly due to either a def ve fan switch or a burned out fan motor Both can be replaced without removing the range hood from the wall or cabinet Use an ohm meter to determine which component is not working If the ohm meter reads that the fan switch has 0 ohms of resistance then it is the motor that needs to be replaced If it reads anything other than zero...

Page 20: ...2 L1 K1 K2 K3 Light does not turn on but fan turns on This could be because the bulb has burned out Try replacing the light bulb If the light s ll does not work either the light switch or the lamp holder socket could be defec ve Both can be replaced without having to remove the range from the wall or cabinet ...

Page 21: ...es com or contact 871 Cranberry Court Oakville Ontario L6L6J7 Canada Tel 905 829 3980 1 800 421 6332 Euro Line Appliances Inc 1 800 ELA WEST Euro Line Appliances West marke ng euro line appliances com All AEG Appliances are backed by a comprehensive 2 year part and labour warranty Informa on on service and parts available from Euro Parts at 1 800 678 8352 f Note rom AB Electrolux publ ...

Reviews: