33
EN
2
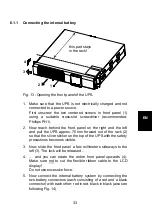
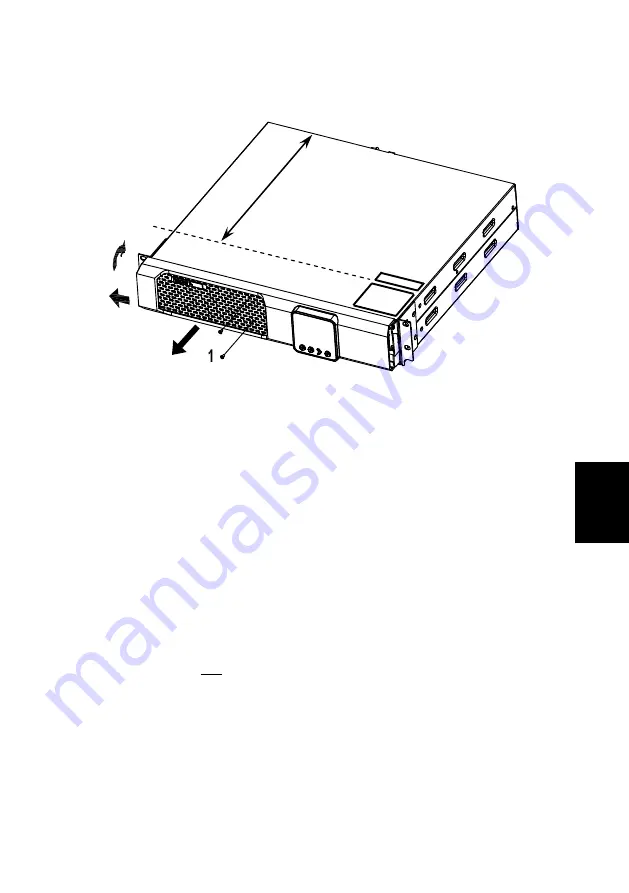
6.1.1 Connecting the internal battery
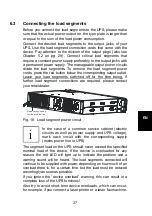
Fig. 13
: Opening the front panel of the UPS
1. Make sure that the UPS is not electrically charged and not
connected to a power source.
First unscrew the two centered screws in front panel (1)
using a suitable cross-slot screwdriver (recommended:
Phillips PH1).
2. Now reach behind the front panel on the right and the left
and pull the UPS approx. 70 mm forward out of the rack (2)
so that the silver sticker on the top of the UPS with the safety
precautions becomes visible.
3. Now slide the front panel a few millimeters sideways to the
left (3). The lock will be released …
4. … and you can rotate the entire front panel upwards (4).
Make sure not to cut the flexible ribbon cable to the LCD
display!
Do not use excessive force.
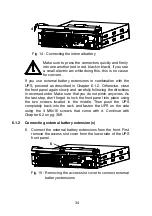
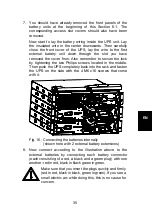
5. Now connect the internal battery system by connecting the
two battery connectors (each consisting of a red and a black
connector) with each other: red in red, black in black (also see
following Fig. 14).
this part stays
in the rack!
3
4
Summary of Contents for protect d. 1000
Page 2: ...2 ...
Page 21: ...21 EN 3 3 CE certificate ...
Page 73: ...73 EN 12 3 Notes ...
Page 74: ...74 ...
Page 75: ...75 EN ...

