67
EN
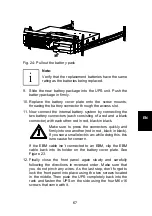
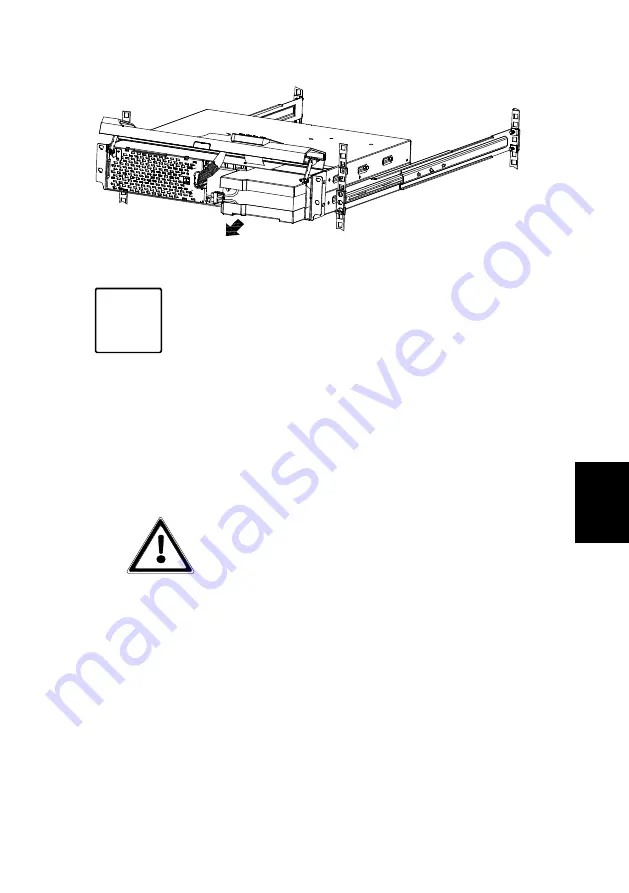
Fig. 24
: Pull out the battery pack
i
Note:
Verify that the replacement batteries have the same
rating as the batteries being replaced.
9. Slide the new battery package into the UPS unit. Push the
battery package in firmly.
10. Replace the battery cover plate onto the screw mounts,
threading the battery connector through the access slot.
11. Now connect the internal battery system by connecting the
two battery connectors (each consisting of a red and a black
connector) with each other: red in red, black in black.
Make sure to press the connectors quickly and
firmly into one another (red in red
, black in black).
If you see a small electric arc while doing this, this
is no cause for concern.
If the EBM cable isn´t connected to an EBM, clip the EBM
cable back into its holder on the battery cover plate. See
Figure 23.
12. Finally close the front panel again slowly and carefully
following the directions in reversed order. Make sure that
you do not pinch any wires. As the last step, don’t forget to
lock the front panel into place using the two screws located
in the middle. Then push the UPS completely back into the
rack and fasten the UPS on the side using the four M6
x
16
screws that come with it.
Summary of Contents for protect d. 1000
Page 2: ...2 ...
Page 21: ...21 EN 3 3 CE certificate ...
Page 73: ...73 EN 12 3 Notes ...
Page 74: ...74 ...
Page 75: ...75 EN ...

