background image

1.

Press the Mode button until the corresponding icon appears.
The FROSTMATIC indicator flashes.

2.

Press the OK button to confirm.
The FROSTMATIC indicator is shown.

This function stops automatically after 52 hours.

To switch off the function before its automatic end:
1.

Press the Mode button until the FROSTMATIC indicator flashes.

2.

Press the OK button to confirm.

3.

The FROSTMATIC indicator goes off.

The function switches off by selecting a different freezer set temperature.

FIRST USE

Cleaning the interior

Before using the appliance for the first time, wash the interior and all internal accessories

with lukewarm water and some neutral soap so as to remove the typical smell of a brand-

new product, then dry thoroughly.
Do not use detergents or abrasive powders, as these will damage the finish.

If “dEMo” appears on the Display, the appliance is in demonstration mode: refer to “WHAT

TO DO IF...” paragraph.

DAILY USE

Freezing fresh food

The freezer compartment is suitable for

freezing fresh food and storing frozen and

deep-frozen food for a long time.

To freeze fresh food activate the FROST

-

MATIC function at least 24 hours before

placing the food to be frozen in the freezer

compartment.

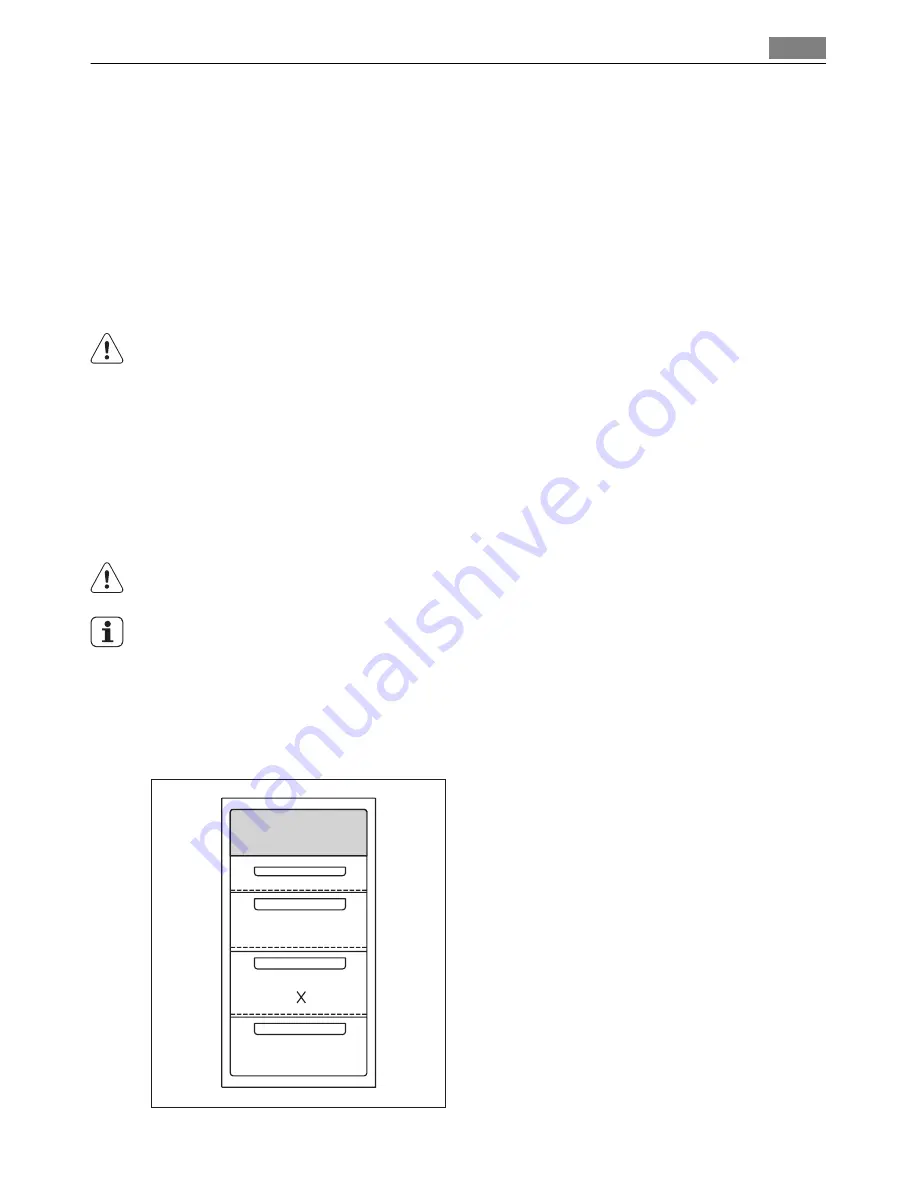
Place the fresh food to be frozen in the "X"

compartment, as shown in the figure.

The maximum amount of food that can be

frozen in 24 hours is specified on the 

rating

plate

, a label located on the inside of the

appliance.

The freezing process lasts 24 hours: during

this period do not add other food to be fro

-

zen.

First use

11

Summary of Contents for SCN71800S0

Page 1: ...SCN71800S0 EN FRIDGE FREEZER USER MANUAL ...

Page 2: ...se spend a few minutes reading to get the very best from it ACCESSORIES AND CONSUMABLES In the AEG webshop you ll find everything you need to keep all your AEG appliances looking spotless and working perfectly Along with a wide range of accessories designed and built to the high quality standards you would expect from specialist cookware to cutlery baskets from bottle holders to delicate laundry b...

Page 3: ...o if 18 Technical data 18 Installation 26 Noises 28 Environmental concerns The following symbols are used in this user manual Important information concerning your personal safety and information on how to avoid damaging the appliance General information and tips Environmental information Subject to change without notice Contents 3 ...

Page 4: ...he plug out of the socket cut the connection cable as close to the appliance as you can and remove the door to prevent playing chil dren to suffer electric shock or to close themselves into it If this appliance featuring magnetic door seals is to replace an older appliance having a spring lock latch on the door or lid be sure to make that spring lock unusable before you discard the old appliance T...

Page 5: ...Avoid prolonged exposure of the appliance to direct sunlight Bulb lamps if foreseen used in this appliance are special purpose lamps selected for household appliances use only They are not suitable for household room illumination Daily Use Do not put hot pot on the plastic parts in the appliance Do not store flammable gas and liquid in the appliance because they may explode Do not place food produ...

Page 6: ...urn The appliance must not be located close to radiators or cookers Make sure that the mains plug is accessible after the installation of the appliance Connect to potable water supply only If a water connection is foreseen Service Any electrical work required to do the servicing of the appliance should be carried out by a qualified electrician or competent person This product must be serviced by a...

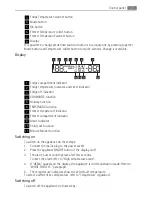
Page 7: ...6 FROSTMATIC function 7 Freezer temperature indicator 8 Freezer compartment indicator 9 Alarm indicator 10 Child Lock function 11 Minute Minder function Switching on To switch on the appliance do these steps 1 Connect the mains plug to the power socket 2 Press the appliance ON OFF button if the display is off 3 The alarm buzzer could operate after few seconds To reset the alarm refer to High tempe...

Page 8: ...lect a different set temperature refer to Temperature regulation Temperature regulation The set temperature of the fridge and of the freezer may be adjusted by pressing the tem perature regulators Set default temperature 5 C for the fridge 18 C for the freezer The temperature indicators show the set temperature The set temperature will be reached within 24 hours After a power failure the set tempe...

Page 9: ...k function To switch on the function 1 Press the Mode button until the corresponding icon appears 2 The Child Lock indicator flashes 3 Press the OK button to confirm The Child Lock indicator is shown To switch off the function 1 Press the Mode button until the Child Lock indicator flashes 2 Press the OK button to confirm 3 The Child Lock indicator goes off High temperature alarm An increase in the...

Page 10: ...ic end 1 Press the Mode button until the COOLMATIC indicator flashes 2 Press the OK button to confirm 3 The COOLMATIC indicator goes off The function switches off by selecting a different fridge set temperature Holiday function This function allows you to keep the refrigerator closed and empty during a long holiday period without the formation of a bad smell The fridge compartment must be empty wi...

Page 11: ...remove the typical smell of a brand new product then dry thoroughly Do not use detergents or abrasive powders as these will damage the finish If dEMo appears on the Display the appliance is in demonstration mode refer to WHAT TO DO IF paragraph DAILY USE Freezing fresh food The freezer compartment is suitable for freezing fresh food and storing frozen and deep frozen food for a long time To freeze...

Page 12: ...show different types of frozen goods The numbers indicate storage times in months for the appropriate types of frozen goods Whether the upper or lower value of the indicated storage time is valid depends on the quality of the foods and treating before freezing Thawing Deep frozen or frozen food prior to being used can be thawed in the refrigerator compart ment or at room temperature depending on t...

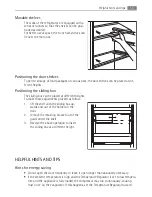
Page 13: ...roceed as follow 1 lift the shelf with the sliding box up wards and out of the holders in the door 2 remove the retaining bracket out of the guide under the shelf 3 Reverse the above operation to insert the sliding box at a different height HELPFUL HINTS AND TIPS Hints for energy saving Do not open the door frequently or leave it open longer than absolutely necessary If the ambient temperature is ...

Page 14: ...ints for freezing To help you make the most of the freezing process here are some important hints the maximum quantity of food which can be frozen in 24 hrs is shown on the rating plate the freezing process takes 24 hours No further food to be frozen should be added during this period only freeze top quality fresh and thoroughly cleaned foodstuffs prepare food in small portions to enable it to be ...

Page 15: ...wax polishes to clean the interior as this will damage the surface and leave a strong odour Clean the condenser black grill and the compressor at the back of the appliance with a brush This operation will improve the performance of the appliance and save electricity consumption Take care of not to damage the cooling system Insert the 2 upper shelves in the original position after leaving them for ...

Page 16: ...the appliance stands sta ble all the four feet should be on the floor The appliance does not operate The lamp does not operate The appliance is switched off Switch on the appliance The mains plug is not connected to the mains socket correctly Connect the mains plug to the mains socket correctly The appliance has no power There is no voltage in the mains socket Connect a different electrical ap pli...

Page 17: ...temperature be fore storage Many products are stored at the same time Store less products at the same time The temperature in the re frigerator is too high There is no cold air circulation in the appliance Make sure that there is cold air circulation in the appliance The temperature in the freezer is too high Products are too near to each other Store products so that there is cold air circulation ...

Page 18: ...ure that the light comes on Closing the door 1 Clean the door gaskets 2 If necessary adjust the door Refer to Installation 3 If necessary replace the defective door gaskets Contact the Service Center TECHNICAL DATA Dimension of the recess Height 1780 mm Width 560 mm Depth 560 mm Rising Time 25 h Voltage 230 240 V Frequency 50 Hz The technical information are situated in the rating plate on the int...

Page 19: ...t person WARNING This appliance must be earthed The manufacturer declines any liability should these safety measures not be observed 1 2 3 4 5 The wires in the mains lead are coloured in accordance with the following code 1 Green and Yellow Earth 3 Brown Live 5 Blue Neutral As the colours of the wires in the mains lead of this appliance may not correspond with the coloured markings identifying the...

Page 20: ... 6 Switch on the appliance The appliance is supplied with a 13 amp plug fitted 2 In the event of having to change the fuse in the plug supplied a 13 amp ASTA approved BS 1362 fuse must be used WARNING A cut off plug inserted into a 13 amp socket is a serious safety shock hazard Ensure that it is disposed of safely Door reversibility The door of the appliance opens to the right If you want to open ...

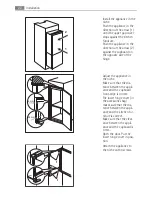
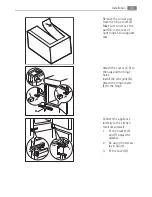
Page 21: ...e upper door Tighten the upper pin Ventilation requirements 6 cm min 200 cm2 min 200 cm2 The airflow behind the appliance must be sufficient Installing the appliance CAUTION Make sure that the mains cable can move freely Do these steps x x If necessary cut the adhe sive sealing strip and then apply it to the appliance as shown in figure Installation 21 ...

Page 22: ... 44 mm Adjust the appliance in the niche Make sure that the dis tance between the appli ance and the cupboard front edge is 44 mm The lower hinge cover in the accessories bag makes sure that the dis tance between the appli ance and the kitchen fur niture is correct Make sure that the clear ance between the appli ance and the cupboard is 4 mm Open the door Put the lower hinge cover in posi tion I I...

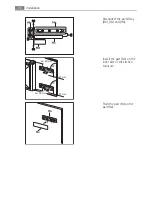
Page 23: ... case E E B D C Attach the covers C D to the lugs and the hinge holes Install the vent grille B Attach the hinge covers E to the hinge F E D Connect the appliance laterally to the kitchen furniture sidewall 1 Fit the bracket E and F adjust the distance 2 Fix using the screws as in figure 3 Fit the cover D Installation 23 ...

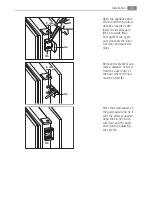
Page 24: ...Disconnect the parts Ha Hb Hc and Hd ca 50 mm ca 50 mm 21 mm 90 90 21 mm Install the part Ha on the inner side of the kitchen furniture Ha Hc Push the part Hc on the part Ha 24 Installation ...

Page 25: ...ce door and the furni ture door and mark the holes Ha K 8 mm Remove the brackets and mark a distance of 8 mm from the outer edge of the door where the nail must be fitted K Hb Place the small square on the guide again and fix it with the screws supplied Align the kitchen furni ture door and the appli ance door by adjusting the part Hb Installation 25 ...

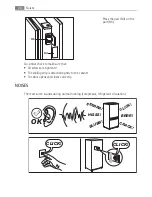
Page 26: ...re that All screws are tightened The sealing strip is attached tightly to the cabinet The door opens and closes correctly NOISES There are some sounds during normal running compressor refrigerant circulation BRRR HISSS CLICK BLUBB CRACK SSSRRR OK CLICK CLICK 26 Noises ...

Page 27: ...BRRR BRRR BLUBB BLUBB HISSS HISSS SSSRRR SSSRRR Noises 27 ...

Page 28: ... electronic equipment By ensuring this product is disposed of correctly you will help prevent potential negative consequences for the environment and human health which could otherwise be caused by inappropriate waste handling of this product For more detailed information about recycling of this product please contact your local council your household waste disposal service or the shop where you p...

Page 29: ...29 ...

Page 30: ...30 ...

Page 31: ...31 ...

Page 32: ...www aeg com shop 222344536 A 272011 ...

Reviews: