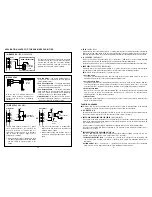
D) Configuration of Output Modes
E) Personal Safety
G)
--
--
Installer Programming
Installer Programming
40
41
42
70
#
71
#
72
#
76
#
1 to 999
After 10 successive false codes, the keypad locks during 30 seconds
After 10 successive false codes, the Duress output switches to ground
Selectable of a
00
Disappearance of all the above securities
#
#
#
50
#
51
#
52
#
60
#
61
#
62
#
80
1
#
80
0
#
81
1
#
81
0
#
82
1
#
#
82
0
#
#
Output 1 in Momentary Mode from 1 to 999 seconds
Output 1 in Start / Stop Mode (toggle)
Output 1 in Start / Stop Mode (toggle) with accelerated code
1 to 999
Output 2 in Momentary Mode from 1 to 999 seconds
Output 2 in Start / Stop Mode (toggle)
Output 2 in Start / Stop Mode (toggle) with accelerated code
1 to 999
Output 3 in Momentary Mode from 1 to 999 seconds
Output 3 in Start / Stop Mode (toggle)
Output 3 in Start / Stop Mode (toggle) with accelerated code
5 to 10
fter 5 to 10 successive false codes, the keypad locks
during 15 minutes. The keypad can be reset to release locking with the
Master Code at any time during the locking period
Door Forced-Open Alarm is Enabled
Door Forced-Open Alarm is Disabled
1 second notifying beep is given to notify the person outside to open
the door when output relay is activated with an user code or egress
button. Good for the locking device that gives no sound when it
activates, such as a magnetic lock.
Notifying beep disabled and replaced by 2 short successful code entry
beeps for valid user codes
Auto Entry Mode is selected.
key that follows the user code is NOT
required in code entry. The User Codes MUST be set in the same digit
length as the Master Code in Auto Entry Mode and the code length can
be 4-8 digits
Manual Entry Mode is selected.
key that follows the user code is
required in code entry. The user codes can be 4-8 digits and they are
not required to be in the same length as the Master Code
In Single User Mode, no matter the selection is Auto or Manual mode, the Master Code and the User Code
MUST be set in the length of 4 digits.
F) Door Forced-Open Alarm
Output Activation Announcer
H) User Code Entry Mode (Auto or Manual)
--
--
--
Installer Programming
Installer Programming
Installer Programming
NOTE:
Locations Code of Duration
Locations
No. of False Entry Validation Comments
Validation Comments
Locations Code of Functions Validation Comments
Locations Code of Functions Validation Comments
Locations Code of Functions Validation Comments
6
CONNECTION HARNESS
ALARM CONTROL PANEL
1 2 3 4 5 6 7 8 9 10 11 12 13 14 15 16
AU
X
LE
D
O/P
1
INHIB
OUTPUT
3
N.O.
( )
-
N.C.
N.O.
COM.
(+)
( )
-
(+)
( )
-
N.C.
DURESS -- TO A 24 HOUR N.O. ZONE
COMMON GROUND OF KEYPAD AND ALARM SYSTEMS
OUTPUT 2
ALARM ARM-DISARM CONTROL
* CONSULT YOUR ALARM INSTALLATION
MANUAL FOR N.C. OR N.O. FOR THE CONTROL
RED LED
FOR ALARM STATUS INDICATION
GREEN LED
FOR ALARM STATUS INDICATION
TAMPERPROOF
TO A 24 HOUR N.C. ZONE
WHITE/ORANGE
YELLOW GREEN
PURPLE
BLUE
WHITE/BROWN
YELLOW
LIGHT BLUE
GREEN
GREY
BLACK
RED
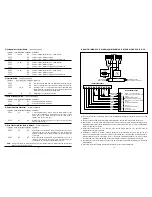
2) BASIC WIRINGS FOR ALARM ARM-DISARM AND STAND ALONE DOOR LOCK
F
F
F
F
F
F
F
The door lock function is exactly the same as like the Application Example (1) except the Green and Red LED
indications.
The Green and Red LEDs are used for Alarm Status indications, such as EXIT, Armed, Alarm Memory etc.
Relay Output 2 is used for Alarm Arm-Disarm Control. Please consult your alarm control panel manual for the
appropriate output contact and the operation mode for the control; such as N.O. or N.C. contact, and Momentary
or Start / Stop mode are required.
Connect the Tamper Switch to a 24 hour N.C. zone and the Duress output to a 24 hour N.O. zone for
tamperproof and emergency reporting.
Connection of "Output 3" to "Output 1 Inhibit" is optional. With this connection, the owner may use the User
Code 3 as authorization Code to stop the operation of the electric lock in the night time or after office hour to
prevent unauthorized access. Set output 3 in Start / Stop mode (Programming Option 61) for ON-OFF control.
The centre LED will change from flashing Green to Red while the operation of the electric lock is stopped.
The Yellow green wire is the common ground to link up the keypad and the alarm control panel to achieve the
logical functions.
Please also see the NOTE stated in Application Example (1) for the common information.
15
EG
IN
OUTPUT 1
N.C. C. N.O.
(+) ( )
-
12-24V AC/DC
DOOR
SENS
(+)
N.O.
N.O.
EGRESS BUTTON
(INSIDE THE HOUSE)
MORE EGRESS BUTTONS
CAN BE CONNECTED IN PARALLEL
TERMINALS
ELECTRIC
LOCK
N.C. N.O.
OR
12V DC
POWER
SUPPLY
1N4004


