5
Gauge Disassembly
STEP 1 -
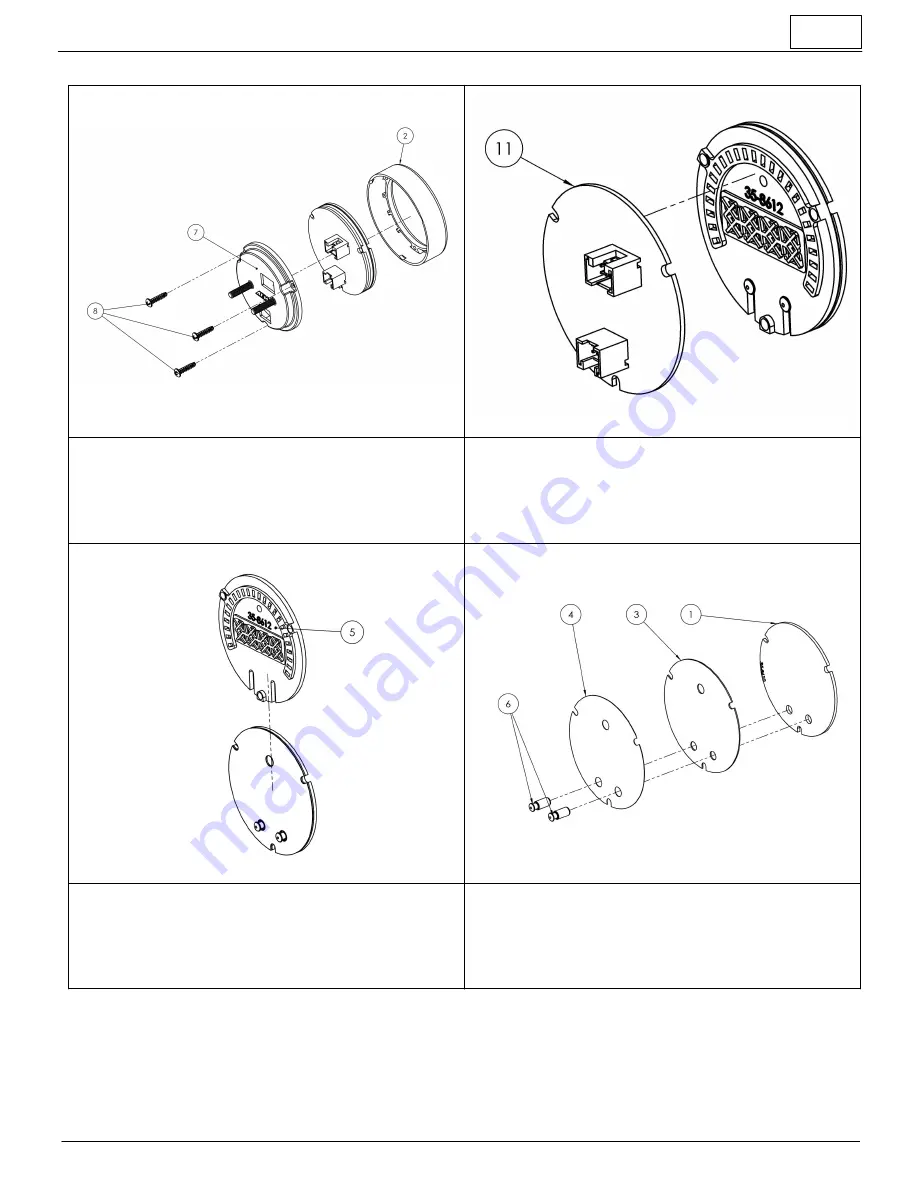
Remove the three assembly screws (8) using a #1 Phillips
head screwdriver. Separate the bezel (2) and cup (7) from the rest of the
assembly. If you have purchased the optional accessory kit, the silver
bezel may be replaced for the existing bezel at this time
STEP 2 -
Separate the PCB (11) from the remaining components
STEP 3 -
Slide the light guide (5) upward to remove it, the buttons may
fall out at this time - take care not to lose them
STEP 4 -
As you separate the remaining components, diffuser (4),
faceplate (3), lens (1), note the order in which they were assembled.
The faceplate (3) may now be reversed to display an alternate scaling or
replaced for a different color as included in the optional accessory kit


