background image

 
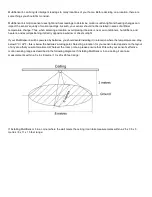
For optimal performance, your MultiSensor 6 should NOT be mounted 

directly on or near metal framing or other large

metallic objects. Large metal objects may weaken the Z­Wave wireless signal MultiSensor 6 depends on for communication
due to the wireless reflective properties of metal. 
 

Physically install your MultiSensor.

 
With your MultiSensor 6 now a part of your Z­Wave network and having 

determined its installation location, it's time to finish

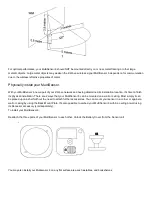
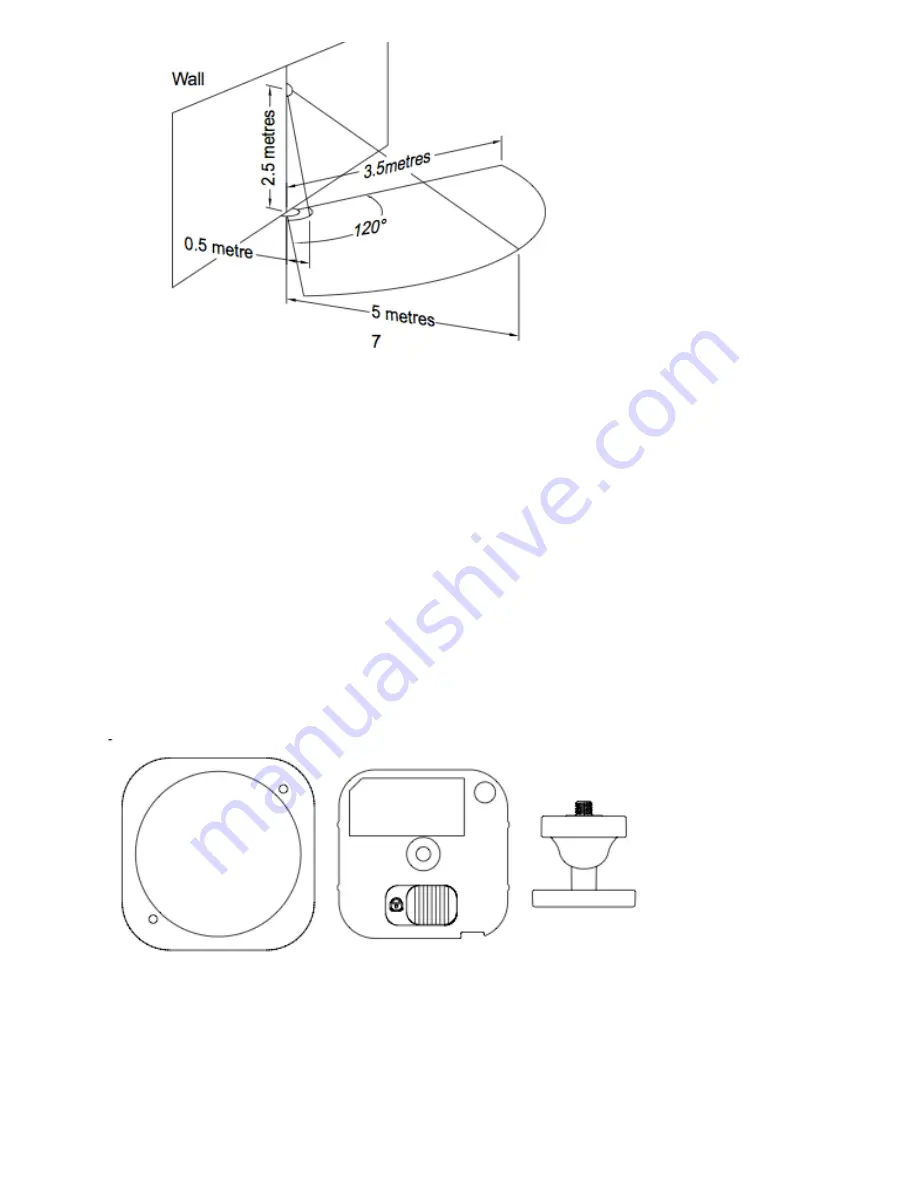
its physical installation. There are 2 ways that your MultiSensor 6 can be mounted on a wall or ceiling. Most simply it can
be placed upon a shelf without the need to attach further accessories. You can mount your sensor in a corner or against a
wall or ceiling by using the Back­Mount Plate. It's also possible to embed your MultiSensor 6 within a ceiling or wall using
its Recessor accessory (sold separately).
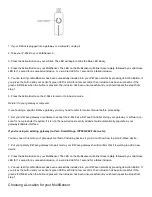
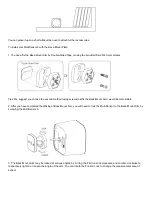
To install your MultiSensor 6;
 
Reattach the three parts of your MultiSensor to each other. Unlock the


Battery Cover from the Sensor unit. 


You may also install your Multisensor 6 on any flat surface area such as tables, and bookshelves;

Summary of Contents for Aeotec MultiSensor 6

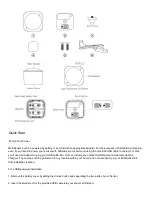
Page 1: ...Wave technology Your home control network will immediately understand motion temperature humidity light ultraviolet and vibration readings wherever MultiSensor 6 is installed Those intelligent readings will equate to intelligent automation And intelligent automation will give you the perfect smart home Get to Know your MultiSensor Your MultiSensor comes packaged with a number of accessories that w...

Page 2: ...is you ll need an adapter to plug your USB cable into this can include any computer USB port and most smartphone chargers These steps can be performed in any location within your home and not necessarily in your MultiSensor 6 s final installation location For a USB powered installation 1 Remove the battery cover by sliding the Unlock button and separating the two parts of your Sensor 2 Insert the ...

Page 3: ...e CR123A though batteries will require changing more frequently If powering your MultiSensor 6 with a sole battery insert it into the battery holder marked 1 Adding your MultiSensor 6 into a Z Wave Network With it powered on it s now time to add your MultiSensor 6 to a Z Wave network To pair the Multisensor 6 you are not limited to only the Z Stick or Minimote You may use any Z Wave Gateway to pai...

Page 4: ...Set your Z Wave gateway or software to accept the Z Stick as a Z Wave Controller Using your gateway or software re scan for new products if required if it is not the new devices recently added should automatically populate in your gateway software interface If you re using an existing gateway ie Vera Smartthings ISY994i ZW Fibaro etc You may need to refer to your gateway s method of including devi...

Page 5: ...directly opposite a window or direct sunlight If your MultiSensor 6 will be powered by batteries you should avoid installing it in a location where the temperature can drop below 0 C 32 F this is below the batteries working point Selecting a location for your sensor also depends on the layout of any area that you want monitored Whatever the room or area please ensure that it fits with your sensor ...

Page 6: ...nish its physical installation There are 2 ways that your MultiSensor 6 can be mounted on a wall or ceiling Most simply it can be placed upon a shelf without the need to attach further accessories You can mount your sensor in a corner or against a wall or ceiling by using the Back Mount Plate It s also possible to embed your MultiSensor 6 within a ceiling or wall using its Recessor accessory sold ...

Page 7: ...cond method using screws to affix the Back Mount Arm would be more stable 2 After you have completed the affixing of Back Mount Arm you will need to lock the MultiSensor to the Back Mount Arm by screwing the MultiSensor in 3 The Back Mount Arm may be locked at various angles by turning the Friction Lock clockwise and counter clockwise to respectively tighten or loosen the angle of the arm You can ...

Page 8: ...s should be disabled on your gateway in order to avoid false motion readings If selecting an outdoor location it s important to position your MultiSensor in a sheltered location It is best if your MultiSensor is not directly exposed to rain and is important that the humidity venting on your MultiSensor never is If you wish to use the Multisensor 6 outdoors you will need to lower settings and angle...

Page 9: ...ke your Z Stick to your MultiSensor 3 Press and hold the Action Button on your Z Stick for 3 seconds and then release 4 Press the Action Button on your MultiSensor 5 If your MultiSensor has been successfully removed from your network the RGB LED will be active with a colourful gradient for 3 seconds When you press the Action Button on the MultiSensor its green LED will blink If the removal was uns...

Page 10: ... LED will blink If the removal was unsuccessful the green LED will stay solid for a few seconds when you press the Action Button Monitoring motion MultiSensor can send Basic Set Command to association group 1 which is setup via the Association Command Class when Motion Sensor detects movement to control the associated devices to OPEN state After 4 minutes by default if the Motion Sensor is not tri...

Page 11: ...release 3 If your MultiSensor has been successfully factory reset from its previous network the RGB LED will be active with a colourful gradient for 3 seconds When you press the Action Button on the MultiSensor its green LED will blink If the removal was unsuccessful the green LED will stay solid for a few seconds when you press the Action Button More Advanced Configurations You can find more adva...

Page 12: ...Lighting 0 LUX to 30000 LUX Max motion sensitivity 5 metres Water proofing IP20 Operating distance Up to 492 feet 150 metres outdoors ...

Reviews: