23-2-2017
Key Fob Gen 5 (User Manual) : Aeotec by Aeon Labs
https://aeotec.freshdesk.com/support/solutions/articles/6000065292-key-fob-gen-5-user-manual-
3/7
1. Take the CR2450 battery out of the box.
2. Remove your Key Fob’s battery cover.
3. Insert the battery with the positive side
(+) on top.
4. Reattach the battery cover.
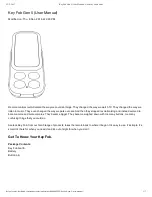
Your Key Fob is now powered on for the first time. As it’s the first time you’re using it, it is by default in Setup Mode.
Now you need to either create a new ZWave network for your Key Fob to control, or to add it to your existing network.
If you already have an existing ZWave network.
During the following steps, your Key Fob should be in close to your primary ZWave controller. This is likely to be a gateway or
hub. You may also refer to our secondary controller quick start article here:
https://aeotec.freshdesk.com/solution/articles/6000125215secondarycontrollerquickstartkeyfobgen5
(https://aeotec.freshdesk.com/solution/articles/6000125215secondarycontrollerquickstartkeyfobgen5)
1. Put your primary ZWave controller into inclusion mode. If you’re unsure of how to do this, refer to the part of its user
manual that describes adding new ZWave devices to your network.
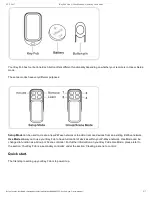
2. Press the Learn button on your Key Fob with the pin or press the bottom right action button. Your Key Fob’s green light will
begin to pulse.
Once the controller and your Key Fob have successfully exchanged information, the green light on your remote will stay lit
for 2 seconds. If the exchange of information fails, the red light on your remote will stay lit for 2 seconds. If this occurs,
please repeat the process from step 1 ensuring that your primary ZWave controller is in inclusion mode.
Your Key Fob will now work as a remote control within your ZWave network, allowing it to both control associated devices
and act as a tool for adding devices to and removing devices from your ZWave network.

