background image

Page 5

Clean Pump 

(continued)

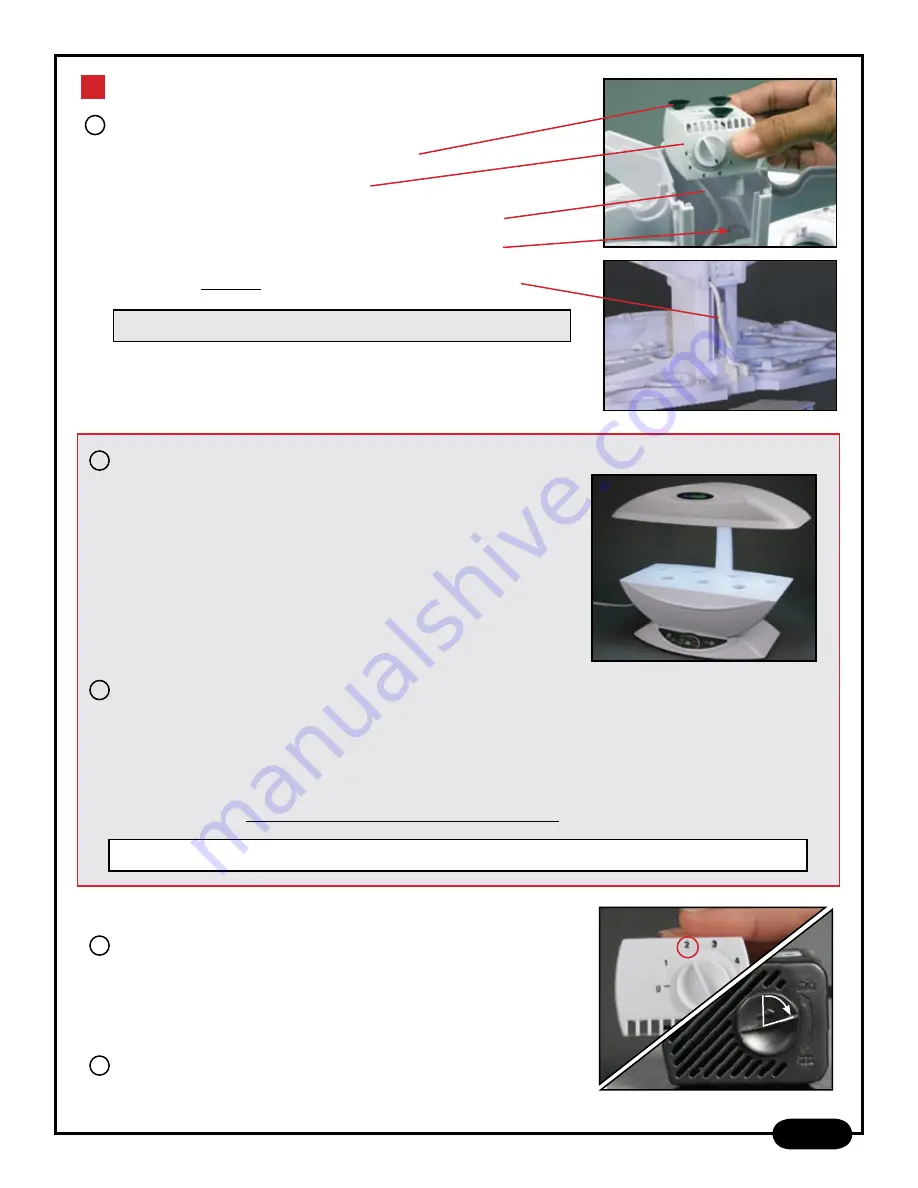
Insert the 

Pump

 back into the 

Pump Tower

 making sure that:

• The 

Rubber Feet

 on the 

Pump

 are facing up.

• The 

Face Plate

 is facing toward you.

• The 

Pump Wire

 goes behind and underneath the 

Pump. 

• 

Pump 

is securely seated in the tube in the

 Pump Tower. 

 Pump Wire

 does not need to go into 

Wire Slot

 at this time.

• Do not put 

Cover Plate

 or 

Filter

 back in place at this time.

Run Dish Soap Through Pump

• Turn 

Grow Surface

 right side up and place it in AeroGarden 

Bowl 

without water. 

(Yes, without water… just for this step!)

NOTE:  If 

Pump

 falls out, it was improperly seated in the 

Pump Tower

. Please  

see Step 4D for instructions on proper placement of 

Pump

 in 

Pump Tower

.

• Place 

Bowl

 back on 

Base

 and plug in AeroGarden. Your 

Pump


will start at this time (listen for a humming sound or put hand on 

Grow Surface

 to feel vibration. If your 

Pump Does Not Start

, see 

Troubleshooting on page 7.)

• Allow 

Pump

 to run for 3 minutes and then unplug AeroGarden. 

E

Rinse Dish Soap from Pump & AeroGarden

• Remove 

Bowl

 from 

Base

.

• Remove 

Grow Surface

 from 

Bowl

 and turn 

Grow Surface

 upside down.

• Disassemble 

Pump Parts

 (see steps 1-3 on page 4).

• Thoroughly rinse all 

Pump Parts

Pump, Pump Tower

 and 

Bowl

 in sink with hot water until no soap  

residue remains. 

Any remaining soap could harm your plants.

F

If you are cleaning your 

Pump

 due to noise, we recommend repeating “Clean Pump” steps 4A-4F for best results.

When you are finished cleaning the 

Pump

, set the 

Face Plate


Dial


to “2”. (If your 

Face Plate

 does not have numbers, set the 

Dial

 to 

the 2 o’clock position, as shown on the black 

Face Plate

 at right.)

G

Face Plate Dial

Reassemble 

Pump Parts

 – 

Impeller, Impeller Cover 

and 

Face Plate

.

H

IMPORTANT!

4

D

Summary of Contents for AeroGarden PRO

Page 1: ...ep Your Garden Healthy and Productive Please refer to these photos and the one on page 2 to identify parts referred to in the Pump Cleaning instructions Lamp Arm Grow Surface Bowl Base Control Panel A...

Page 2: ...s upright in shallow dish Be sure roots are in water A B C Page 2 D E F Grow Surface upside down AeroGarden Components continued Use the illustration and corresponding numbered spaces to indicate wher...

Page 3: ...Turn Grow Surface upside down and remove Cover Plate 1 Insert flat head screwdriver at an angle into rectangular slot on right side of Pump Tower and gently push down on screwdriver 2 Repeat step 1 o...

Page 4: ...the Pump Hint Removing the Face Plate requires leverage not strength And don t worry about breaking the Face Plate it is sturdy If necessary use toothbrush to scrub off residue from Pump to ease remov...

Page 5: ...ill start at this time listen for a humming sound or put hand on Grow Surface to feel vibration If your Pump Does Not Start see Troubleshooting on page 7 Allow Pump to run for 3 minutes and then unplu...

Page 6: ...wn until all corners snap in place Push Pump Wire back in Wire Slot B Turn Grow Surface right side up and place clean or new Filter back in slots in front of the Pump If you do not have a Filter pleas...

Page 7: ...Filter while cleaning or replanting A temporary Filter can be made from a green scrubbing pad like the ones used to scour pots and pans Be sure the pad is soap free Cut a 1 1 2 x 1 5 8 rectangle to u...

Page 8: ...AeroGrow Customer Service Mon Fri 6am 7pm Sat Sun 8am 4pm Mountain Time 1 800 476 9669 www aerogrow com 2007 2008 AeroGrow International Inc 506003 0000 AB 1 29 08...

Reviews: