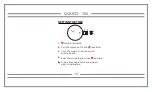
16
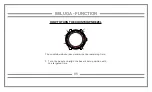
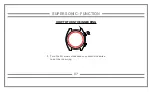
PRECAUTIONS AND PREVENTIVE MEASURES
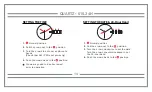
Water Resistance
1.
[3atm / 30m / 100ft]
Watches water resistant to
30 meters /100 feet.
2.
[5atm / 50m / 165ft]
Watches water resistant to
50 meters /165 feet.
3.
[10atm / 100m / 330ft]
Watches water resistant from
100 meters / 330 feet or more
with screw down crown and
diving bezel.
According to the water resistance 1, 2 or 3
listed above, watches are protected against:
1-2-3
2-3
Shower/ Free diving / Water sports
Water splashes / Rain
Limited Warranty
Your AEROMAT watch is warrantied
by AEROMAT for a period of twenty
four (24) months from the date of
purchase under the terms and conditions
of this warranty. The international
AEROMAT warranty covers material
and manufacturing defects. The warranty
only becomes active if the warranty
certificate is dated, fully and correctly
completed. In the event that repairs
are improper to restore the normal
conditions of use of your AEROMAT
watch, AEROMAT guarantees its
replacement by an AEROMAT watch of
identical or similar characteristics. The
warranty for the replacement watch is
TWENTY FOUR (24) MONTHS after the
date the replacement is issued.
This manufacturer’s warranty does not
cover:
1. The life of the battery
2. Wear and tear and aging (e.g. scratched
crystal; alteration of the color and/or
material of non metallic straps and
chains, such as leather, textile, rubber;
peeling of the plating).
3. Any damage on any part of the watch
resulting from abnormal/abusive use,
lack of care, negligence, and accidents
(nicks, dents, crushing, broken crystal,
etc.). Incorrect use of the watch and
non-observance of the use directions
provided by AEROMAT. The AEROMAT
watch not handled by a reputable
jeweler or service center (e.g., for
battery replacement, services or repairs)
or which has been altered in its original
condition beyond AEROMAT’s control.
Summary of Contents for 515.24H
Page 1: ......