background image

12

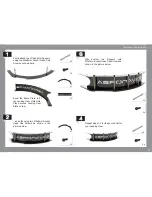
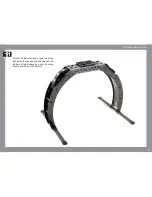
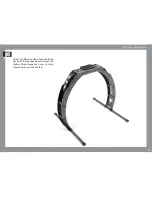
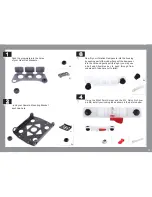
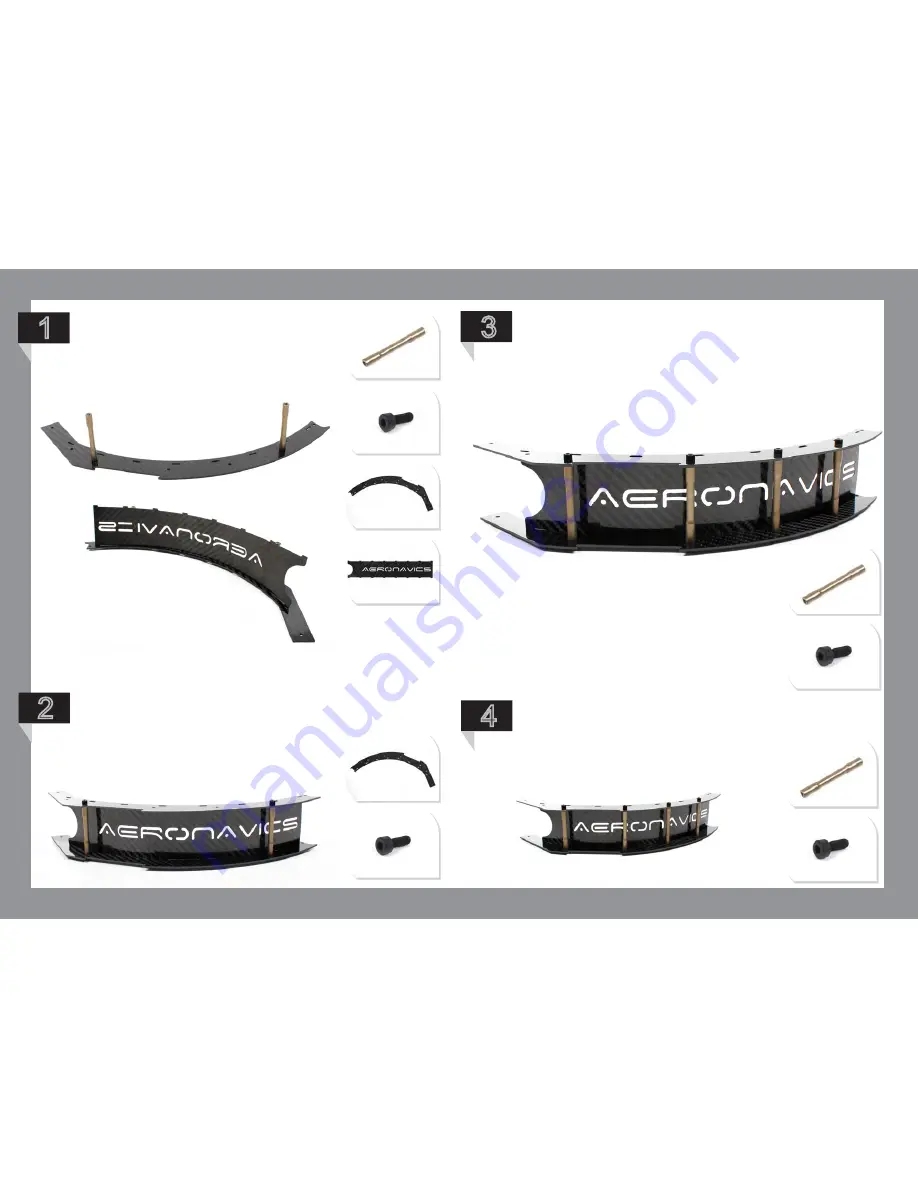
Bend  the  Brace  Plate  to  fit 

the Landing Gear Plate slots. 

Place second Landing Gear 

Plate on top...

1

...and affix using two M3x8mm Socket 

Head  Cap  Screws  as  shown  in  the 

picture below.

2

3

X2

X1

X1

X8

X4

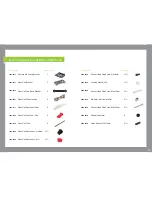
STANDARD LANDING GEAR

X2

X2

X1

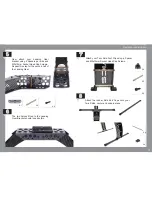
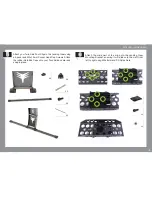
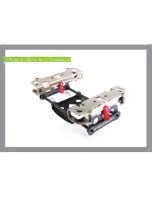
Firstly attach two of the 50mm Spacers 

using the M3x8mm Socket Head Cap 

Scews as shown here. 

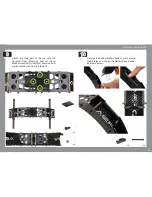
Repeat steps 1-3 for the second half of 

your Landing Gear .

Affix  another  two  Spacers  with 

M3x8mm Socket Head Cap Screws as 

shown in the picture below.

X4

X2

4

Summary of Contents for XM Titanium

Page 1: ...1 B u i l d M a n u a l...

Page 2: ...UILD CHECKLIST 10 3 0 LANDING GEAR ASSEMBLY INSTRUCTIONS 11 Standard Landing Gear 16 Extended Landing Gear 20 4 0 GEAR RAIL ASSEMBLY 27 5 0 Center Plate and Boom Assembly Instructions 43 6 0 Main Comp...

Page 3: ...3 F l i g h t o p e r a t i o n a n d s a f e t y...

Page 4: ...ockwise are also installed correctly before your first flight Before the first flight hand test your craft arm and calibrate your electronics hold the craft with both hands by the landing gear skids a...

Page 5: ...ft with the wind at your back so the craft will drift directly away from you Always keep your eyes on the craft when in flight if people approach you inside your safety perimeter to talk to you or to...

Page 6: ...ver the craft from all sides to make sure that nothing appears unusual or out of place Check your flight perimeter Check for power lines and overhead obstacles Assess the weather conditions wind direc...

Page 7: ...fly the craft above 400 feet in height the length of a football field Never fly near people A 50m 150 ft perimeter around and above people is a recommended minimum and operational law in most countrie...

Page 8: ...8 P r e b u i l d C h e c k l i s t...

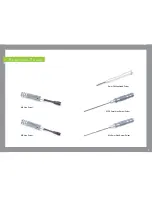
Page 9: ...9 M4 3mm Hex Screw Driver M4 Hex Driver 3mm Phillips Head Driver M3 2 5mm Hex Screw Driver R e q u i r e d T o o l s M3 Hex Driver...

Page 10: ...10 A s s e mb l y I n s t r u c t i o n s...

Page 11: ...2 6 2 14 2 2 1 4 2 Landing Gear Mounting Bracket Landing Gear Plate Standard Twin Landing Gear Brace Plate Battery Strap Battery Mounting Pad Battery Strap Keeper M3 QR Mounting Bracket Male M3 QR Mo...

Page 12: ...Cap Screws as shown in the picture below 2 3 X2 X1 X1 X8 X4 STANDARD LANDING GEAR X2 X2 X1 Firstly attach two of the 50mm Spacers using the M3x8mm Socket Head Cap Scews as shown here Repeat steps 1 3...

Page 13: ...a Spacer and M3x12mm Socket Head Cap Screws 7 The two halves fitted to the Landing Gear Bracket should look like this 6 X4 X4 X2 X4 X4 STANDARD LANDING GEAR Now attach your Landing Gear bracket using...

Page 14: ...ar Mounting Bracket using M3x8mm and SS Nyloc Nuts ensuring it will slide onto the craft from left to right x4 x4 STANDARD LANDING GEAR Hot glue the Rubber Battery Pads to your Landing Gear Plates and...

Page 15: ...15 11 STANDARD LANDING GEAR Attach the Battery Straps feed the Strap behind both alloy spaces and through the Battery Strap Keeper and your Landing Gear should now look like this...

Page 16: ...0 6 14 3 4 Landing Gear Mounting Bracket Landing Gear Plate Ext Twin Landing Gear Brace Plate Battery Strap Battery Mounting Pad Battery Strap Keeper M3 QR Mounting Bracket Male M3 QR Mounting Bracket...

Page 17: ...ing four M3x8mm Socket Head Cap Screws as shown in the picture below 2 3 X4 X4 X2 EXTENDED LANDING GEAR Bend the Brace Plate to fit the Landing Gear Plate slots Place second Landing Gear Plate on top...

Page 18: ...r and M3x12mm Socket Head Cap Screws Attach the rubber Skid End Caps onto your Twin Skids center and snap in place X4 X4 X2 X2 X2 Attach the male part of the clip onto the Landing Gear Mounting Bracke...

Page 19: ...p Keeper as shown below 9 x4 x2 EXTENDED LANDING GEAR Now attach your Landing Gear bracket using 2 Spacers per side and M3x12mm Socket Head Cap Screws Repeat this step for the second half of the Landi...

Page 20: ...20 10 EXTENDED LANDING GEAR Attach the Battery Straps feed the Strap behind both alloy spacers and through the Battery Strap Keeper and your Landing Gear should now look like this...

Page 21: ...21 P a r t 2 G e a r R a i l a s s e mb l y...

Page 22: ...1 2 1 2 1 4 1 8 4 1 Camera Mounting Bracket Gear Rail Bracket Gear Rail Dog Bone Bracket Gear Rail Main Housing Gear Rail Dampener Seat Gear Rail Lock Tab Red Gear Rail Tube Gear Rail Dampener medium...

Page 23: ...ough you may use a ball end Allum Hex key to push through from underneath take care not to twist 1 and your Camera Mounting Bracket as shown here 2 3 X4 X2 X1 X1 Push the grommets into the holes of yo...

Page 24: ...pull out from the top as indicated by circle 6 Please note that one of the housings has the locking tab facing the open side of the bracket the other one has it facing the closed side X4 X4 X4 Camera...

Page 25: ...Make sure your locking tabs both face to the front of the craft 10 9 X4 X2 Attach the dog bones using the M3x12mm Socket Head Cap Screws on both sides of you assembly Push the Gear Rail Brackets onto...

Page 26: ...26 11 Turn the Locking Tabs down to secure your Gear Rail Assembly and check these before each flight Your final setup should now look like this...

Page 27: ...ransparent Adhesive Dome M3 Washer Stainless Steel Socket Head Cap Screw M3x35mm Titanium Button Head Socket M3x8mm Aluminium M3x10mm 304 Hex Socket Grubscrew XM Battery Mounting Bracket Dome Mount Bo...

Page 28: ...les relates to which parts Take one of the plates and lay it out with the notch at the top and the sticker facing up Camera Rail Mounting Boom Bracket Mounting Inner The notch indicates the front of t...

Page 29: ...the M3x6mm Nylon Screws and Standoffs for your Universal Flight Controller Adapter Plate UFCAP to your Top Center Plate The correct holes can be found by placing your UFCAP over the Center Plate Use t...

Page 30: ...Nylon Black Under Body Spacer M3 L 10mm Standoff Threaded M3x12 7mm Nylon Transparent Adhesive Dome M3 Washer Stainless Steel Socket Head Cap Screw M3x35mm Titanium Button Head Socket M3x8mm Aluminiu...

Page 31: ...er plate setup to get an understanding which holes relates to which parts Take one of the plates and lay it out with the notch at the top and the sticker facing up Adapter Plate Mounting Camera Rail M...

Page 32: ...nstall the M3x6mm Nylon Screws and Standoffs for your Universal Flight Controller Adapter Plate UFCAP to your Top Center Plate The correct holes can be found by placing your UFCAP over the Center Plat...

Page 33: ...Mounting Plate with the notch on your bottom Center Plate Note there are two notches on the Center Plate depending on which configuration you prefer The notch indicates the front of the craft Slot th...

Page 34: ...ace to the center Again align the notches of the top and bottom Center Plates Also align the rivnuts with the boom cluster bolts Apply a little pressure and flip over 6 You may now fully tighten the b...

Page 35: ...achment and the 4 red spared M3 Rivnuts are to attach the female part of the landing gear snap lock system 35 9 10 Your setup should now look like this Now attach the quick release landing gear body m...

Page 36: ...P like so and fasten with M3x4mm Nylon Screws 11 13 14 12 Place this assembly on top of the nylon standoffs of your Core notch to the front and fasten with M3x6mm Nylon Screws x8 x4 x4 x4 Place the Wo...

Page 37: ...37 15 Your setup should now look like this...

Page 38: ...38 P a r t 3 XM BATTERY MOUNT PLATES 1 Battery Mounting Position...

Page 39: ...ugh the appropriate hole from underneath the top CP Screw the under body spacer firmly ontop and wind the grubscrew in as shown below Note Use of Thread Lock is recommended It should now look like thi...

Page 40: ...40 3 x1 Your setup should now look like this 4 Screw the top mounting posts firmly on top of the grub screws...

Page 41: ...the ends of the booms as shown below This way around 2 3 Slide the Cam to the edge of the core making sure that the bolts are a lined with the slots on the core Push the Folding Cam mechanism from th...

Page 42: ...d pull out the QR mechanism a few times to make sure that the action and height of the bolts is correct Slide the Quick Release Mechanism into the slots You may need to push down the bottom center pla...

Page 43: ...43 Landing Gear Assembly Core Assembly Gear Rail Assembly P a r t 5 M a i n C o m p o n e n t A s s e mb l y...

Page 44: ...ding Gear should always clip on from left to right as shown here NOTE The Gear Rail Brackets may be fitted at any point once the Outer Boom Clamps have been fastend find the instructions in Step 3 of...

Page 45: ...45 2 Once clipped on secure with M3x20mm Socket Head Cap Screws and M3 Locking Washers as shown below x2 x2...

Page 46: ...46 3 You will note 4 Stainless Steel M3x35mm Socket Head Cap Screws 4 M3 Locking Washers and 4 Gear Rail Center Plate Spacers These are used to attach your Gear Rail Brackets to your Core...

Page 47: ...7 4 You can now slide your Gear Rail Assembly in place as shown in the Gear Rail Assembly Chapter NOTE It is extemely important to turn the red Locking Tabs down to lock the Gear Rail Assembly in plac...

Page 48: ...ASSEMBLY 1 2 2 1 2 1 Socket Head Cap Screw M3x30mm Machine Screw M3x6mm SS Nyloc Nut M3 SS O ring 2 5mm O ring 1mm O ring 1 5mm M3 Locking Washer M3 Flat Washers 2 4 2 4 1 2 2 2 Parts Spares Parts Spa...

Page 49: ...ne mount disk by slotting the desired machine screws through the chamfered side of the disk and into the firewall mount holes of the engine x4 Fit two of the 2 5mm O rings over the M3x30mm Socket Head...

Page 50: ...the Nacelle on top and snap together 7 x2 Please Note we are showing the hi visibility boom nacelles in these pictures To buy your hi visibility boom nacelles go to www droidworx co nz x2 Slide the 1...

Page 51: ...ine Mount Bracket Locate the engine mount dimple into the top boom locating hole 4 Add the second Engine Mount Bracket fold the engine and wires over to fit onto the Engine Mount Disk Tighten with two...

Page 52: ...52 Your final setup should now look like this 5...

Page 53: ...53 1 4 4 1 4 Dome Top Mounting Post Machine Screw M3x6mm Pan Phillips Dome Grommet D o m e C o v e r A s s e mb l y Parts Spares Product Code 1106 0010 1506 0060 2506 0140 2506 0260...

Page 54: ...54 2 x4 1 Mount your Top Mounting Posts using the M3x6mm Machine Screws x4 Fit 4 Dome Rubber Grommets to the dome as shown...

Page 55: ...e dome onto the top of the craft aligning the grommets with the corresponing dome mounting posts 3 To attach remove your Dome to from your XM Craft place fingers on each side of the mounting post and...

Page 56: ...Mounting Plate Socket Head Cap Screw M4x35mm Washer 1mm M4 Nylon Black Nyloc Nut M4 SS Boom Bracket Outer Parts Spares Product Code 1306 0080 1306 0110 2505 0110 2505 0180 2505 0160 1205 0084 A t t a...

Page 57: ...to the Boom with the curve facing inwards Place your GPS Mounting Plate on top and adjust the distance of the Boom Clamps if necessary Flip your setup over Using M4x35mm Socket Head Cap Screws and Was...

Page 58: ...58 7 5 6 x4 x2 Place the bottom Boom Clamps as shown in the picture below following the curve of the upper Boom Clamps Add washers and secure with M4 Nyloc Nuts x4...

Page 59: ...59 8 Your final setup should now look like this...

Page 60: ...lamps onto the Boom as shown in the pictures below Place your WKM Mounting Plate on top aligning the holes pointed out below Your final setup should now look like this Using M4x35mm Socket Head Cap Sc...

Reviews: