19
G
B
Before using the compressor, read the instructions for use carefully and
comply with the following safety precautions. Consult this handbook if
you have any doubts regarding functioning.
Preserve all the documentation so that anyone who uses the
compressor can consult this beforehand.
SAFETY RULES
1
This symbol indicates warnings to be read before using the product so as
to prevent injury to the user.
Compressed air is a potentially dangerous form of energy; always take
great care when using the compressor and its accessories.
Warning: the compressor may restart when power is restored following
a blackout.
An ACOUSTIC PRESSURE value of 4 m. corresponds to the ACOUSTIC
POWER value stated on the yellow label located on the compressor,
minus 20 dB.
THINGS TO DO
●
The compressor must be used in a suitable environment (well
ventilated with an ambient temperature of b5°C and +40°C)
and never in places affected by dust, acids, vapors, explosive or
flammable gases
.
●
Always maintain a safety distance of at least 4 meters between the
compressor and the work area.
●
Any coloring of the belt guards of the compressor during painting operations
indicates that the distance is too short.
●
Insert the plug of the electric cable in a socket of suitable shape, voltage
and frequency complying with current regulations.
●
Use extension cables with a maximum length of 5 meters and of suitable
cross-section.
●
The use of extension cables of different length and also of adapters and
multiple sockets should be avoided.
●
Always use the switch
I/O
to switch off the compressor.
●
Always use the handle to move the compressor.
●
When operating, the compressor must be placed on a stable, horizontal
surface.
THINGS
NOT
TO DO
●
Never direct the jet of air towards persons, animals or your body. (Always
wear safety goggles to protect your eyes against flying objects that may be
lifted by the jet of air).
●
Never direct the jet of liquids sprayed by tools connected to the compressor
towards the compressor.
●
Never use the appliance with bare feet or wet hands or feet.
●
Never pull the power cable to disconnect the plug from the socket or to
move the compressor.
●
Never leave the appliance exposed to adverse weather conditions.
●
Never transport the compressor with the receiver under pressure.
●
Do not weld or machine the receiver. In the case of faults or rusting, replace
the entire receiver.
●
Never allow inexpert persons to use the compressor. Keep children and
animals at a distance from the work area.
●
This appliance is not intended for use by persons (including children) with
reduced physical, sensory or mental capabilities, or lack of experience
and knowledge, unless they have been given supervision or instruction
concerning the use of the appliance by a person responsible for their
safety.
●
Children should be supervised to ensure that they do not play with the
appliance.
●
Do not position flammable or nylon/fabric objects closed to and/or on the
compressor.
●
Never clean the compressor with flammable liquids or solvents. Check that
you have unplugged the compressor and clean with a damp cloth only.
●
The compressor must be used only for air compression. Do not use the
compressor for any other type of gas.
●
The compressed air produced by the compressor cannot not be used
for pharmaceutical, food or medical purposes except after particular
treatments and cannot be used to fill the air bottles of scuba divers.
THINGS YOU SHOULD KNOW
●
To avoid overheating of the electric motor, this compressor is
designed for intermittent operation as indicated on the technical
dataplate
(for example, S3-25 means 2.5 minutes ON, 7.5 minutes OFF). In
the case of overheating, the thermal cutout of the motor trips, automatically
cutting off the power when the temperature is too high. The motor restarts
automatically when normal temperature conditions are restored.
●
All the compressors are fitted with a safety valve that is tripped in the case
of malfunctioning of the pressure switch in order to assure machine safety.
●
When fitting a tool, the flow of air in output must be switched off.
●
The red notch on the pressure gauge refers to the maximum operating
pressure of the tank. It does not refer to the adjusted pressure.
●
When using compressed air, you must know and comply with the safety
precautions to be adopted for each type of application (inflation, pneumatic
tools, painting, washing with water-based detergents only, etc.).
●
Do not cover the air inlets on the compressor.
●
Do not open or tamper with any part of the compressor. Contact an
authorized Service Center.
ASSEMBLY
2
You must fully assemble the appliance before using it for the first time.
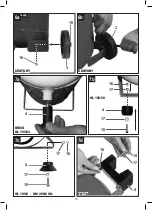
Fitting the wheels (Fig. 3, 4, 5 & 6)
Fit the supplied wheels as shown in Fig. 3, 4, 5 & 6:
● Fig. 3a & 3b: Assembly of wheel kit - version A
Assembly by sequence: a, b, c, d, e
● Fig. 4a & 4b: Assembly of wheel kit - version B
● Fig. 5a & 5b: Assembly of wheel kit - version C
● Fig. 6a & 6b: Assembly of wheel kit - version D
Fitting the rubber foot (ref. 4)
Fit the supplied rubber stopper as shown in Fig. 7.
START-UP AND USE
3
●
Check for correspondence between the compressor plate data with the
actual specifications of the electrical system. A variation of ± 10% with
respect of the rated value is allowed.
●
Insert the plug of the power cable in a suitable socket checking that the
I/O
switch located on the compressor is in the OFF «O» position.
●
At this point, the compressor is ready for use.
●
Operating on the
I/O
switch, the compressor starts, pumping air into the
receiver through the delivery pipe.
●
When the upper calibration value (set by the manufacturer) has been
reached, the compressor stops.
When air is used, the compressor restarts automatically when the lower
calibration value is reached (2 bar between upper and lower).
●
The pressure in the receiver can be checked on the gauge provided.
●
The compressor continues to operate according to this automatic cycle
until the
I/O
switch is turned.
●
Always wait at least 10 seconds from when the compressor has been
switched off before restarting this.
●
All compressors are fitted with a pressure reducer (ref. 7). Operating on the
knob with the tap open (turning it in a clockwise direction to increase the
pressure and in a counterclockwise direction to reduce it), air pressure can
be regulated so as to optimize use of pneumatic tools
.
●
The value set can be checked on the gauge (ref. 6).
●
The set pressure can be taken from the quicklock coupling (ref. 5).
●
Please check that the air consumption and the maximum working
pressure of the pneumatic tool to be used are compatible with the
pressure set on the pressure regulator and with the amount of air
supplied by the compressor.
●
Always pull out the plug and drain the receiver once you have completed
your work.
Preserve this handbook for future reference
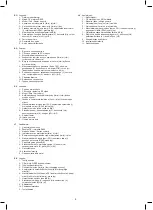
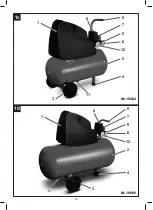
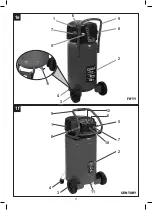
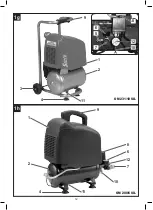
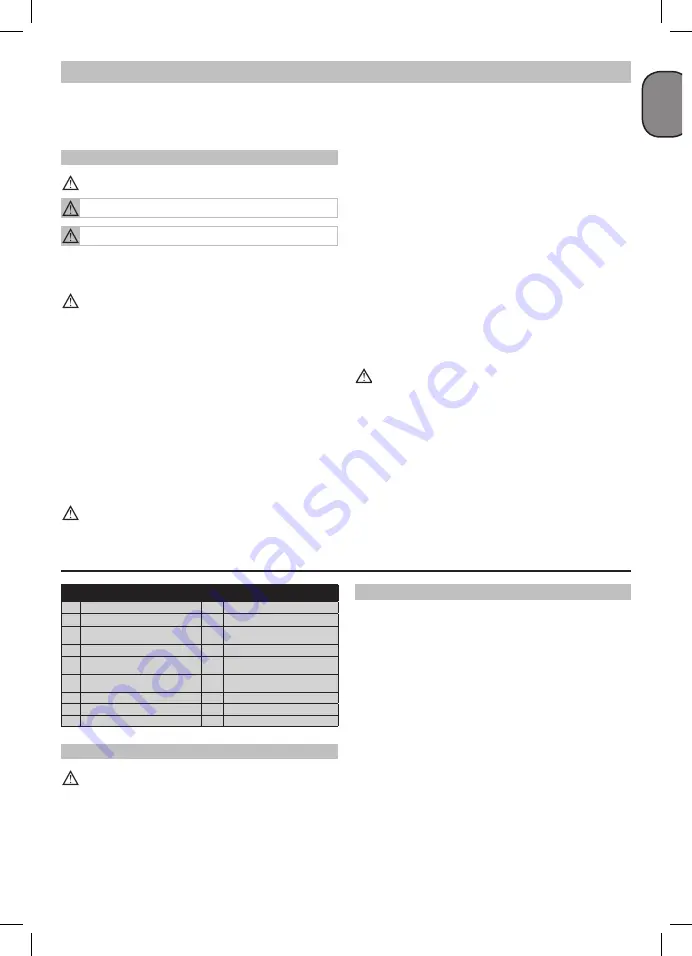
COMPONENTS (fig. 1 - 2 - 3 - 4 - 5 - 6)
1.
Shroud
10.
Safety valve
2.
Pressure vessel (tank)
11.
Receiver condensation drainage tap
3.
Wheel
12.
Pressure gauge (for reading the tank
pressure)
4.
Rubber foot
13.
Axle
5.
Quick-lock coupling (regulated
compressed air)
14.
Clip
6.
Pressure gauge (for reading the preset
pressure by means of regulator)
15.
Screw
7.
Pressure regulator
16.
Nut
8.
I/O
switch
17.
Washer
9.
Transportation handle
Summary of Contents for BRICO
Page 9: ...9 1a 1b 2 1 1 11 4 11 10 5 7 BRICO OL 195 6 6 4 6 3 9 7 5 2 9...
Page 10: ...10 1c 1d 2 1 1 11 3 OL 195 24 OL 195 50 4 8 8 3 9 5 7 6 12 2 9 5 7 6 12 4 11...
Page 11: ...11 1e 9 8 2 5 FIFTY 6 4 3 11 1 7 1f CENTURY 5 6 12 2 7 10 8 4 3 11 9 1...
Page 12: ...12 1h 1 4 11 10 7 OM 200 6 SIL 12 2 9 8 6 1g OM 231 10 SIL 11 2 1 9 3 4 12 8 7 6 5 10...
Page 16: ...16 7e 15 17 4 16 CENTURY...
Page 38: ...38 G R 2 bar I O 10 7 6 5 4 2 11 5...
Page 52: ...52 R U O 2 10 7 6 5 4 11 5...
Page 60: ...60 B G 2 I O 10 7 6 5 4 11 5...
Page 69: ...63 230V Ac 50 Hz 120V Ac 60 Hz 230V Ac 50 Hz 120V Ac 60 Hz 69...
Page 70: ...63 230V Ac 50 Hz 120V Ac 60 Hz 230V Ac 50 Hz 120V Ac 60 Hz 70...
Page 71: ...63 230V Ac 50 Hz 120V Ac 60 Hz 230V Ac 50 Hz 120V Ac 60 Hz 71...

