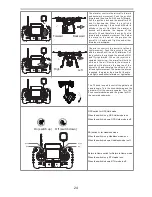
· The propellers are self-tightening units. Please do not use other screws or screw glue to attach them to the motor shafts.
· Make sure that the propellers are installed in the correct positions, otherwise the aircraft will not be able to fly
normally.
· Since the propeller blades are thin and somewhat sharp, it is recommended that users wear gloves during
installation to prevent accidental scratches.
13
3 The Propellers
3.1 Introducti on
Propeller
Propeller A
Propeller B
Illustration
Installation
Use only with an “A” motor
Use only with an “B” motor
Symbol explanation
Lock: symbolizes the direction in which the propeller is tightened.
Unlock: symbolizes the direction which the propeller is loosened.
3.2 Installation
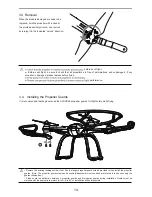
1) Before installing the propellers, please check to make sure that all letters on the propellers match the
letters on the motor arms. Propeller A’s go with A motors and propellers B’s go with B motors.
2) Mount all 4 propellers on their motors (A to A motors, B to B motors). Turn each propeller in the indicated
“lock” direction. Propellers should be firmly (but not overly) secured to their motor shafts.
The APHUDX4
uses 9-inch propellers. Each is marked with either an A or a B. Please replace damaged
propellers. Before installing the propellers for the first time, please check whether the propeller and
motor arm read "A" or "B”. The two letters should match.


