


BEFORE
YOU
BEGIN
INTRODUCTION
IMPORT
ANT
PRECAUTIONS
ASSEMBL
Y
BEFORE
YOU
BEGIN
ELLIPTICAL
OPERA
TION
LIMITED
W
ARRANTY
TROUBLESHOOTING
&
MAINTENANCE
CONDITIONING
GUIDELINES
BEFORE YOU
BEGIN
ASSEMBL
Y
INTRODUCTION
IMPORT
ANT
PRECAUTIONS
ELLIPTICAL OPERA
TION
CONDITIONING GUIDELINES
TROUBLESHOOTING &
MAINTENANCE
LIMITED WARRANTY
ASSEMBLY
STEP 2
WASHER (W)
8.2 mm
Qty: 6
NUT (X)
Qty: 2
SPRING WASHER (Y)
8.2 mm
Qty: 6
BOLT (D)
15 mm
Qty: 2
BOLT (E)
15 mm
Qty: 4
BOLT (F)
70 mm
Qty: 2
HARDWARE BAG FOR STEP 2 CONTENTS :
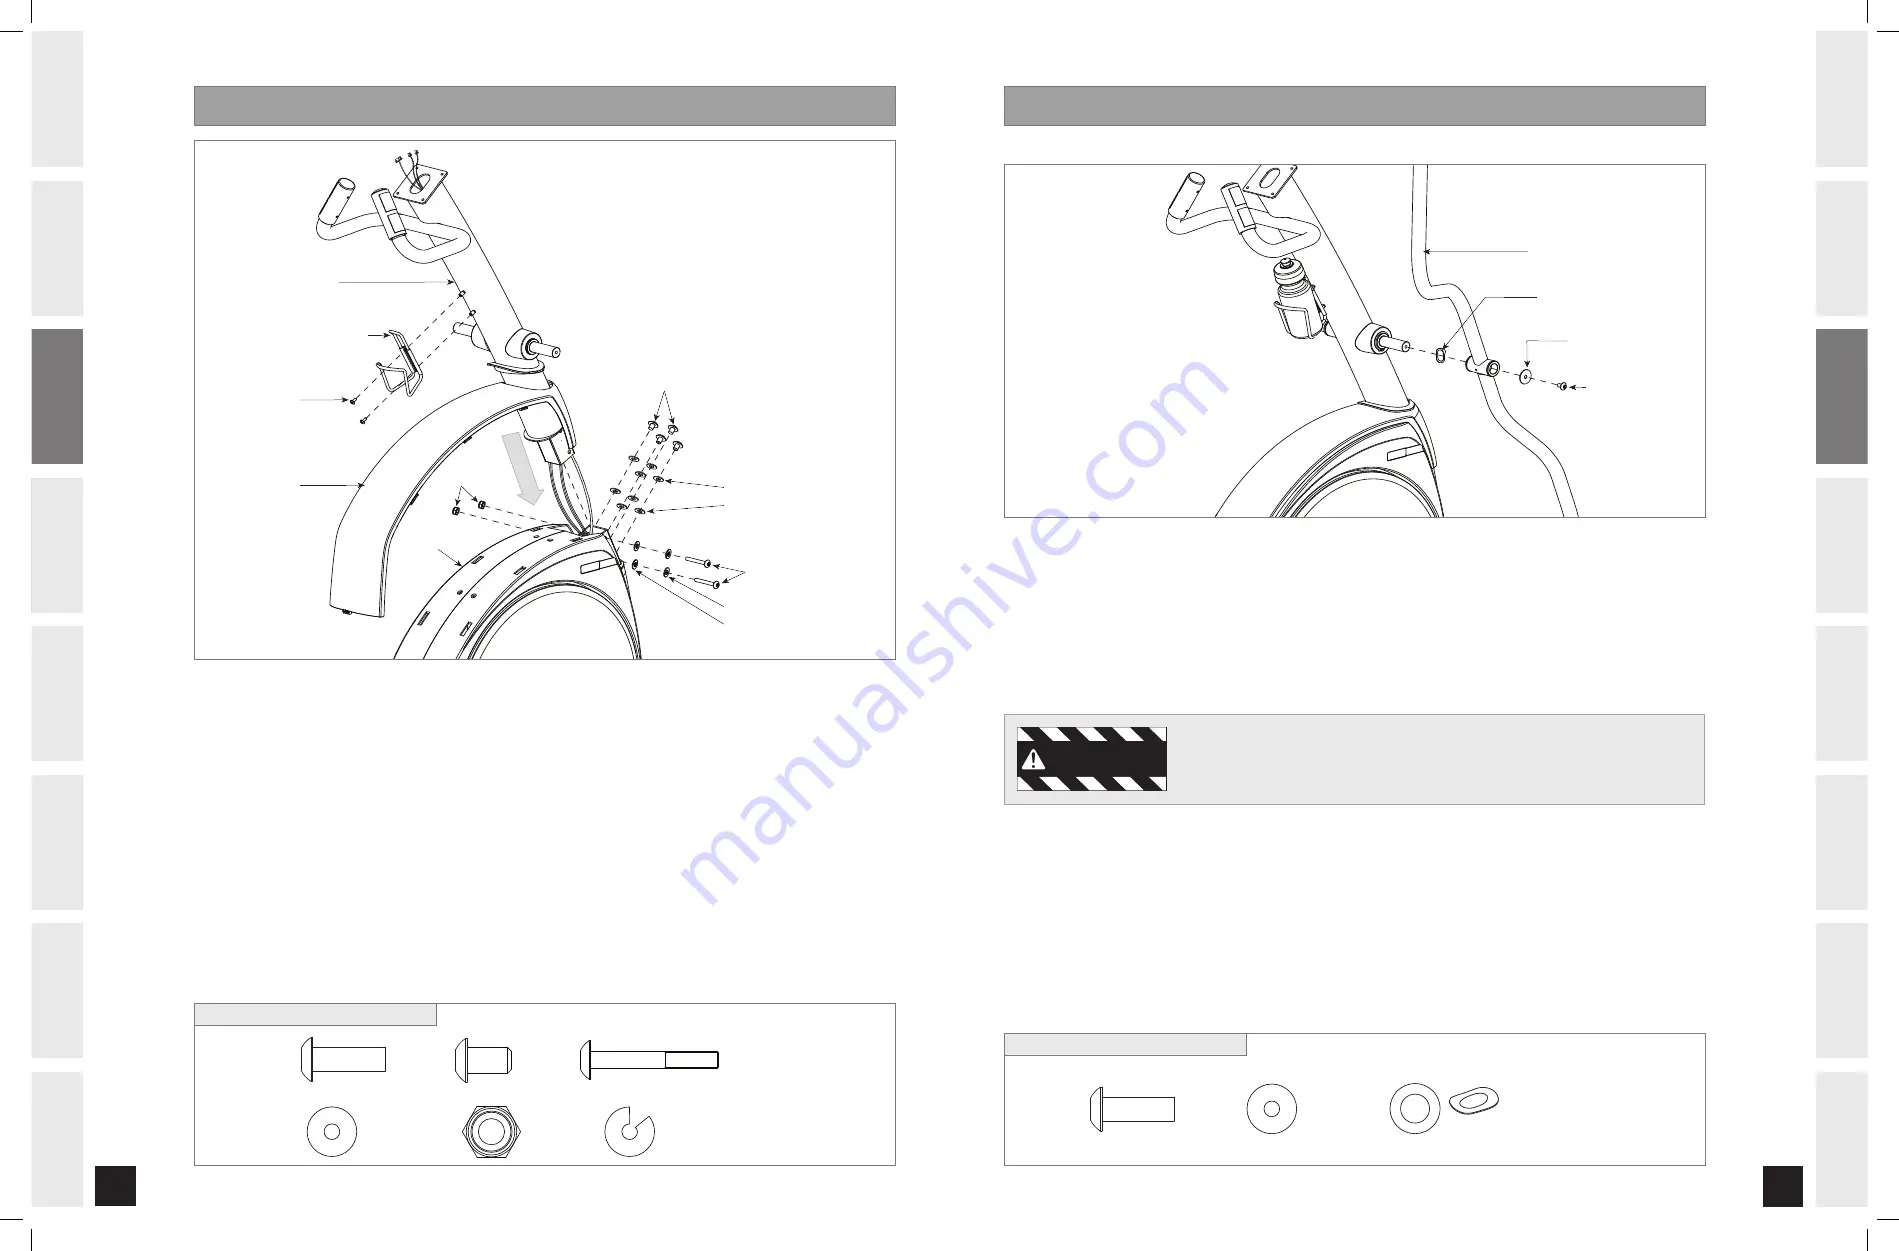
Open
HARDWARE BAG FOR STEP 2.
Slide
cONSOLE MAST BOOT
and
TOP cAP
onto the bottom of the
cONSOLE MAST
.
Carefully pull the
cONSOLE WIRES
through the
cONSOLE MAST
using the twist tie located inside the
cONSOLE MAST
.
DO NOT PINcH WIRES!
Attach the
cONSOLE MAST
to the
MAIN FRAME
using 4
BOLTS (E)
, 4
WASHERS (W)
and 4
SPRING WASHERS
(Y)
in the front and 2
BOLTS (F),
2
WASHERS (W),
2
SPRING WASHERS (Y)
and 2
NUTS (X)
from the side.
Attach the
WATER BOTTLE HOLDER
to the mast using 2
BOLTS (D)
.
A.
B.
C.
D.
E.
BOLT (D)
TOP CAP
MAIN FRAME
WATER BOTTLE CAGE
CONSOLE MAST
BOLT (E)
BOLT (F)
WASHER (W)
WASHER (W)
NUT (X)
SPRING WASHER (Y)
SPRING WASHER (Y)
ASSEMBLY
STEP
RIGHT HANDLEBAR
BOLT (G)
WASHER (H)
WAVY WASHER (I)
Open
HARDWARE BAG FOR STEP 3.
B) Slide
RIGHT HANDLEBAR
onto
cONSOLE MAST
and attach using 1
BOLT (G)
, 1
WASHER (H)
and
1
WAVY WASHER (I)
.
C) Repeat on other side.
After handlebars are assembled they will rotate freely – be cautious. Until the
machine is fully assembled, do not grab the handlebars for support.
A.
WARNING
BOLT (G)
15 mm
Qty: 2
WASHER (H)
Qty: 2
WAVY WASHER (I)
Qty: 2
angle view
HARDWARE BAG FOR STEP CONTENTS :
2.0 AE_Rev.1.6.indd 8-9
8/27/07 3:29:58 PM


