background image

AFG Sport 5.7AE Owners Manual 082015 | © 2015 Advanced Fitness Group

Designed & Engineered in the U.S.A. •  Made in China | Conçu et développé aux États-Unis. • Fabriqué en Chine | Diseño y tecnología de los EE.UU. • Hecho en China

SERVICIO DE ASISTENCIA  

TÉCNICA A CLIENTES

DO NOT RETURN TO THE RETAILER 

if you have any problems during assembly or if 

parts are missing.
For fast and friendly service, please contact one 

of our trained customer technicians via phone, 

email or our website.
We want to know if you have a problem and we 

want to have an opportunity to correct it for you.
NOTE: Please read the TROUBLESHOOTING 

section in the ELLIPTICAL GUIDE before 

contacting Customer Tech Support. Additional 

product information is available on our website.

En cas de difficulté lors de l’assemblage ou si 

des pièces manquent, NE RENVOYEZ PAS 

L’APPAREIL AU DÉTAILLANT.
Pour un service rapide et amical, communiquez avec 

un de nos techniciens qualifiés, par téléphone, courriel 

ou notre site Web.
Advanced Fitness Group tient à ce qu’on lui signale 

tout problème d’utilisation, afin de pouvoir y remédier.
REMARQUE : lisez la section DÉPANNAGE du 

GUIDE D’UTILISATION DE L’EXERCISEUR 

ELLIPTIQUE avant de contacter le service de soutien 

technique à la clientèle. Pour plus ample information 

sur le produit, visitez notre site Web.

Si tiene problemas durante el ensamblaje o si le faltan piezas NO 

DEVUELVA ESTE APARATO AL VENDEDOR MINORISTA.
Para obtener servicio rápido y amable, comuníquese por teléfono, 

correo electrónico o a través de nuestro sitio en Internet con 

alguno de nuestros técnicos capacitados en ayuda a clientes.
Nos interesa saber si usted tiene algún problema y queremos tener 

la oportunidad de corregir la situación.
NOTA: Antes de comunicarse con el servicio de asistencia técnica a 

clientes, lea la sección de RESOLUCIÓN DE PROBLEMAS en la 

GUÍA DEL USUARIO DE LA MÁQUINA ELÍPTICA. Puede encontrar 

información adicional del producto en nuestro sitio en Internet.

CUSTOMER 

TECH SUPPORT

SERVICE DE SOUTIEN 

TECHNIQUE À LA CLIENTÈLE

STOP

ATTENTION

¡ALTO!

STOP

ATTENTION

¡ALTO!

STOP

ATTENTION

¡ALTO!

USA & CANADA:
1-855-396-2524
support@advancedfitnessgroup.com
www.afgfitness.com

Advanced Fitness Group
1600 Landmark Drive, 
Cottage Grove WI, 53527

Summary of Contents for 5.7AE

Page 1: ...OPIETARIO DE LA M QUINA EL PTICA Read the ELLIPTICAL GUIDE before using this OWNER S MANUAL Lire le GUIDE D UTILISATION DE L EXERCISEUR ELLIPTIQUE avant de se servir du pr sent MANUEL DU PROPRI TAIRE...

Page 2: ...2 3 ENGLISH 26 FRAN AIS 50 ESPA OL...

Page 3: ...ill seem loose and may cause irritating noises To prevent damage to the elliptical the assembly instructions must be reviewed and corrective actions should be taken Before proceeding find your ellipti...

Page 4: ...VERTISSEMENT CONSULTEZ UN M DECIN AVANT D UTILISER CET QUIPEMENT POSSIBILIT DE BLESSURES S RIEUSES SI L QUIPEMENT EST UTILISE DE MANI RE INCORRECTE AVANT USAGE LISEZ LE GUIDE D UTILISATEUR NE LAISSEZ...

Page 5: ...ING Unpack the product where you will be using it Place the elliptical carton on a level flat surface It is recommended that you place a protective covering on your floor Never open box when it is on...

Page 6: ...h the STABILIZER TUBE 1 to the MAIN FRAME 2 using 2 BOLTS A 2 SPRING WASHERS B and 2 ARC WASHERS C on each side B C HARDWARE FOR STEP 1 PART TYPE DESCRIPTION QTY M8X1 25PX30L 4 A BOLT 8 2X15 4X2T 4 B...

Page 7: ...LT 10 2X18 4X2 5T 4 E SPRING WASHER 10 2X20X1 5T 4 F FLAT WASHER A Open HARDWARE FOR STEP 2 B Align GUIDE RAIL SET 3 with MAIN FRAME 2 as shown C Attach the GUIDE RAIL SET 3 to the MAIN FRAME 2 using...

Page 8: ...and arrange them on the appropriate side of the elliptical E Slide WAVY WASHER J over CRANK 7 followed by RIGHT PEDAL ARM 8R as shown Rest pedal arm wheel on GUIDE RAIL 9 F Attach the RIGHT PEDAL ARM...

Page 9: ...de the LEFT LOWER LINK ARM PIVOT SHAFT 10L into the PEDAL ARM BRACKET 11 D Attach the LEFT LOWER LINK ARM PIVOT SHAFT 10L to the PEDAL ARM BRACKET 11 using 1 FLAT WASHER M 1 SPRING WASHER L and 1 BOLT...

Page 10: ...FLAT WASHER T 1 SMALL FLAT WASHER R 1 HANDLEBAR CAP 14 1 SMALL FLAT WASHER R 1 SPRING WASHER S and 1 BOLT P D Repeat steps B C on the opposite side of the elliptical E Slide FRONT TOP CAP PIECE 22 and...

Page 11: ...6 C Secure the joint with 1 BOLT U 1 SPRING WASHER V 1 FLAT WASHER W and 1 NUT X D Repeat steps B C on the opposite side of the elliptical 15 16 V X W U HARDWARE FOR STEP 6 PART TYPE DESCRIPTION QTY M...

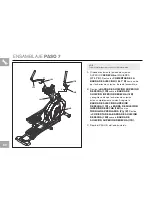
Page 12: ...EBAR 17R onto the RIGHT LOWER HANDLEBAR 18R making sure handlebars are joined together completely Secure the RIGHT UPPER HANDLEBAR 17R to the RIGHT LOWER HANDLEBAR 18R using PRE ATTACHED SET SCREWS Y...

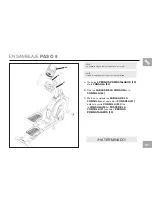
Page 13: ...ED BOLTS 19 from the CONSOLE 20 B Attach the CONSOLE CABLES to the CONSOLE 20 C Carefully tuck the CONSOLE CABLES into the CONSOLE MAST 21 before attaching the CONSOLE 20 Attach CONSOLE 20 to CONSOLE...

Page 14: ...14...

Page 15: ...and programming The BASIC OPERATION section in the ELLIPTICAL GUIDE has instructions for the following LOCATION OF THE ELLIPTICAL POWER GROUNDING INSRUCTIONS FOOT POSITIONING MOVING THE ELLIPTICAL LE...

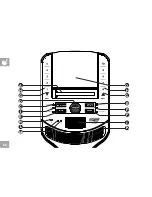
Page 16: ...16 G H D E N C B O P F K L A I G J H M...

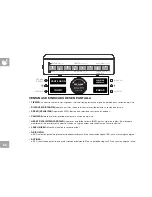
Page 17: ...d for 3 seconds to reset the console G RESISTANCE KEYS used to adjust resistance H RESISTANCE QUICK KEYS used to reach desired resistance more quickly I FAN KEY press to turn fan on and off J FAN pers...

Page 18: ...als are moving CALORIES Total calories burned during your workout HEART RATE Shown as BPM beats per minute Used to monitor your heart rate displayed when contact is made with both pulse grips LEVEL Sh...

Page 19: ...el 1 OR B SELECT A TARGET AND WORKOUT 1 Select your USER by turning the workout knob and then pressing when your desired USER is displayed 2 Select your WEIGHT by turning the workout knob and then pre...

Page 20: ...romotes weight loss by increasing and decreasing the resistance while keeping you in your fat burning zone Includes 10 levels Resistance changes segments repeat every 60 seconds Segment Warm Up 1 2 3...

Page 21: ...ttom of the console AFG TABLET CONNECTED FITNESS SYSTEM Your AFG machine is tablet ready allowing you to use Bluetooth technology to wirelessly connect your tablet to your AFG Sport Elliptical Using t...

Page 22: ...22...

Page 23: ...23 LIMITED HOME USE WARRANTY...

Page 24: ...IONS Who IS covered The original owner and is not transferable What IS covered Repair or replacement of a defective motor electronic component or defective part and is the sole remedy of the warranty...

Page 25: ...legal rights and your rights may vary from state to state Equipment used for commercial purposes or any use other than a single family or Household unless endorsed by Advanced Fitness Group for cover...

Page 26: ...26 FRAN AIS...

Page 27: ...ts Afin de ne pas endommager l exerciseur elliptique lisez les instructions d assemblage et prenez les mesures correctives qui s imposent Avant de continuer recherchez le num ro de s rie de votre exer...

Page 28: ...EZ PAS CET QUIPEMENT LA PORT E DES ENFANTS POUR USAGE DOMESTIQUE UNIQUEMENT PRECAUCI N CONSULTAR CON UN MEDICO ANTES DE USAR ESTE EQUIPO POSIBILIDAD DE RESULTAR EN HERIDAS GRAVES SI EL EQUIPO EST UTIL...

Page 29: ...lez l appareil l endroit o vous l utiliserez D posez la bo te contenant l exerciseur elliptique sur une surface nivel e et plane Il est conseill de placer une toile de protection sur le plancher N ouv...

Page 30: ...BILISATION 1 au CADRE PRINCIPAL 2 l aide de 2 BOULONS A 2 RONDELLES LASTIQUES B et 2 RONDELLES EN ARC C sur chaque c t B C QUINCAILLERIE N CESSAIRE POUR L TAPE 1 PI CE TYPE DESCRIPTION QT M8 X 1 25 P...

Page 31: ...E LASTIQUE 10 2 X 20 X 1 5 T 4 F RONDELLE PLATE A Ouvrez LE SACHET DE QUINCAILLERIE UTILISER LORS DE L TAPE 2 B Alignez L ENSEMBLE DE GLISSI RES 3 avec le CADRE PRINCIPAL 2 tel qu illustr C Fixez L EN...

Page 32: ...u bon c t de l exerciseur elliptique E Enfilez la RONDELLE ONDUL E J sur la MANIVELLE 7 suivie du LEVIER DE P DALE DROITE 8R comme indiqu dans l illustration Appuyez la roue du levier de p dale sur la...

Page 33: ...DE LA BARRE DE LIAISON INF RIEURE 10L dans le SUPPORT DU LEVIER DE P DALE 11 D Fixez l ARBRE PIVOT GAUCHE DE LA BARRE DE LIAISON INF RIEURE 10L sur le SUPPORT DU LEVIER DE P DALE 11 l aide d une ROND...

Page 34: ...ITE RONDELLE PLATE R d un CAPUCHON DE GUIDON 14 D une PETITE RONDELLE PLATE R d une RONDELLE LASTIQUE S et d un BOULON P D R p tez les tapes B et C de l autre c t de l exerciseur elliptique E Glissez...

Page 35: ...aide d un BOULON U d une RONDELLE LASTIQUE V d une RONDELLE PLATE W et d un CROU X D R p tez les tapes B et C de l autre c t de l exerciseur elliptique 15 16 V X W U QUINCAILLERIE N CESSAIRE POUR L T...

Page 36: ...ous assurant que les poign es sont compl tement jointes Fixez la POIGN E DE GUIDON SUP RIEURE DROITE 17R sur la POIGN E DE GUIDON INF RIEURE DROITE 18R l aide des VIS DE R GLAGE PR INSTALL ES Y ET Z G...

Page 37: ...STALL S 19 de la CONSOLE 20 B Branchez les C BLES DE CONSOLE sur la CONSOLE 20 C Ins rez soigneusement les C BLES DE LA CONSOLE dans le MONTANT DE LA CONSOLE 21 avant de fixer la CONSOLE 20 Fixez la C...

Page 38: ...38...

Page 39: ...DE D UTILISATION DE L EXERCISEUR ELLIPTIQUE comprend des directives sur les points suivants EMPLACEMENT DE L EXERCISEUR ELLIPTIQUE INSTRUCTIONS CONCERNANT L ALIMENTATION ET LA MISE LA TERRE POSITIONNE...

Page 40: ...40 CHANGEMENT DE L AFFICHAGE STOP D MARRAGE VENTILATEUR PERTE DE POIDS INTERVALLE DISTANCE CALORIES NIVEAU NIVEAU POUSSER POUR S LECTIONNER OU MODIFIER L AFFICHAGE G H D E N C L A I M B O P F K G J H...

Page 41: ...initialiser la console G TOUCHES DE R SISTANCE utilis es pour ajuster la r sistance H TOUCHES RAPIDES DE R SISTANCE utilis es pour obtenir la r sistance d sir e plus rapidement I TOUCHE FAN VENTILATE...

Page 42: ...veiller sa fr quence cardiaque s affiche lorsqu un contact est tabli avec les deux poign es d tectant la fr quence cardiaque LEVEL NIVEAU affiche le niveau de r sistance actuel OBJECTIFS Le voyant DEL...

Page 43: ...r sistance par d faut est 1 OU B S LECTIONNEZ UN OBJECTIF ET UN ENTRA NEMENT 1 S lectionnez l UTILISATEUR en tournant le bouton d entra nement puis en appuyant dessus lorsque l UTILISATEUR souhait s a...

Page 44: ...u sp cialement pour cibler la graisse favorise la perte de poids en augmentant et en diminuant la r sistance tout en maintenant l utilisateur dans la zone qui favorise la perte de graisse Comprend 10...

Page 45: ...T PHYSIQUE AFG UNE TABLETTE Votre machine AFG est compatible avec les tablettes en vous permettant d utiliser la technologie Bluetooth pour connecter sans fil votre tablette votre exerciseur elliptiqu...

Page 46: ...46...

Page 47: ...47 GARANTIE LIMIT E USAGE DOMESTIQUE...

Page 48: ...ST couvert Le propri taire initial la garantie n est pas transf rable Ce qui EST couvert La r paration ou le remplacement d un moteur de composants lectroniques ou de pi ces d fectueux ce qui constitu...

Page 49: ...e y compris mais sans s y limiter les frais d abonnement un centre de conditionnement physique le temps de travail perdu les visites de diagnostic les visites d entretien ou les frais de transport Les...

Page 50: ...50 ESPA OL...

Page 51: ...la m quina el ptica se deben repasar las instrucciones de ensamblaje y tomar medidas correctivas Antes de seguir adelante busque el n mero de serie de la m quina el ptica que se encuentra ubicado en u...

Page 52: ...BEFORE USING KEEP CHILDREN OFF AND AWAY FROM THIS EQUIPMENT FOR CONSUMER USE ONLY AVERTISSEMENT CONSULTEZ UN M DECIN AVANT D UTILISER CET QUIPEMENT POSSIBILIT DE BLESSURES S RIEUSES SI L QUIPEMENT ES...

Page 53: ...juego de torniller a DESEMPAQUE Extraiga el producto del paquete en el lugar donde lo utilizar Coloque la caja de la m quina el ptica sobre una superficie plana y nivelada Se recomienda que coloque un...

Page 54: ...O ESTABILIZADOR 1 al BASTIDOR PRINCIPAL 2 usando 2 PERNOS A 2 ARANDELAS EL STICAS B y 2 ARANDELAS DE ARCO C de cada lado B C TORNILLER A PARA EL PASO 1 PIEZA TIPO DESCRIPCI N CANT M8X1 25PX30L 4 A PER...

Page 55: ...L STICA 10 2X20X1 5T 4 F ARANDELA PLANA A Abra la BOLSA DE LA TORNILLER A PARA EL PASO 2 B Conecte el CONJUNTO DE RIELES GU A 3 con el BASTIDOR PRINCIPAL 2 como se muestra C Una el CONJUNTO DE RIELES...

Page 56: ...R y col quelos en el lado correspondiente del el ptico E Deslice la ARANDELA ONDULADA J encima del CIG E AL 7 seguido por el brazo del pedal DERECHO 8R como se muestra Apoye la rueda del brazo del ped...

Page 57: ...IRATORIO DEL BRAZO CONECTOR INFERIOR IZQUIERDO 10L dentro del SOPORTE DEL BRAZO DEL PEDAL 11 D Conecte el EJE GIRATORIO DEL BRAZO CONECTOR INFERIOR IZQUIERDO 10L hacia el SOPORTE DEL BRAZO DEL PEDAL 1...

Page 58: ...NDELA PLANA PEQUE A R 1 CAPUCH N PARA BARRA DE SUJECI N 14 1 ARANDELA PLANA PEQUE A R 1 ARANDELA EL STICA S y 1 PERNO P D Repita los pasos B C en el lado opuesto de la m quina el ptica E Deslice la PI...

Page 59: ...ERIOR 16 C Asegure la junta con 1 PERNO U 1 ARANDELA EL STICA V 1 ARANDELA PLANA W y 1 TUERCA X D Repita los pasos B C en el lado opuesto de la m quina el ptica 15 16 V X W U TORNILLER A PARA EL PASO...

Page 60: ...re la BARRA DE SUJECI N INFERIOR DERECHA 18R y aseg rese de que las barras de sujeci n est n completamente unidas Asegure la BARRA DE SUJECI N SUPERIOR DERECHA 17R a la BARRA DE SUJECI N INFERIOR DERE...

Page 61: ...STALADOS 19 de la CONSOLA 20 B Una los CABLES DE LA CONSOLA a la CONSOLA 20 C Meta con cuidado los CABLES DE LA CONSOLA en el poste de la CONSOLA 21 antes de unir la CONSOLA 20 Una la CONSOLA 20 al PO...

Page 62: ...62...

Page 63: ...AMIENTO B SICO en la GU A DE LA M QUINA EL PTICA tiene instrucciones para lo siguiente UBICACI N DE LA M QUINA EL PTICA INSTRUCCIONES DE ALIMENTACI N Y DE CONEXI N A TIERRA POSICI N DE LOS PIES C MO M...

Page 64: ...64 CAMBIAR PANTALLA PARAR INICIO VENTILADOR P RDIDA DE PESO INTERVALO DISTANCIA CALOR AS NIVEL NIVEL PRESIONE PARA SELECCIONAR O CAMBIAR LA PANTALLA G H D E N C B O P F K L A I G J H M...

Page 65: ...os para poner en cero la consola G RESISTENCIA TECLAS se utilizan para ajustar la resistencia H TECLAS R PIDAS DE RESISTENCIA se utilizan para alcanzar el nivel de resistencia deseado con mayor rapide...

Page 66: ...BPM por sus siglas en ingl s Se utiliza para monitorear el ritmo card aco se muestra cuando se sujetan ambas empu aduras con sensor de pulso LEVEL NIVEL Muestra el nivel de resistencia actual OBJETIVO...

Page 67: ...ia predeterminado ser el nivel 1 O BIEN B SELECCIONE UN OBJETIVO Y UNA RUTINA 1 Seleccione su USUARIO al girar la perilla de rutina y luego presionarla cuando se muestre su USUARIO deseado 2 Seleccion...

Page 68: ...una sesi n de ejercicio dise ada espec ficamente para eliminar la grasa promueve la p rdida de peso aumentando y disminuyendo la resistencia mientras lo mantiene dentro de su zona ptima para quemar g...

Page 69: ...de la consola SISTEMA DE EJERCICIO AFG CONECTADO A UNA TABLETA Su equipo AFG est listo para conectarse a una tableta lo cual le permite utilizar la tecnolog a Bluetooth a fin de conectar de forma ina...

Page 70: ...70...

Page 71: ...71 GARANT A LIMITADA PARA EL USO DOM STICO...

Page 72: ...el propietario original EXCLUSIONES Y LIMITACIONES Qui n EST cubierto El propietario original la cobertura no es transferible Qu EST cubierto La reparaci n o la sustituci n de un motor un componente e...

Page 73: ...stituci n incluidos a t tulo enunciativo y no limitativo tarifas de membres a de gimnasio tiempo de trabajo perdido visitas de diagn stico visitas de mantenimiento o transporte El equipo utilizado par...

Page 74: ...on lui signale tout probl me d utilisation afin de pouvoir y rem dier REMARQUE lisez la section D PANNAGE du GUIDE D UTILISATION DE L EXERCISEUR ELLIPTIQUE avant de contacter le service de soutien tec...

Reviews: