background image

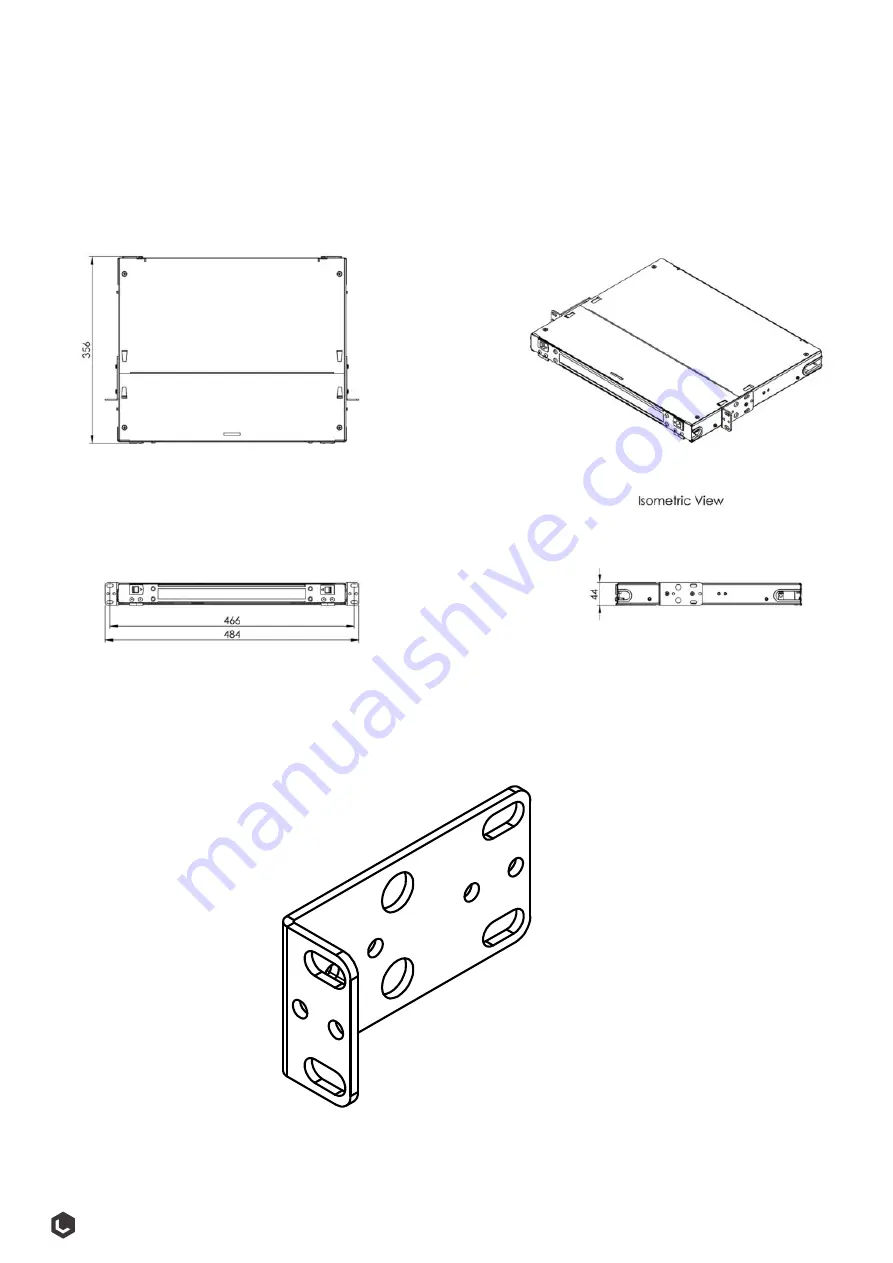
Component Overview

3

L-Series AM-1RU Sliding Patch Panel

© AFL Hyperscale. All rights reserved

Series

L-Series AM-1RU Sliding Patch Panel

Mounting Bracket

Summary of Contents for AM-1RU

Page 1: ...Installation Guide AM 1RU Sliding Patch Panel Series ...

Page 2: ...for an eye examination immediately General Precautions Personnel must be thoroughly familiarized with all applicable Occupational Health and Safety OH S regulations local regulations and your company safety practices and policies Warning To reduce the chance of accidental injury Before work begins all personnel must be thoroughly familiar with the operation of all equipment and procedures to be us...

Page 3: ...Component Overview 3 L Series AM 1RU Sliding Patch Panel AFL Hyperscale All rights reserved Series L Series AM 1RU Sliding Patch Panel Mounting Bracket ...

Page 4: ...RU Sliding Patch Panel 1 02 Mounting Bracket 2 02 Mounting Bracket 01 L Series AM 1RU Sliding Patch Panel 6 x Screws Cross Head Screwdriver Up to 2 Spools Up to 2 24f Splice Trays Mounting Frame What You Will Need Related Products Up to 3 L Series Adapter Plates Up to 3 L Series 24f Cassettes ...

Page 5: ...ights reserved Series Panel Mounting Once extracted from the box adjust the brackets to the required level Secure the panel to the 19 profile in the position required using the four screws Note Type of screw required may vary depending on the type of frame 1 2 ...

Page 6: ... s guidelines Once complete secure the cable at the panel entry point using the cable tie Proceed to secure the aramid inside the holder ensuring the aramid is properly secured and tightening with the screw 3 Loose Tube Installation 6 AFL Hyperscale All rights reserved Series ...

Page 7: ...le at the entry and in the middle of the tray 5 MicroCable Installation Install the tie point bracket in the middle of the second row of holes 4 7 L Series AM 1RU Sliding Patch Panel AFL Hyperscale All rights reserved Series ...

Page 8: ...l 01 After the fibers are addressed in the splice tray s and spools secure the splice protectors in the splice protector holder 02 Load the fibers and cables as shown above To add more splice trays simply close the lid on the first tray and secure a second tray on top ensure the splice trays are properly secured in the tray hinge 03 Once secured check the assemblies are in the correct position in ...

Page 9: ...s into the tie point and tighten with the screw then cable in the middle of the tray Once complete place the pigtail in adapter plates and splice 8 Tight Buffered Cable Installation 9 L Series AM 1RU Sliding Patch Panel AFL Hyperscale All rights reserved Series ...

Page 10: ...Notes 10 AFL Hyperscale All rights reserved Series ...

Page 11: ...Notes 11 L Series AM 1RU Sliding Patch Panel AFL Hyperscale All rights reserved Series ...

Page 12: ...AFLHSAM1UPAN311019V1 Thank you for choosing AFL Hyperscale www aflhyperscale com AFL Hyperscale reserves the right to make changes in this Installation Guide at any time without notice ...

Reviews: