20
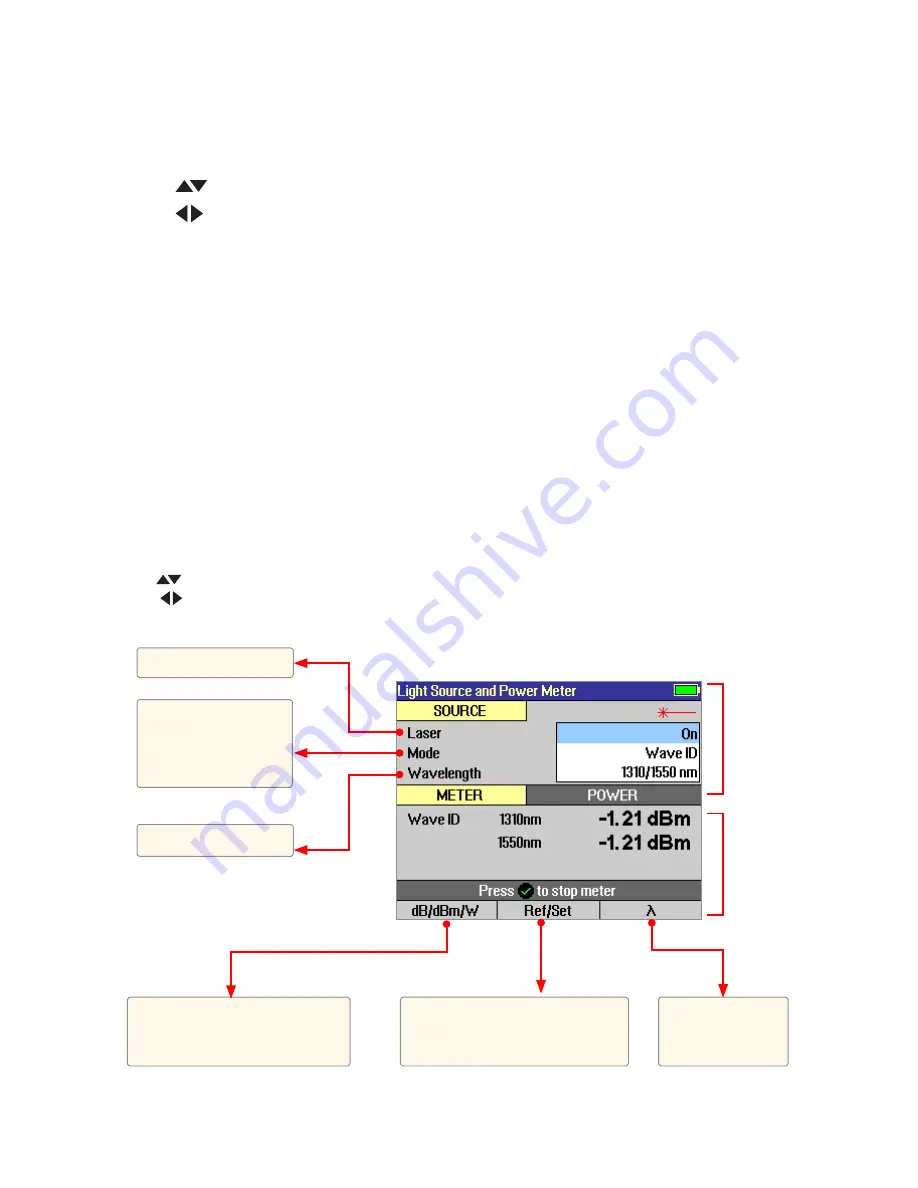
Light Source and Power Meter Settings
Light Source Operation
After enabling the Light Source & Optical Power Meter test mode or turning the [Laser] option On, let
the laser stabilize for approximately five minutes.
1. Use
keys to highlight the desired light source setup parameter.
2. Use
keys to change the highlighted parameter.
Turn the current light source laser on or off.
Set up the light source for CW (continuous wave), 1 kHz, 2 kHz, 270 Hz, or 330 Hz tone, or Wave ID
operation.
Set up the light source for the desired wavelength operation.
Optical Power Meter Operation
1. Press the [Ref/Set] soft key to see the Reference value (in dBm) for several seconds, then display will
return to dB mode.
2. To set a new OPM reference level, hold the [Ref/Set] key until you see REFERENCE [SAVED]. This
takes about one second.
3. When you release the [Ref/Set] soft key, the unit should display a loss value of about 0.0 dB.
4. You can sample and hold live POWER or LOSS readings by pressing the Test key. While a held value
is shown you will see POWER [ STOPPED] or LOSS [STOPPED].
5. Press the Test key again to return to the live data view.
Press to toggle units: dB to
measure loss, dBm or W to
measure power
Press to toggle
OPM wavelength
Hold to set OPM reference
level(s). Press briefly to see
current reference levels
Turn laser On/Off
Select wavelength(s)
Select test mode: CW,
270 Hz, 330 Hz, 1 kHz
and 2 kHz tones, or
Wave ID
Use
to navigate source menu
Use
to change source menu items
meter
meter
Light
Source
settings
Meter
settings
meter
source
source
source


