Safety 13
4510001 REV B - 220620
Safety
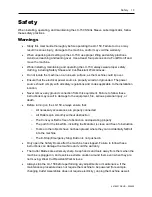
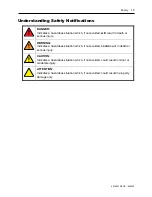
When installing, operating, and maintaining the LX-150 Shrink Sleeve Label Applicator, follow
these safety practices.
Warnings
•
Study this User Guide thoroughly before operating the LX-150. Failure to do so may
result in serious injury, damage to the machine, and/or may void the warranty.
•
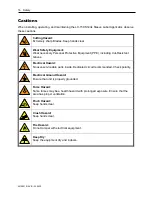
When unpacking and setting up the LX-150, use proper lifting and safety practices.
Avoid overreaching and leaning over. Use at least four persons and a Forklift to lift and
move the machine.
•
While installing, maintaining and operating the LX-150, always wear proper safety
clothing, including Safety Shoes and Cut-Resistant Work Gloves.
•
Do not locate the machine on an uneven surface, as the machine could tip over.
•
Ensure that the electrical power source is properly wired and grounded. The power
source should comply with all safety regulations and codes applicable to the installation
location.
•
Never remove any ground connection from this equipment. Failure to follow these
instructions may result in damage to the equipment, fire, serious personal injury, or
death.
•
Before turning on the LX-150, always ensure that:
o
All necessary accessories are properly connected
o
All Rollers spin smoothly without obstruction
o
The Conveyor Belt is free of obstruction and operating properly
o
The path for the label film, including the Mandrel, is clean and free of obstruction
o
Tools or other objects have not been placed where they can accidentally fall/roll
into the machine
o
The E-Stop (Emergency Stop) Button is not pushed in
•
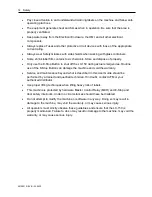
Only open the Safety Doors after the machine has stopped. Failure to follow these
instructions can damage the machine and void the warranty.
•
The Cutter Blades are extremely sharp. Keep hands and tools away from them when the
machine is plugged in, and exercise extreme caution around them even when they are
not moving. Wear Cut-Resistant Work Gloves.
•
Always stop the LX-150 before performing any adjustments or maintenance. If the
maintenance procedure does not require the machine to be powered (for example,
changing Cutter Assemblies does not require electricity), unplug the machine as well.
Summary of Contents for LX-150
Page 1: ...LX 150 Shrink Sleeve Label Applicator User Guide ...
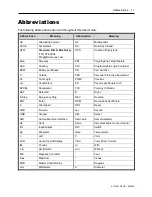
Page 2: ...2 Abbreviations 4510001 REV B 220620 ...
Page 4: ...4 Abbreviations 4510001 REV B 220620 ...
Page 12: ...12 Abbreviations 4510001 REV B 220620 ...
Page 76: ...76 Installation 4510001 REV B 220620 ...
Page 132: ...132 Setup 4510001 REV B 220620 ...
Page 146: ...146 Operation 4510001 REV B 220620 ...
Page 186: ...186 Electrical Schematics 4510001 REV B 220620 LX150N J002 220V Indicator Lamp Circuit ...
Page 187: ...Electrical Schematics 187 4510001 REV B 220620 LX150N J003 220V PLC ...
Page 189: ...Electrical Schematics 189 4510001 REV B 220620 LX150N J005 220V ...
Page 190: ...190 Electrical Schematics 4510001 REV B 220620 LX150N J006 220V ...
Page 191: ...Electrical Schematics 191 4510001 REV B 220620 LX150N J007 220V HMI ...
Page 192: ...192 Electrical Schematics 4510001 REV B 220620 LX150N J008 220V UR1 Unwind Circuit ...
Page 193: ...Electrical Schematics 193 4510001 REV B 220620 LX150N J009 220V UR1 Unwind Cable ...
Page 194: ...194 Electrical Schematics 4510001 REV B 220620 LX150N J010 220V Film Roll Motor ...
Page 195: ...Electrical Schematics 195 4510001 REV B 220620 LX150N J011 220V Timing Screw Motor Drive ...
Page 196: ...196 Electrical Schematics 4510001 REV B 220620 LX150N J012 220V Timing Screw Motor ...
Page 197: ...Electrical Schematics 197 4510001 REV B 220620 LX150N J013 220V Brushdown Circuit ...
Page 200: ...200 Electrical Schematics 4510001 REV B 220620 LX150N J016 220V PLC I O Extension ...
Page 202: ...202 Electrical Schematics 4510001 REV B 220620 LX150N J002 480V Indicator Lamp Circuit ...
Page 203: ...Electrical Schematics 203 4510001 REV B 220620 LX150N J003 480V PLC ...
Page 205: ...Electrical Schematics 205 4510001 REV B 220620 LX150N J005 480V ...
Page 206: ...206 Electrical Schematics 4510001 REV B 220620 LX150N J006 480V ...
Page 207: ...Electrical Schematics 207 4510001 REV B 220620 LX150N J007 480V HMI ...
Page 208: ...208 Electrical Schematics 4510001 REV B 220620 LX150N J008 480V UR1 Unwind Circuit ...
Page 209: ...Electrical Schematics 209 4510001 REV B 220620 LX150N J009 480V UR1 Unwind Cable ...
Page 210: ...210 Electrical Schematics 4510001 REV B 220620 LX150N J010 480V Film Roll Motor ...
Page 211: ...Electrical Schematics 211 4510001 REV B 220620 LX150N J011 480V Timing Screw Motor Drive ...
Page 212: ...212 Electrical Schematics 4510001 REV B 220620 LX150N J012 480V Timing Screw Motor ...
Page 213: ...Electrical Schematics 213 4510001 REV B 220620 LX150N J013 480V Brushdown Circuit ...
Page 216: ...216 Electrical Schematics 4510001 REV B 220620 LX150N J016 480V PLC I O Extension ...
Page 219: ...Diagrams and Parts Lists 219 4510001 REV B 220620 Dancer Assembly ...
Page 221: ...Diagrams and Parts Lists 221 4510001 REV B 220620 Cutter Assembly ...
Page 225: ...Diagrams and Parts Lists 225 4510001 REV B 220620 Applicator Assembly ...
Page 227: ...Diagrams and Parts Lists 227 4510001 REV B 220620 LX 150 Frame ...
Page 229: ...Diagrams and Parts Lists 229 4510001 REV B 220620 Head Height Adjust ...
Page 235: ...Diagrams and Parts Lists 235 4510001 REV B 220620 Support and Film Drive Wheel Assemblies ...
Page 238: ...238 Diagrams and Parts Lists 4510001 REV B 220620 400mm Timing Screw Assembly ...
Page 240: ...240 Diagrams and Parts Lists 4510001 REV B 220620 ...


