background image

2

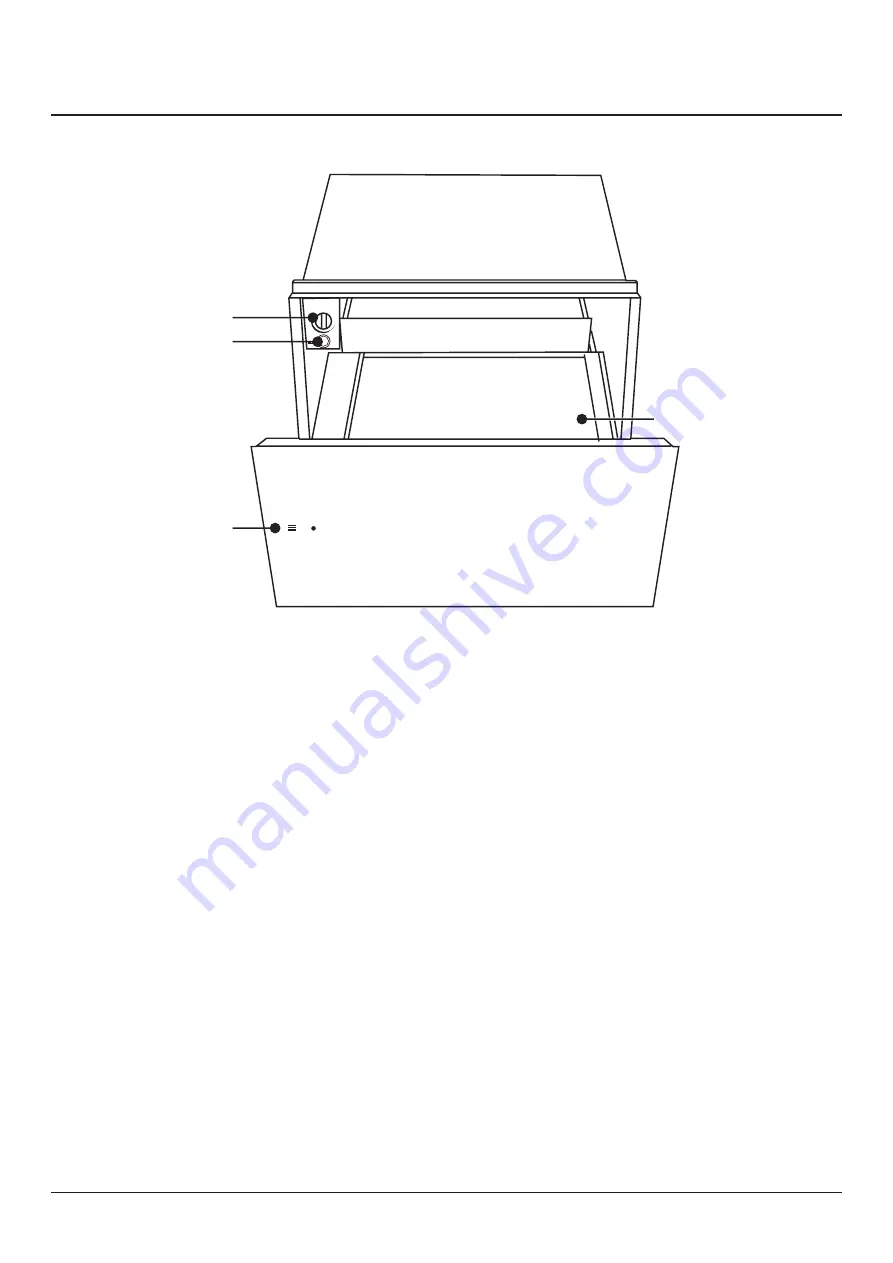
The controls consist of a temperature dial and an On/Off 

switch. These are only visible when the drawer is open. When 

the drawer is closed, you can tell when the appliance is 

switched on because the On/Off switch illuminates through 

the hole in the front of the drawer.
It is operated by the temperature knob and can be adjusted 

between 30°C and 80°C. 
The temperature dial must only be turned in a clockwise 

direction as far as it will go and then back again. 
To prevent damage to the thermostat, do not force the 

temperature knob past the maximum position.

1. 

To open, push the door to open.

2. 

Place the crockery.

3. 

Set the required temperature.

4. 

Press the power switch, which will light up to confirm 

the warming drawer is switched on.

5. 

Push to close the drawer.

6. 

Switch the appliance off before removing the warmed 

dishes.

The symbols are recommendations for optimum settings and 

do not indicate absolute temperature values (

Table 2.1

).

2.  Warming Drawer

D

A
B

C

Warming Times

The time necessary for warming depends on various factors:

• 

Material and thickness of the dishes.

• 

Quantity of dishes to be warmed.

• 

Arrangement of dishes in the drawer.

• 

Temperature setting.

Therefore exact warming times cannot be provided.
With use, experience will demonstrate optimal warming 

times and temperature settings. Temperature setting is 

approx.60°C. Evenly heated crockery will take about:

• 

30 – 35 minutes for 6 place setting.

• 

40 - 45 minutes for 12 place setting.

Warming drawer capacity

The capacity of the warming drawer is 25kg. 

The number of items this includes depends on the size and 

thickness of your crockery.

A. 

Temperature control

B. 

On / Off

C. 

Indicators

D. 

Warming Drawer

Summary of Contents for Rangemaster ECL14WDBL/BL

Page 1: ...RMB45WDBL SS ECL14WDBL BL User Guide Installation Service Instructions U110608 03...

Page 2: ......

Page 3: ...arts should be used Always allow the appliance to cool and then switch it off at the mains before cleaning or carrying out any maintenance work unless specified otherwise in this guide Personal Safety...

Page 4: ...ched on 5 Push to close the drawer 6 Switch the appliance off before removing the warmed dishes The symbols are recommendations for optimum settings and do not indicate absolute temperature values Tab...

Page 5: ...after use before undertaking any cleaning Warming drawer exterior Clean with a damp cloth If it is very dirty add a few drops of dish washing detergent to the water Dry with a dry cloth Slight colour...

Page 6: ...but NOT in a room containing a bath or shower This appliance is designed for domestic cooking only Use for any other purpose could invalidate any warranty or liability claim The kitchen should be dry...

Page 7: ...ims are included with this 45 cm built in appliance These shims are only used when you notice the appliance is uneven in the cabinet Check that the dimensions of the cabinet are correct for this appli...

Page 8: ...6 3 Circuit Diagram POWER L N E Switch button 1A 2A 4B 3B M1 Heat dissipation fan Temperature control switch Grill Thermal protector...

Page 9: ...nsions Oven Housing Height 141 594 Width 595 560 568 Depth 548 555 min Mass kg 16 Data Brand Rangemaster Model identification RMB45WDBL SS ECL14WDBL BL Type of drawer Electric Number of cavities 1 Vol...

Page 10: ...liance started from the date of purchase of this product Any cosmetic damage to the appliance must be reported within 90 days of delivery Please note that AGA Rangemaster Limited have appointed UK War...

Page 11: ......

Page 12: ......

Page 13: ......

Page 14: ......

Page 15: ......

Page 16: ...Clarence Street Royal Leamington Spa Warwickshire CV31 2AD England Tel 44 0 800 8046261 E mail consumers agarangemaster co uk...

Reviews: