background image

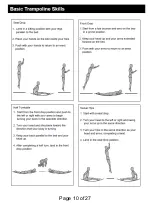
Page 10 of 27

Summary of Contents for 166826

Page 1: ... Enclosure Customer Service 888 922 2336 7 00 am to 12 00 am CST daily Live Chat at www academy com Email customerservice academy com Made in China Please keep this instruction manual for future reference Assembly Instructions User s Manual ...

Page 2: ...e 26 Warranty Information 27 Note Before beginning assembly of product make sure all parts are present Compare parts with package content list and hardware contents If any part is missing or damaged do not attempt to assemble the unit Contact customer service for replacement parts Page 2 of 27 ...

Page 3: ...Page 3 of 27 ...

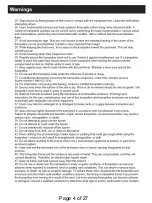
Page 4: ...Page 4 of 27 ...

Page 5: ...Page 5 of 27 ...

Page 6: ...Page 6 of 27 ...

Page 7: ...Page 7 of 27 ...

Page 8: ...Page 8 of 27 ...

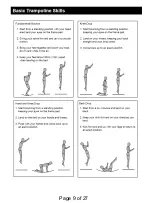
Page 9: ...Page 9 of 27 ...

Page 10: ...Page 10 of 27 ...

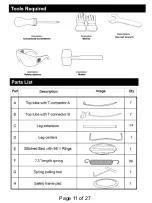
Page 11: ...Page 11 of 27 ...

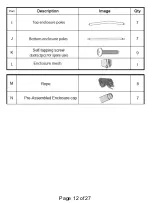
Page 12: ...Page 12 of 27 ...

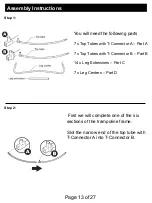
Page 13: ...parts 7 x Top Tubes with T Connector A Part A 7 x Top Tubes with T Connector B Part B 14 x Leg Extensions Part C 7 x Leg Centers Part D First we will complete one of the six sections of the trampoline frame Slot the narrow end of the top tube with T Connector A into T Connector B ...

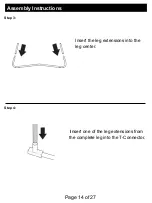
Page 14: ...Assembly Instructions Step 3 Step 4 Page 14 of 27 Insert the leg extensions into the leg center Insert one of the leg extensions from the complete leg into the T Connector ...

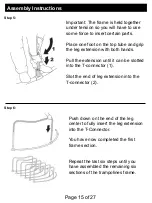
Page 15: ...ip the leg extension with both hands Pull the extension until it can be slotted into the T connector 1 Slot the end of leg extension into the T connector 2 Push down on the end of the leg center to fully insert the leg extension into the T Connector You have now completed the first frame section Repeat the last six steps until you have assembled the remaining six sections of the trampolines frame ...

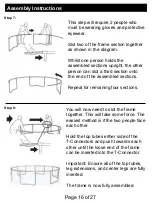
Page 16: ...ird section onto the end of the assembled sections Repeat for remaining four sections You will now need to slot the frame together This will take some force The easiest method is if the two people face each other Hold the top tubes either side of the T Connectors and push towards each other until the loose end of the frame can be inserted into the T Connector Important Ensure all of the top tubes ...

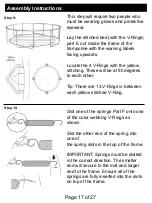
Page 17: ...ellow stitching These will be at 90 degrees to each other Tip There are 13 V Rings in between each yellow stitched V Ring Slot one of the springs Part F onto one of the color webbing V Rings as shown Slot the other end of the spring into one of the spring slots in the top of the frame IMPORTANT Springs must be slotted in the correct direction The smaller end will secure to the mat and larger end t...

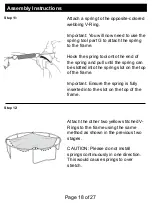
Page 18: ...onto the end of the spring and pull until the spring can be slotted into the spring slot on the top of the frame Important Ensure the spring is fully inserted into the slot on the top of the frame Attach the other two yellow stitched V Rings to the frame using the same method as shown in the previous two stages CAUTION Please do not install springs continuously in one direction This would cause sp...

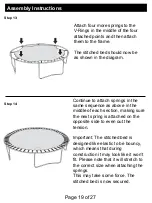
Page 19: ... to attach springs in the same sequence as above in the middle of each section making sure the next spring is attached on the opposite side to even out the tension Important The stitched bed is designed like elastic to be bouncy which means that during construction it may look like it won t fit Please note that it will stretch to the correct size when attaching the springs This may take some force...

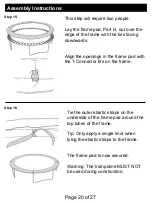
Page 20: ...ties facing downwards Align the openings in the frame pad with the T Connector B s on the frame Tie the outer elastic straps on the underside of the frame pad around the top tubes of the frame Tip Only apply a single knot when tying the elastic straps to the frame The frame pad is now secured Warning The trampoline MUST NOT be used during construction ...

Page 21: ...ll also need a cross head screwdriver not supplied Slot Part J the bottom enclosure tubes into Part I the top enclosure tubes Align the hole on the bottom enclosure tube with the slot in the top enclosure tube Screw one of the self tapping screws through the slot in the top enclosure tube and into the hole in the bottom enclosure tube using the crosshead screwdriver ...

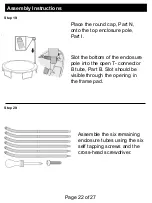
Page 22: ...onto the top enclosure pole Part I Slot the bottom of the enclosure pole into the open T connector B tube Part B Slot should be visible through the opening in the frame pad Assemble the six remaining enclosure tubes using the six self tapping screws and the cross head screwdriver ...

Page 23: ...nstructions Page 23 of 27 Step 21 Step 22 Slot the remaining enclosure tubes with hemisphere caps into the remaining T connector B s on the frame The enclosure tubes are now fitted and you have completed step 22 ...

Page 24: ...e cord around one of the V Ring attachments located on the mat Push the cord through a hole at the bottom of the netting Important Keep the cord tight at all times Slot the cord through the middle of the next V Ring then through the net and down through the next V Ring Continue to do this until you have used up nearly all the cord then tie this end around a V Ring Tie another cord to this V Ring a...

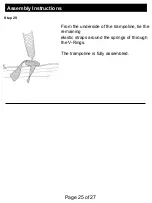
Page 25: ...Assembly Instructions Step 25 Page 25 of 27 From the underside of the trampoline tie the remaining elastic straps around the springs of through the V Rings The trampoline is fully assembled ...

Page 26: ...Page 26 of 27 ...

Page 27: ...Page 27 of 27 ...

Reviews: