background image

e P h o t o   C L 1 8   U s e r ’ s   G u i d e 

19

Chapter 3: Transferring Images to
your PC

Installing the Software Needed

1 .  

I n s e r t  t h e  C o r e l ®  C D - R O M  i n t o  t h e  C D - R O M  d r i v e  o f  y o u r  c o m p u t e r . 

T h e  i n s t a l l a t i o n  s t a r t s  a u t o m a t i c a l l y . 

2 .  

F o l l o w  t h e  i n s t r u c t i o n s  i n  t h e  s u c c e s s i v e  s c r e e n s . 

3 .  

I n s e r t  t h e  e P h o t o   C L 1 8   C o l l e c t i o n  C D - R O M  i n t o  t h e  C D - R O M  d r i v e  o f 
y o u r  c o m p u t e r . 

4 .  

O p e n  t h e  D R I V E R S  f o l d e r  o n  t h e  C D - R O M  a n d  d o u b l e - c l i c k  t h e  S e t u p  f i l e  t o 
i n s t a l l  t h e  e P h o t o  C L 1 8  T W A I N  a n d  V i d e o  f o r  W i n d o w s ®  d r i v e r s . 

I f  y o u  w a n t  t o  u s e  t h e  C L 1 8  f o r  v i d e o c o n f e r e n c i n g  ( w i t h  N e t M e e t i n g ® )  o r  v i d e o 
c a p t u r i n g  ( w i t h  V i d e o I m p r e s s i o n ™ ) : 

5 .  

I n s e r t  t h e  e P h o t o   C L 1 8   C o l l e c t i o n  C D - R O M  i n t o  t h e  C D - R O M  d r i v e  o f 
y o u r  c o m p u t e r . 

6 .  

R u n  t h e  S e t u p  f i l e  i n  t h e  N e t M e e t i n g  o r  V i d e o I m p r e s s i o n  f o l d e r  t o  s t a r t  t h e 
i n s t a l l a t i o n . 


N o t e :  T h e  i n s t a l l e r  i n  t h e  N e t M e e t i n g  f o l d e r  w i l l  a l s o  i n s t a l l  o r  u p d a t e 

y o u r  I n t e r n e t  E x p l o r e r  i f  n e c e s s a r y . 

7 .  

F o l l o w  t h e  i n s t r u c t i o n s  i n  t h e  s u c c e s s i v e  s c r e e n s . 


N o t e :  T o  s e n d  o r  u p l o a d  i m a g e s  t h r o u g h  t h e  i n t e r n e t  f o r  p r i n t i n g  o n 
p h o t o g r a p h i c  p a p e r ,  u s e  t h e  A G F A n e t  c l i e n t  s o f t w a r e .  T o  i n s t a l l ,  d o u b l e - 
c l i c k  t h e  s e t u p  f i l e  i n  t h e  A G F A n e t  f o l d e r  o n  t h e  e P h o t o  C L 1 8  C o l l e c t i o n  C D - 
R O M .  T o  u s e  t h e  A g f a  I n t e r n e t  P r i n t  S e r v i c e ,  y o u  n e e d  t h e  A G F A n e t  c l i e n t 
s o f t w a r e .  F o r  m o r e  d e t a i l s ,  v i s i t :  

h t t p : / / w w w . a g f a n e t . c o m 

Connecting the Camera to your PC

1 .  

P r e s s  t h e  O n / O f f  b u t t o n  t o  s w i t c h  t h e  c a m e r a  o n . 

2 .  

P l u g  o n e  e n d  o f  t h e  U S B  c a b l e  i n t o  y o u r  c a m e r a ’ s  U S B  p o r t . 

3 .  

P l u g  t h e  o t h e r  e n d  o f  t h e  U S B  c a b l e  i n t o  y o u r  c o m p u t e r ’ s  U S B  p o r t . 

Summary of Contents for ePhoto CL18

Page 1: ...ePhoto CL18 User s Guide abc ...

Page 2: ...d All software and hardware described in this document are subject to change without any notice Regulation Compliance FCC Information Test FCC Warning This equipment meets the limits for a Class B digital device pursuant to Part 15 of FCC Rules Only the power pack and cable supplied with the camera should be used Operation with other power packs and cables is likely to result in interference to ra...

Page 3: ...ce by one or more of the following measures n Reorient or relocate the receiving antenna n Increase the separation between the equipment and receiver n Connect the equipment into an outlet on a circuit different from that to which the receiver is connected Canadian Radio Interference Regulations Statement This Class B digital device meets all the requirements of the Canadian Interference Causing E...

Page 4: ...fect until the end of the one 1 year period or shall be 30 days whichever is longer This warranty is transferable with new owner notification to Agfa This warranty shall not apply if the customer n Abuses or modifies Product or Software n Operates the system in an environment with excessive dirt moisture chemical fumes extremes of temperature or other improper conditions The camera is not impermea...

Page 5: ...f unsuitable batteries may result in the batteries splitting or leaking or causing a fire injury or soiling of the battery compartment n Do not try to charge the alkaline battery This may cause the battery to split leak causing fire or injury n Only use the batteries specified for this camera The use of other power sources may cause fire Care and Maintenance n Avoid leaving the camera in the sun o...

Page 6: ...Then breathe on the surface to form a mist and gently wipe it with a soft lint free cloth or lens cleaning tissue n To avoid scratching the lens use a gentle circular motion when wiping n Never use harsh or abrasive cleaners on the outside surfaces of the camera Wipe off dust with a clean dry cloth ...

Page 7: ...T ran sf e rrin g Imag e s t o yo u r P C 1 9 Installing the Software Needed 19 Connecting the Camera to your PC 19 Transferring Still Images to your PC 20 C h ap t e r 4 D isp layin g Imag e s o n yo u r T V 2 1 Adapting the TV Standard PAL NTSC 21 Displaying Images on TV 21 Deleting a Specific Image 22 C h ap t e r 5 U sin g t h e e P h o t o C L 1 8 f o r V id e o A p p licat io n s 2 3 Videoco...

Page 8: ...98 n USB powered no batteries needed n with videoconferencing software D e le t in g st ill imag e s p 1 6 n to delete images n to clear the camera memory C ap t u rin g vid e o imag e s p 2 2 n using the USB interface at 100KB s on your PC this requires Windows 98 n USB powered no batteries needed n with video capture software T ran sf e rrin g st ill imag e s t o yo u r P C p 1 7 n fast image do...

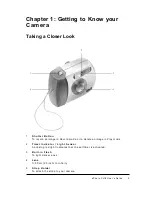
Page 9: ...o n To record an image in Record mode or to delete an image in Play mode 2 T ime r In d icat o r L ig h t S e n so r A blinking red light indicates that the selftimer is activated 3 B u ilt in F lash To light dark scenes 4 L e n s f 50 cm 20 inch to infinity 5 S t rap H o ld e r To attach the strap to your camera ...

Page 10: ...ion set or VCR 3 U S B P o rt To connect your camera with a USB cable to your computer to download still images and capture video images 4 F lash T ime r P re vio u s B u t t o n To set the flash options with or without activating the selftimer in Record mode To select the previous image to delete or preview in Play mode v Note Press this button for 4 seconds to set the T V st an d ard ...

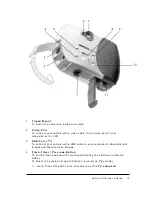
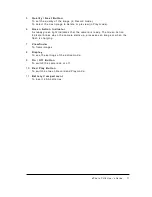
Page 11: ...n light indicates that the camera is ready The Green Action Indicator blinks when the camera starts up processes an image or when the flash is charging 7 V ie wf in d e r To frame images 8 D isp lay To see the settings of the active mode 9 O n O f f B u t t o n To switch the camera on or off 10 R e c P lay B u t t o n To switch between Record and Play mode 11 B at t e ry C o mp art me n t To inser...

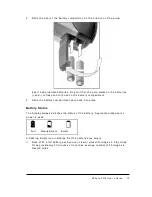
Page 12: ... ePhoto CL18 has two possible power sources n batteries n USB power Batteries Inserting Batteries Your ePhoto CL18 camera comes with 2 AA Alkaline batteries v Note You can also use NiMH NiCd or Lithium batteries 1 Unlock the battery compartment door ...

Page 13: ...y compartment 3 Slide the battery compartment door back into place Battery Status The Display always indicates the status of the battery Segments disappear as power is used Full Nearly Empty Empty A flashing Empty icon indicates that the batteries are empty v Note With a full battery pack you can view or work with images in Play mode for approximately 30 minutes or record an average number of 50 i...

Page 14: ...n n Always replace all batteries with two identical new or fully charged ones n Dispose used batteries in a manner that complies with applicable laws USB Power The moment you connect your camera to a PC with the supplied USB cable it is powered by the PC and does not use battery power v Note If the camera is USB powered the flash is disabled Camera Controls On Off Button Switching On the Camera Pr...

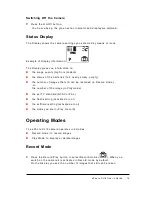
Page 15: ...ty n the number of images that still can be recorded in Record mode or the number of the image in Play mode n the set TV standard NTSC or PAL n the flash setting activated or not n the selftimer setting activated or not n the mode you are in Play Record Operating Modes The ePhoto CL18 camera operates in 2 modes n Record mode to record images n Play Mode to display or delete images Record Mode Pres...

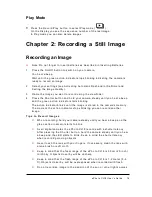
Page 16: ...ing The action indicator blinks until the image is stored in the camera s memory The moment the action indicator stops blinking you can record another image T ip s t o R e co rd Imag e s o When recording hold your camera steady until you hear a beep and the green action indicator starts to blink o As all digital cameras the ePhoto CL18 records with a shutter latency After pressing the Shutter butt...

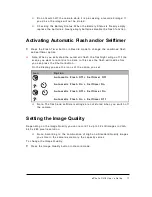
Page 17: ...this case the flash will load before you can press the Shutter button On the display you see the icons of the option you set Ico n O p t io n A u t o mat ic F lash O f f S e lf t ime r O f f A u t o mat ic F lash O n S e lf t ime r O n A u t o mat ic F lash O f f S e lf t ime r O n A u t o mat ic F lash O n S e lf t ime r O f f v Note The flash and selftimer settings are not stored when you switch...

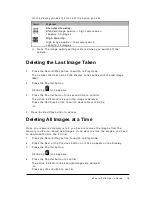
Page 18: ...appears 3 Press the Shutter button for a second time to confirm The action indicator blinks until the image is deleted Press the Rec Play button to switch back to Record mode or 3 Press the Rec Play button to cancel Deleting All Images at a Time Once your camera s memory is full you have to remove the images from the memory in order to record new images If you want to store the images you have to ...

Page 19: ...CD ROM into the CD ROM drive of your computer 6 Run the Setup file in the NetMeeting or VideoImpression folder to start the installation v Note The installer in the NetMeeting folder will also install or update your Internet Explorer if necessary 7 Follow the instructions in the successive screens v Note To send or upload images through the internet for printing on photographic paper use the AGFAn...

Page 20: ...lect the images you want to transfer to your PC by clicking the thumbnail of the picture To select several images use the Ctrl key 7 Select the Save Pictures to Disk Directory button in the TWAIN driver window 8 Select or create a folder on your computer to store your images 9 Click the Save button 10 Close the TWAIN driver by clicking the Exit button in the TWAIN driver window 11 Click the Home b...

Page 21: ...witch on the camera 2 Press the Rec Play button for 4 seconds 3 Press the Flash Timer button to select NTSC or PAL 4 Press the Rec Play button to confirm your choice Displaying Images on TV To display recorded images on TV 1 Switch off your camera 2 Plug one end of the supplied video cable into the Video port of the camera 3 Plug the other end of the video cable into the video port of the TV set 4...

Page 22: ...era to a TV set with the video cable or PC 3 Press the Next or the Previous button until the image you want to delete is displayed 4 Press the Shutter button to delete the image A blinking icon appears 5 Press the Shutter button to confirm The action indicator blinks until the image is deleted or Press any other button to cancel v Note To delete all images at a time refer to Deleting all images at...

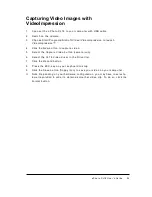
Page 23: ...he USB cable 2 Switch on the camera 3 Connect to the internet 4 Choose Start Programs Accessories Communications NetMeeting to launch MS NetMeeting 5 Select Option from the Tools menu 6 Specify the ILS Server address in the Directory Settings box 7 Select the Directory option in the Call menu 8 Choose someone to videoconference with 9 Activate the video receive function by clicking the Play button...

Page 24: ...lick the New button to capture video 5 Select the Capture Video button camera icon 6 Select the CL18 Video driver in the Driver list 7 Click the Record button 8 Press the ESC key on your keyboard to stop 9 Click the Save button floppy icon to save your video on your computer v Note Depending on your hardware configuration you may have to select a lower resolution in order to obtain a smoother vide...

Page 25: ...oes not work n The flash is off Check the flash setting Support For more information and support on your Agfa ePhoto CL18 1 Visit http support agfa com homeOffice to register see p 4 and create an Agfa e Service Account to benefit from personalized one to one on line technical support access to customized self help tools and technical information automatic e mail notification of all new support ti...

Page 26: ...of your nearest Agfa Service Office 5 Consult the Software Library Select the S o f t ware L ib rary tab to retrieve available TWAIN and video driver updates for your ePhoto CL18 camera For more information and support on Corel Print Office 2000 Consult the help system or visit http www corel com For more information and support on MS NetMeeting Consult the help system or visit http www microsoft ...

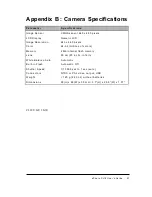
Page 27: ...ge Resolution 640 x 480 pixels Color 24 bit millions of colors Memory 2 Mb internal flash memory Lens 50 cm 20 inch infinity White Balance Auto Automatic Built in Flash Automatic Off Shutter Speed 1 10000 sec to 1 sec auto Connectors NTSC or PAL video output USB Weight 120 g 4 23 oz without batteries Dimensions 95 H x 65 W x 35 mm 3 7 H x 2 55 W x 1 37 CL18 UG V1 0 1E ...

Reviews: