AF 5078MS Quick
Start
Guide
420x297
mm
1
.
1
Digital
Photo
Frame
1
.
2
Power Supply
1
.
3
Quick Guide
1. 4
Warranty
Card
(
not
depicted
)
3
2
.
1
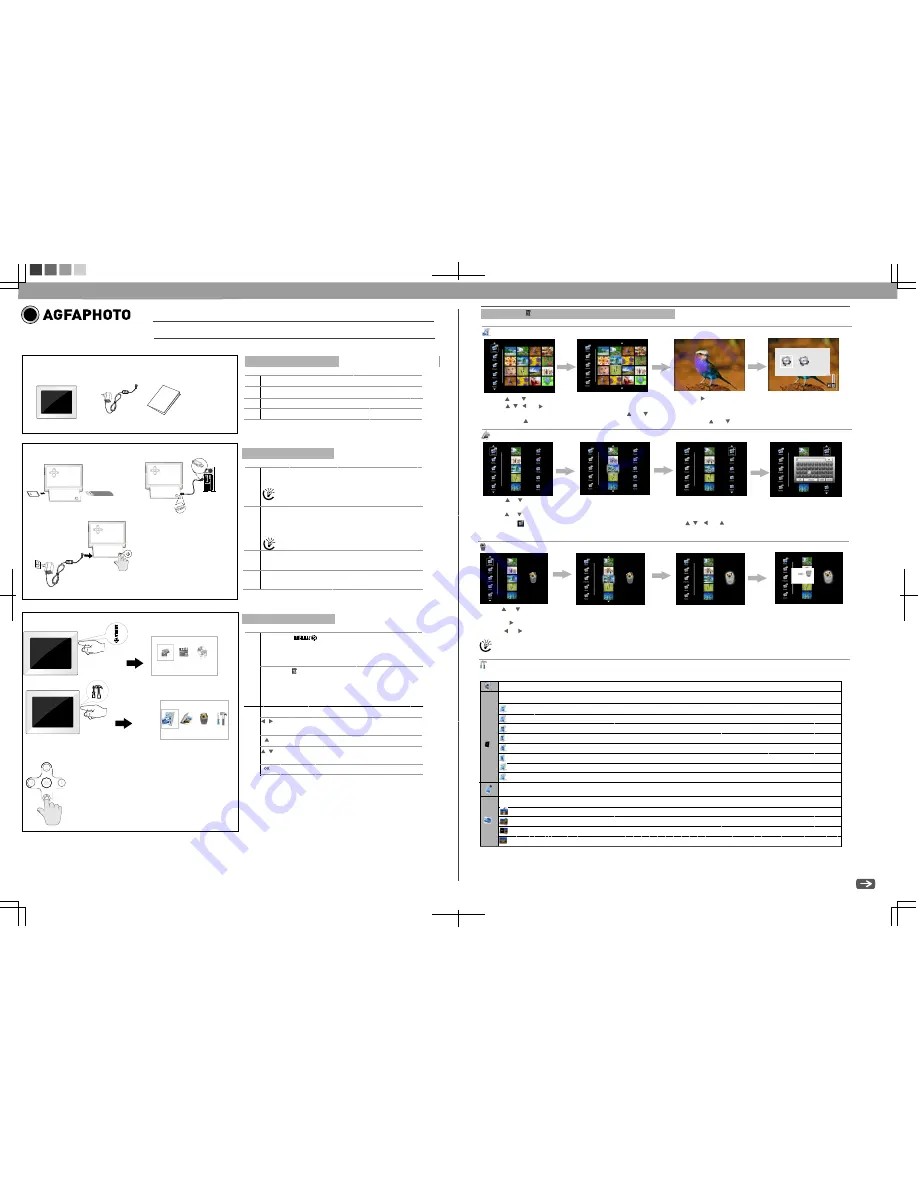
Insert a memory card (SD, MMC or MS) into the card slot.
Insert the USB device into the USB port.
1
Packing
Contents
2. 2
Connecting to a PC.
Using the USB cable(not included), you can connect your
frame to a computer to transfer files between the internal
memory and computer.
2. 3
Plug AC adaptor into the Digital Photo Frame, and plug
it into a wall outlet.
2.4
Press the POWER button on the rear of the device to
power on.
Tips
The card will only fit in one direction; do not
force it. The card should fit snugly when
properly inserted.
2
1
2 Getting Started
3
.
1 Press
the
button
to
enter
the
main
menu
.
A
:
Photo
Playback
B
:
Video
Playback
C
:
Music
Playback
3. 2
Use the direction key to select different item
.
3 Basic
Operations
A B C
3
.
1
3
.
2
A
:
Preview
Mode
B
:
Copy
Menu
C: Delete Menu
D: Setting Mode
Tips
Press
the
button
to
enter
the
setting
menu
:
/
1
.
Direction
Key
2
.
Skips to previous or next image/video/music file.
Enable music playing menu during slide show.
/
1. Direction Key
2. Adjust the volume during audio playback.
Start/Pause/Validation the playback.
fla
sh
m
r
a
em
o
y cr
d
USB drive
2.1
2.2
2.3
2.4
If you connected the frame to a computer, the
inserted memory card can not be recognized.
1.2
1.3
1.1
A
B
C
D
Photo
Copy
Menu
Photo
Preview
Mode( 16 thumbnails per page)
Press
the
button during photo playback:
1. Use or
button
to
select a folder/album on the left ,then press button.
2. Use
、 、
or
button
to
select
an
image and
press
the OK to start the slideshow.
3. Skips to the previous or next image,use the or button.To pause or start the slide show,press the OK .
4. Press the button to enter the background music setting menu. Use or button to adjust the volume.
1. Use or button to select
a source;
2. Select an
image and press the OK.
3. Use or button to select
a
folder
/
album and press the OK to start copying.
4. If select and press the OK,you can rename the album. Use
、 、
or button to select a letter/digit and press
the OK. After input all the letters/digits, select the “Enter “ and press the OK to confirm.
Photo
Delete
Menu
1. Use or
button to select
a source
and;
2. Select an
image
and press the OK.Press
the
OK
again
to
cancel
the
selections
.
3. Press
button
and
then
press
the
OK button.
4. Use
or
button
to
select
P
to
delete
,
select
Q
to cancel.
Q
Q
P
P
Setting
Mode
Icons in the setting mode:
To set
specific fun frame.
To choose the specific power start up mode.
Eco
Setting(Set the automatically power on/off time).
Album
Mp3
The
same
steps
for
music
/
video
copy
/
delete
.
:
Start up with photo slide show orderly
:
Start up with photo slide show randomly
:
Start up with video playing orderly
:
Start up with video playing randomly
:
Start up with photo slide show & then video playing orderly
:
Start up with photo slide show & then video playing randomly
:
Start up with music playing orderly
:
Start up with music playing randomly
Photo Setting(from the left to the right)
:
Rotation
:
To change the interval time for slide show.
:
To choose different transition effect for slide show.
:
To set different LCD screen
display ratio.


