Memory card installation
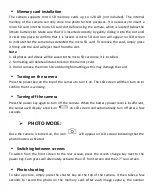
The camera supports micro SD memory cards up to 128 GB (not included). The internal
memory of the camera can only store one photo for test purposes. It is necessary to insert a
micro SD card into the micro SD card slot before using the camera, which is located below the
lithium battery slot. Make sure that it is inserted correctly by gently sliding it into the slot until
it clicks into place to confirm that it is locked. A micro SD card icon will appear on LCD screen
to indicate that the camera has detected the micro SD card. To remove the card, simply press
it firmly and the card will eject itself from the slot.
Note:
1. All photos and videos will be saved to the micro SD card once it is installed.
2. Formatting will delete all data stored on the memory card.
3. Do not remove the micro SD card during formatting as this may damage the card.
Turning on the camera
Press the power key on the top of the camera to turn it on. The LCD screen will then turn on to
confirm that it is working.
Turning off the camera
Press the power key again to turn off the camera. When the battery power level is insufficient,
the camera will display a red icon
on LCD screen and automatically turn off after a few
seconds.
PHOTO MODE:
Once the camera is turned on, the icon
will appear on LCD screen indicating that the
photo mode is activated.
Switching between screens
To switch from the front screen to the rear screen, press the screen change key next to the
power key. Each press will alternately activate the 1.8" front screen and the 2.7" rear screen.
Photo shooting
To take a picture, simply press the shutter key on the top of the camera. It then takes a few
seconds to record the photo on the memory card. After each image capture, the number
Summary of Contents for Realishot WP8000
Page 1: ......
Page 5: ... Camera description ...
Page 23: ... Description de l appareil photo ...
Page 42: ... Kamera leírása ...
Page 57: ......
Page 58: ......


