I - 5
Installation
Get Started
Connect the plug at the end of the power supply into the socket labelled ”Power” until you
hear it click.
Connect one end of the ISDN connection cable into the socket labelled SO until you her it click
in place.
Connect the other end of the cable to the NTTP of the network provider or the installed socket.
Connect the TAE Adaptors to the telephone system.
Connect the plugs of your telephone equipment to the TAE adaptors.
The default setting of the AC 14 / AC 14 WebPhonie / AC16 WebPhonie is that the first
connection is extension 11 and the second connection is extension 12.
Plug the power supply into the 230V main socket. The green LED will light up.
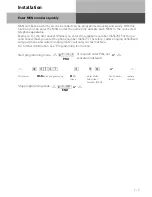
Enter the MSN numbers (see below).
You now can make calls. After lifting the telephone receiver you will hear the dial tone of the
telephone exchange.
An incoming call received on one of your MSN numbers will ring extension 11 and 12.
Summary of Contents for AC 14
Page 1: ...1 Bedienung AC 14 AC 14 WebPhonie AC 16 WebPhonie User Guide ISDN PBX System ...
Page 14: ...I 8 Installation ...
Page 42: ...U 28 User Guide ...
Page 80: ...A 10 Appendix ...
Page 82: ...S 2 Index ...


