1 - 17
System Telephones
ST 20/25
DECT 30
ST 30
Button Assignment of Specific
Functions
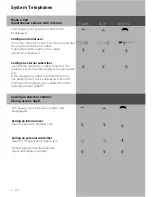
Press ENTER:to confirm selection.
Enter the phone number to which Do Not
Disturb should apply:
1 = First internal phone number
2 = Second internal phone number
1 & 2 = First and Second internal phone
numbers
Press ENTER to confirm
Enter the call mode to which Do Not
Disturb is to apply:
1 = internal calls
2 = external calls
1 & 2 = internal and external calls
Press SET to end programming.
You now can turn this feature on or
off by just pressing the allocated Button.
$
z
$
z
!
$
&
!
As described earlier (Change Button Assignment), start programming mode with SET 31and
select Button and required function.
„Do not disturb“ Function Button
Call Variant 2 (Night Service) Call
Variant 3 (Call Forwarding)Function
Button example based on Call Variant 2
1 - 17
$
z
$
z
!
$
&
!
H
z
H
z
H D
H
J
H D
Press ENTER:to confirm selection.
Press NEXT to select the Number or
Name of SO Line
to which this feature should apply.
If this feature should apply to all lines
or the line number is to be entered prior
to activation then select All or General
Press SET to end programming
Summary of Contents for AS 100 IT
Page 1: ...Manual Profi Line AS 40 40P 4000 100 IT ISDN PBX System...
Page 9: ...E 9 Introduction...
Page 10: ...1 2 System Telephones ST20 25 DECT 30 ST 30...
Page 103: ...1 95 System Telephones ST20 25 DECT 30 ST 30...
Page 104: ...1 96 System Telephones ST20 25 DECT 30 ST 30...
Page 105: ...1 97 System Telephones ST20 25 DECT 30 ST 30...
Page 106: ...2 2 Analogue and ISDN Phones...
Page 156: ...3 2 Programming your System ST 25 DECT 30 ST 30...
Page 177: ...3 23 Programming your System ST 25 DECT 30 ST 30...
Page 183: ...Communication via PC PC 7...
Page 200: ...S 6 Index Declaration of Conformity...
Page 201: ...S 7 Index...
Page 202: ...S 8 Index...
Page 203: ...S 9 Index...


