1
Turn the power switch to the Off position, then remove the power cord from the
instrument.
2
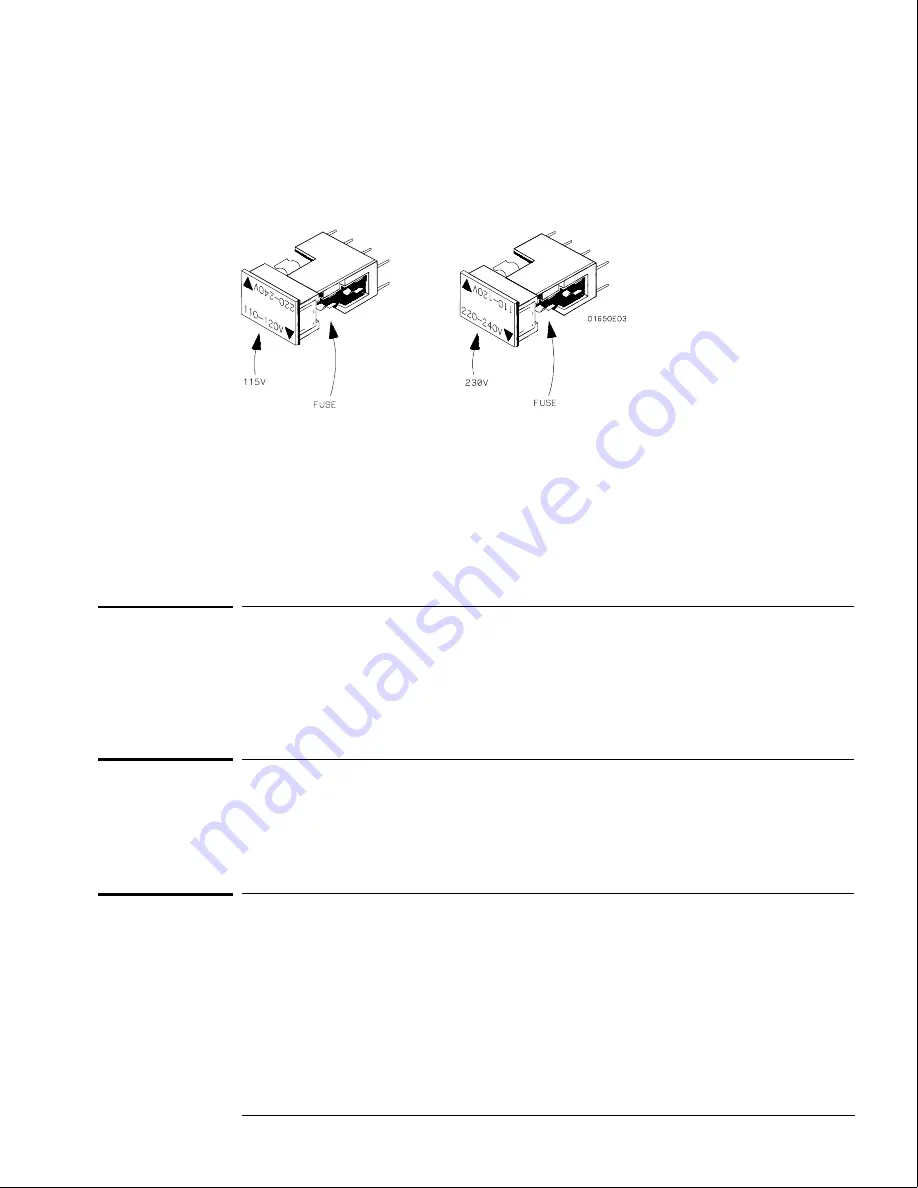
Remove the fuse module by carefully prying at the top center of the fuse module
until you can grasp it and pull it out by hand.
3
Reinsert the fuse module with the arrow for the appropriate line voltage aligned
with the arrow on the line filter assembly switch.
4
Reconnect the power cord. Turn on the instrument by setting the power switch to
the On position.
To degauss the display
If the logic analyzer has been subjected to strong magnetic fields, the CRT might
become magnetized and display data might become distorted. To correct this
condition, degauss the CRT with a conventional external television type degaussing
coil.
To clean the logic analyzer
With the instrument turned off and unplugged, use mild soap and water to clean the
front and cabinet of the logic analyzer. Harsh soap might damage the water-base
paint.
To test the logic analyzer
•
If you require a test to verify the specifications, start at the beginning of chapter 3,
"Testing Performance."
•
If you require a test to initially accept the operation, perform the self-tests in
chapter 3.
•
If the logic analyzer does not operate correctly, go to the beginning of chapter 5,
"Troubleshooting."
Preparing for Use
To degauss the display
2–5
Summary of Contents for 1664A
Page 3: ...The Agilent Technologies 1664A Logic Analyzer iii...
Page 8: ...Contents viii...
Page 22: ...2 6...
Page 91: ...Troubleshooting Flowchart 1 Troubleshooting To use the flowcharts 5 3...
Page 92: ...Troubleshooting Flowchart 2 Troubleshooting To use the flowcharts 5 4...
Page 93: ...Troubleshooting Flowchart 3 Troubleshooting To use the flowcharts 5 5...
Page 94: ...Troubleshooting Flowchart 4 Troubleshooting To use the flowcharts 5 6...
Page 95: ...Troubleshooting Flowchart 5 Troubleshooting To use the flowcharts 5 7...
Page 96: ...Troubleshooting Flowchart 6 Troubleshooting To use the flowcharts 5 8...
Page 97: ...Troubleshooting Flowchart 7 Troubleshooting To use the flowcharts 5 9...
Page 98: ...Troubleshooting Flowchart 8 Troubleshooting To use the flowcharts 5 10...
Page 99: ...Troubleshooting Flowchart 9 Troubleshooting To use the flowcharts 5 11...
Page 100: ...Troubleshooting Flowchart 10 Troubleshooting To use the flowcharts 5 12...
Page 101: ...Troubleshooting Flowchart 11 Troubleshooting To use the flowcharts 5 13...
Page 102: ...Troubleshooting Flowchart 12 Troubleshooting To use the flowcharts 5 14...
Page 124: ...Exploded View of the 1664A Replacing Assemblies 6 4...
Page 137: ...Exploded View Exploded view of the 1664A logic analyzer Replaceable Parts Exploded View 7 3...
Page 160: ...8 18...
Page 162: ......


