123
Chapter 6: Replacing Assemblies
1680A,AD-series disassembly/assembly
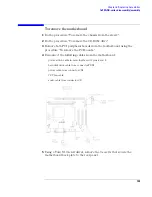
To remove the motherboard
1
Do the procedure "To remove the chassis from the sleeve".
2
Do the procedure "To remove the CD-ROM drive" .
3
Remove both PCI peripheral boards from the motherboard using the
procedure "To remove the PCI boards."
4
Disconnect the following cables from the motherboard:
power switch cable from motherboard J1 pins 6 and 8
hard disk drive cable from connector FDD1
power cable from connector CN1
CPU fan cable
audio cable from connector CD
5
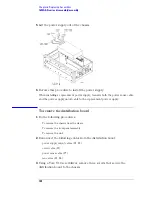
Using a Torx T-10 screwdriver, remove the 3 screws that secure the
motherboard back plate to the rear panel.
Summary of Contents for 1680 series
Page 13: ...13 Chapter 1 General Information Dimensions 1680A AD Series 1690A AD Series...
Page 74: ...74 Chapter 3 Testing Performance Performance Test Record...
Page 142: ...142 Chapter 6 Replacing Assemblies 1690A AD series disassembly assembly...
Page 172: ...172 Chapter 8 Theory of Operation Self Tests Descriptions...
Page 174: ......


