36
Chapter 3: Testing Logic Analyzer Performance
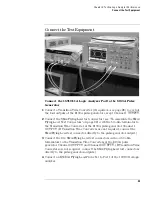
Connect the Test Equipment
Verify and adjust 8133A pulse generator DC offset
1
On the 54845A oscilloscope, select
Measure
from the menu bar at the top
of the display.
2
Select
Markers...
3
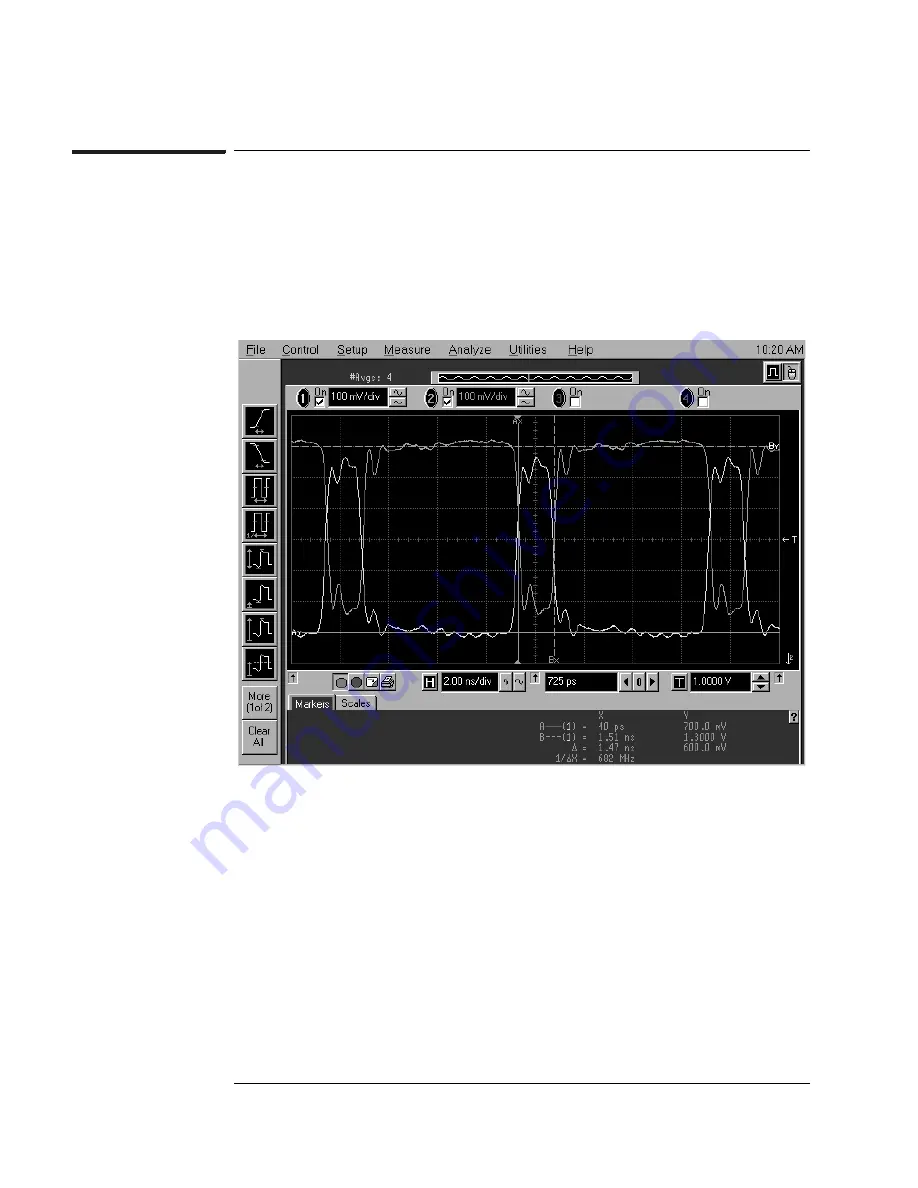
In the Markers Setup window set marker “Ay” to 0.7 V, and set marker
“By” to 1.3 V.
4
Observe the waveforms on the oscilloscope display. If they are not
centered within the “Ay” and “By” markers, adjust the 8133A pulse
generator’s Channel 1 OFFSET until the waveforms are centered as close
as possible. (The resolution of the 8133A OFFSET setting is 10 mV.)
Summary of Contents for 16900 Series
Page 3: ...3 Chapter The 16910A Logic Analyzer The 16911A Logic Analyzer...
Page 8: ...8 Contents...
Page 14: ...14 Chapter 1 General Information...
Page 18: ...18 Chapter 2 Preparing for Use...
Page 61: ...61 4 Calibrating This chapter gives you instructions for calibrating the logic analyzer...
Page 65: ...65 Chapter 5 Troubleshooting Troubleshooting Flowchart 1...
Page 66: ...66 Chapter 5 Troubleshooting Troubleshooting Flowchart 2...
Page 82: ...82 Chapter 5 Troubleshooting To test the cables 18 Return to the troubleshooting flow chart...
Page 94: ...94 Chapter 7 Replaceable Parts 16910A Exploded View Exploded view of the 16910A logic analyzer...
Page 95: ...95 Chapter 7 Replaceable Parts 16911A Exploded View Exploded view of the 16911A logic analyzer...
Page 96: ...96 Chapter 7 Replaceable Parts...
Page 102: ...102 Index...


