Agilent 4155C/4156C User’s Guide Vol.1, Edition 11
2-31
Installation
Mounting Connectors
Mounting Connectors
Previous sections described how to install the available accessories, and the
16495
Installation Guide
provides the information on how to install connector plates on the
shielding box. However, you may choose to mount connectors directly on your own
connector plate or test fixture.
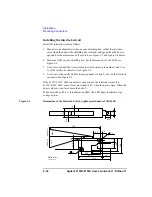
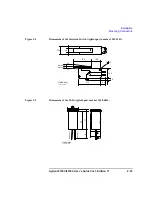
To do this, you will need to make connector holes and mount the connectors
yourself. This section contains information on connector hole dimensions.
To mount connectors:
1. Select the appropriate parts for your application. See Table 2-2.
2. Make the holes and mount the connectors. See Table 2-3.
For Kelvin connections using the 4156C SMU, use Agilent 16493K Kelvin
cable. A Kelvin cable requires a Kelvin triaxial connector, which has two
connector holes and three screw holes.
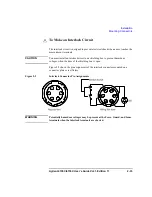
3. Build the interlock circuit shown in “To Make an Interlock Circuit” on page
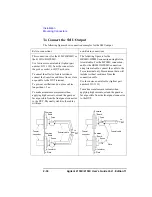
4. Attach cables from the connectors to the DUT (device under test). Refer to “To
Connect the GNDU Output”, “To Connect the SMU Output”, and “To Connect
the VSU/VMU/PGU Outputs” later in this chapter.
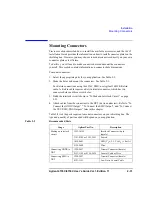
Table 2-2 lists the parts required to mount connectors on your shielding box. The
type and quantity of parts needed will depend on your application.
Table 2-2
Recommended Parts
Usage
Agilent Part No.
Description
Making an interlock
circuit
1252-1419C
Interlock Connector (6 pin,
female)
3101-0302 or 3101-3241
Switch
1450-0641
LED (V
F
≅
2.1 V @ I
F
= 10 mA)
8150-5680
Wire
Connecting GNDU to
DUT
1250-2457
Triaxial Connector (female)
8121-1189 or 8150-2639
Coaxial Cable or Wire
Connecting SMU to
DUT
1250-2457
Triaxial Connector (female)
8121-1191
Low Noise Coaxial Cable
Summary of Contents for 41501A
Page 19: ...Contents Agilent 4155C 4156C User s Guide Vol 1 Edition 11 9 Accessories and Options...
Page 20: ...Agilent 4155C 4156C User s Guide Vol 1 Edition 11 Contents...
Page 21: ...1 Introducing the 4155C 4156C...
Page 41: ...2 Installation...
Page 84: ...2 44 Agilent 4155C 4156C User s Guide Vol 1 Edition 11 Installation Maintenance...
Page 85: ...3 Connecting to Network...
Page 129: ...4 File Operations...
Page 152: ...4 24 Agilent 4155C 4156C User s Guide Vol 1 Edition 11 File Operations Backing Up a Diskette...
Page 153: ...5 Print Plot Function...
Page 198: ...5 46 Agilent 4155C 4156C User s Guide Vol 1 Edition 11 Print Plot Function Output Examples...
Page 199: ...6 External Keyboard...
Page 203: ...7 Initial Settings...
Page 209: ...8 Specifications...
Page 243: ...9 Accessories and Options...


