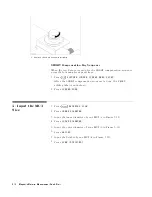
8.
Measuring
the
MUT
After
you
place
the
MUT
on
the
test
xture
,
the
measured
result
is
displayed.
P
erforming
A
utomatic
Scaling
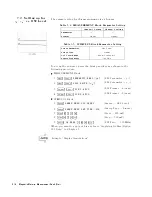
Often,
the
trace
obtained
after
specifying
the
frequency
range
is
too
large
or
too
small
vertically
for
the
grid.
However
,
by
using
the
automatic
scaling
function,
you
can
obtain
the
optimum
vertical
setting.
1.
Press
4
Chan
1
5
to
activate
channel
1.
2.
Press
4
Scale
Ref
5 .
3.
Press
NNNNNNNNNNNNNNNNNNNNNNNNNNNNNNNN
AUTO
SCALE
to
scale
the
trace
of
channel
1.
4.
Press
4
Chan
2
5
to
activate
channel
2.
5.
Press
NNNNNNNNNNNNNNNNNNNNNNNNNNNNNNNN
AUTO
SCALE
to
scale
the
trace
of
channel
2.
If
you
want
to
change
scale
manually
,
press
4
Scale
Ref
5
NNNNNNNNNNNNNNNNNNNNNNNNNNNNN
SCALE/DIV
and
turn
the
rotary
knob
or
input
scale
value
as
required.
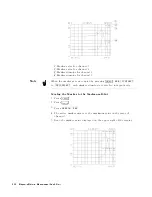
Y
ou
will
get
the
measurement
results
shown
on
the
rst
page
of
this
chapter
.
9.
Analyzing
a
Measurement
Result
If
you
can
obtain
the
correct
trace
on
the
display
,
you
can
analyze
a
measurement
result
by
using
the
marker
.
Using
the
Marker
Marker
functions
allow
you
to
read
out
the
trace
values
and
the
frequency
,
and
also
to
move
to
a
specic
point
(for
example
,
the
maximum,
the
minimum,
or
the
peak
point).
In
this
procedure
,
reading
a
measured
value
and
moving
the
marker
to
the
maximum
point
is
demonstrated.
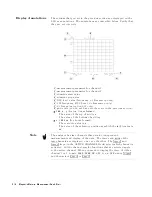
Reading
a
Measured
V
alue
1.
Press
4
Ma
rk
er
5 .
2.
Turn
the
rotary
knob
until
the
marker
moves
to
the
point
where
you
want
to
read
the
measured
value
.
3.
Read
the
marker
value
displayed
on
the
upper
right
of
the
display
.
Magnetic
Material
Measurement
Quick
Start
5-19
Summary of Contents for 4291B
Page 20: ......
Page 24: ...Figure 2 1 Contents 2 4 Installation and Set Up Guide ...
Page 26: ...Figure 2 2 Agilent Part Numbers of Power Cables 2 6 Installation and Set Up Guide ...
Page 34: ...Figure 2 7 Connecting a Keyboard 2 14 Installation and Set Up Guide ...
Page 60: ......
Page 104: ......
Page 130: ......
Page 152: ......
Page 158: ......

