Using
the
Marker
The
marker
function
allows
you
to
read
a
value
at
the
marker
,
to
read
values
at
several
points
on
the
trace
,
or
to
search
for
specic
points
(like
max/min
or
peak).
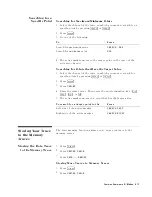
Reading
a
V
alue
Using
the
Marker
1.
Press
4
Ma
rk
er
5 .
2.
The
active
marker
is
displayed
on
the
traces
.
3.
Move
the
marker
by
performing
one
of
the
following
steps:
Turn
the
rotary
knob
until
the
marker
moves
to
the
point
where
you
want
to
read
the
measured
value
.
Enter
the
target
stimulus
by
using
numerical
keys
.
4.
Read
the
marker
value
displayed
on
the
upper
right
of
the
display
.
Reading
V
alues
by
Using
the
Sub-markers
1.
Press
4
Ma
rk
er
5 .
2.
Move
the
active
marker
to
a
point
where
you
want
to
set
a
sub-marker
.
3.
Press
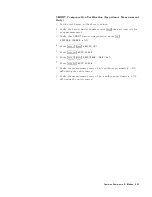
NNNNNNNNNNNNNNNNNNNNNNN
SUB
MKR
.
4.
Select
from
NNNNNNNNNNNNNNNNNNNNNNNNNNNNN
SUB
MKR
1
to
NNNNN
7
.
5.
Press
4
Utilit
y
5 .
6.
T
oggle
NNNNNNNNNNNNNNNNNNNNNNNNNNNNNNNNNNNNNNNNNNNNNNN
MKR
LIST
on
OFF
to
NNNNNNNNNNNNNNNNNNNN
ON
off
.
The
sub-marker
appears
at
the
point
at
which
the
marker
was
displayed.
Sub-markers
are
xed
horizontally
and
you
cannot
move
them.
The
sub-marker
value
can
only
be
displayed
by
using
the
marker
list.
T
o
clear
a
sub-marker
,
press
4
Ma
rk
er
5
NNNNNNNNNNNNNNNNNNNNNNNNNNNNNNNNNNNNNNNNN
CLEAR
SUB
MKR
.
Then
press
the
sub-marker
number
that
you
want
to
erase
from
the
display
.
T
o
clear
all
the
markers
,
press
4
Ma
rk
er
5
NNNNNNNNNNNNNNNNNNNNNNNNNNNNNNNNNNN
PRESET
MKRS
.
Figure
6-10.
Marker
List
6-16
Features
Common
to
All
Modes
Summary of Contents for 4291B
Page 20: ......
Page 24: ...Figure 2 1 Contents 2 4 Installation and Set Up Guide ...
Page 26: ...Figure 2 2 Agilent Part Numbers of Power Cables 2 6 Installation and Set Up Guide ...
Page 34: ...Figure 2 7 Connecting a Keyboard 2 14 Installation and Set Up Guide ...
Page 60: ......
Page 104: ......
Page 130: ......
Page 152: ......
Page 158: ......


