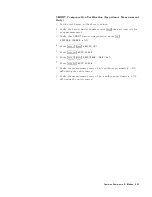
Saving
Measured
Data
for
a
Spreadsheet
1.
Insert
a
DOS
format
disk
into
the
oppy
disk
drive
.
2.
Press
4
Save
5
key
.
3.
Press
NNNNNNNNNNNNNNNNNNNNNNNNNNNNN
DATA
ONLY
and
NNNNNNNNNNNNNNNNNNNNNNNNNNNNNNNN
SAVE
ASCII
.
4.
Select
the
oppy
disk
drive
as
the
storage
device
by
toggling
to
NNNNNNNNNNNNNNNNNNNNNNNNNNNNNNNNNNNNNNNNNNNNNNN
STOR
DEV
[DISK]
.
5.
Enter
a
lename
.
Then
press
N
NNNNNNNNNNNNN
DONE
.
The
measured
data
is
saved
as
ASCII
text.
Each
value
is
separated
by
a
tab
.
When
you
open
this
le
from
the
spreadsheet
software
,
specify
the
le
format
as
the
\TEXT
with
T
AB
delimiter".
Purging
a
File
If
there
is
a
le
on
the
disk
that
has
the
same
name
you
entered
when
saving
a
le
,
the
error
message
,
\lename
error"
is
displayed.
T
o
save
the
le
,
you
must
use
another
lename
or
purge
the
old
le
.
T
o
purge
a
le
,
press
4
Save
5
NNNNNNNNNNNNNNNNNNNNNNNNNNNNNNNNNNNNNNNNNNNN
FILE
UTILITIES
NNNNNNNNNNNNNNNNNNNNNNNNNNNNNNNN
PURGE
FILE
then
select
the
displayed
lename
by
pressing
the
associated
softkey
.
Initializing
a
Disk/Memory
Disk
for
Use
1.
Insert
a
disk
that
is
not
write
protected
(if
you
are
initializing
the
memory
disk,
skip
this
step).
2.
Press
4
Save
5
NNNNNNNNNNNNNNNNNNNNNNNNNNNNNNNNNNNNNNNNNNNN
FILE
UTILITIES
.
3.
Select
the
disk
format
(either
DOS
or
LIF)
by
toggling
NNNNNNNNNNNNNNNNNNNNNNNNNNNNNNNNNNNNNN
FORMAT
[DOS]
or
NNNNNNNNNNNNNNNNN
[LIF]
.
4.
Select
the
initialized
storage
device
by
toggling
NNNNNNNNNNNNNNNNNNNNNNNNNNNNNNNNNNNNNNNNNNNNNNN
STOR
DEV
[DISK]
or
NNNNNNNNNNNNNNNNNNNNNNNNNN
[MEMORY]
.
5.
Press
NNNNNNNNNNNNNNNNNNNNNNNNNNNNNNNN
INITIALIZE
.
6.
Press
NNNNNNNNNNNNNNNNNNNNNNNNNNNNNNNNNNNNNNNNNNNNNNNNNNNNNNNNNNNNNN
INITIALIZE
DISK:
YES
to
initialize
the
memory
disk
or
the
disk.
Printing
Printing
a
Display
Image
1.
Connect
a
printer
to
the
analyzer
.
2.
Press
4
Copy
5
N
NNNNNNNNNNNNNNNNNNNNNNNNNNNNNNNNNNNNNNNNNNNNNNNNN
[STANDARD]
to
print.
T
o
stop
printing
in
progress
,
press
4
Copy
5
NNNNNNNNNNNNNNNNNNNNNNNNNNNNNNNN
COPY
ABORT
.
Features
Common
to
All
Modes
6-21
Summary of Contents for 4291B
Page 20: ......
Page 24: ...Figure 2 1 Contents 2 4 Installation and Set Up Guide ...
Page 26: ...Figure 2 2 Agilent Part Numbers of Power Cables 2 6 Installation and Set Up Guide ...
Page 34: ...Figure 2 7 Connecting a Keyboard 2 14 Installation and Set Up Guide ...
Page 60: ......
Page 104: ......
Page 130: ......
Page 152: ......
Page 158: ......


