102
Chapter 5
Setting Measurement Conditions
Setting Time Delay for Measurement
Setting Time Delay for Measurement
Time delay can be set for the period before sweep or actual measurement starts after the
measurement signal is applied to DUT. This function is useful, for example, when a certain
period is required before the characteristics of DUT become stable after the signal is
applied. Another application of this function is to observe changes in impedance of DUT in
the time domain for a long span.
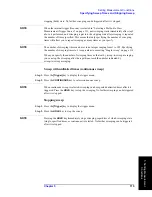
Setting with sweep time
Setting the time period for an entire sweep (sweep time) makes it possible to set equal time
delays (time delay at a measurement point): from applying the signal to starting
measurement and then to each measurement point.
Step 1.
Press the
[Sweep]
key to display the sweep menu.
Step 2.
Press the
TIME
key to display the sweep time menu.
Step 3.
Press the
SWEEP TIME
key. This will display the current setting for the sweep time value
in the parameter settings area in the upper-left part of the screen.
Step 4.
Use the keys or the rotary knob in the ENTRY block in one of the following ways to
specify a value for the sweep time.
•
Enter the desired value with the numeric keys (
[0]
to
[9]
,
[.]
, and
[-]
) and then press one
of the unit keys (
[G/n]
,
[M/
m
]
,
[k/m]
, or
[
´
1]
).
•
Turn the rotary knob (
m
m
m
m
) until the desired value is set.
•
Press the step keys ([
][
¯
]) to set the desired value.
Setting with time delay at measurement point
Time delay for each measurement point (time delay at a measurement point) can be
directly set.
Step 1.
Press the
[Sweep]
key to display the sweep menu.
Step 2.
Press the
TIME
key to display the sweep time menu.
Step 3.
Press the
POINT DELAY
key. This will display the current setting for the time delay at a
point in the parameter settings area in the upper-left part of the screen.
Step 4.
Use the keys or the rotary knob in the ENTRY block in one of the following ways to
specify a value for the time delay at a measurement point.
•
Enter the desired value with the numeric keys (
[0]
to
[9]
,
[.]
, and
[-]
) and then press one
of the unit keys (
[G/n]
,
[M/
m
]
,
[k/m]
, or
[
´
1]
).
•
Turn the rotary knob (
m
m
m
m
) until the desired value is set.
•
Press the step keys ([
][
¯
]) to set the desired value.
Summary of Contents for 4294A
Page 1: ......
Page 2: ......
Page 4: ......
Page 5: ......
Page 6: ......
Page 8: ......
Page 16: ...8 ...
Page 30: ...22 Chapter1 Installation Power Cable Figure 1 2 Alternative Power Cable Options ...
Page 70: ...62 Chapter3 Front Rear Panel and LCD Display Items Displayed on the LCD ...
Page 436: ...428 AppendixB Key Definitions Softkeys displayed by pressing the Recall key ...
Page 454: ...446 AppendixC Error messages WRONG I O PORT DIRECTION ...
Page 468: ......

