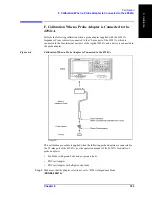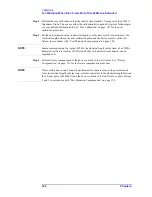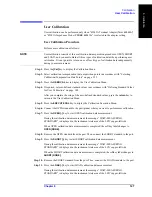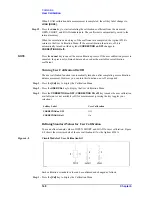
Chapter 6
147
Calibration
User Calibration
6. Ca
libr
ati
on
User Calibration
User calibration can be performed only when “42942A Terminal Adapter (
7mm 42942A
)”
or “42941A Impedance Probe (
PROBE 42941A
)” is selected in the adapter setting.
User Calibration Procedure
Perform user calibration as follows:
NOTE
User calibration consists of three calibration data acquisition procedures: OPEN, SHORT,
and LOAD, and you must obtain all three types of calibration data when performing user
calibration. It is not possible to turn on or off each type of calibration data independently
during your measurement.
Step 1.
Press the
[Cal]
key to display the Calibration Menu.
Step 2.
Select calibration (compensation) data acquisition points in accordance with “Selecting
Calibration/Compensation Data Points” on page 155.
Step 3.
Press the
USER CAL
key to display the User Calibration Menu.
Step 4.
If required, set user-defined standard values in accordance with “Defining Standard Values
for User Calibration” on page 148.
After you complete the setup of the user-defined standard values, press the
return
key to
return to the User Calibration Menu.
Step 5.
Press the
EXECUTE CAL
key to display the Calibration Execution Menu.
Step 6.
Connect the OPEN standard to the port (plane) where you want to perform user calibration.
Step 7.
Press the
OPEN [-]
key to start OPEN calibration data measurement.
During the calibration data measurement, the message “WAIT--MEASURING
STANDARD” is displayed in the instrument state area of the LCD's upper-left side.
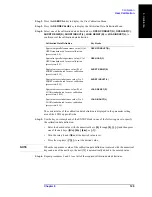
When OPEN calibration data measurement is completed, the softkey label changes to
OPEN [DONE]
.
Step 8.
Remove the OPEN standard from the port. Then, connect the SHORT standard to the port.
Step 9.
Press the
SHORT [-]
key to start SHORT calibration data measurement.
During the calibration data measurement, the message “WAIT--MEASURING
STANDARD” is displayed in the instrument state area of the LCD's upper-left side.
When the SHORT calibration data measurement is completed, the softkey label changes to
SHORT [DONE]
.
Step 10.
Remove the SHORT standard from the port. Then, connect the LOAD standard to the port.
Step 11.
Press the
LOAD [-]
key to start LOAD calibration data measurement.
During the calibration data measurement, the message “WAIT--MEASURING
STANDARD” is displayed in the instrument state area of the LCD's upper-left side.
Summary of Contents for 4294A
Page 1: ......
Page 2: ......
Page 4: ......
Page 5: ......
Page 6: ......
Page 8: ......
Page 16: ...8 ...
Page 30: ...22 Chapter1 Installation Power Cable Figure 1 2 Alternative Power Cable Options ...
Page 70: ...62 Chapter3 Front Rear Panel and LCD Display Items Displayed on the LCD ...
Page 436: ...428 AppendixB Key Definitions Softkeys displayed by pressing the Recall key ...
Page 454: ...446 AppendixC Error messages WRONG I O PORT DIRECTION ...
Page 468: ......

