Chapter 3 Replacing Assemblies
Removing the Shroud
Assembly Level Service Guide
3-7
3
Removing the Shroud
Use the following procedure to remove the shroud:
WARNING
WHEN THE SHROUD IS REMOVED FROM THE COUNTER,
DANGEROUS LINE VOLTAGES THAT CAN CAUSE SERIOUS
INJURY ARE EXPOSED. ALWAYS DISCONNECT THE POWER
CORD BEFORE REMOVING THE SHROUD.
1
Remove all detachable connector fittings and/or adapters from the
connectors on the instrument’s front panel.
2
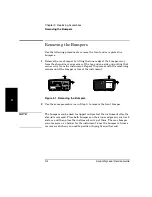
Remove the front and rear bumpers (see “Removing the Bumpers” on
page 3-4).
NOTE
The bumpers can be used to support and protect the instrument after the
shroud is removed. Place both bumpers on their inner edges on your work
surface, and then place the instrument on top of them. The rear bumper
can also serve as a holder for the instrument (once the bumper retainers
are removed) when you need to position it upright on either end.
3
Remove the handle (see “Removing the Handle” on page 3-5).
4
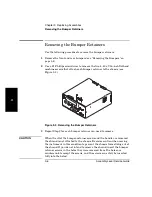
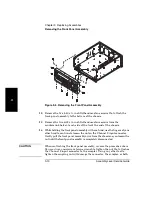
Remove the four bumper retainers from the front end of the instrument
(see Figure 3-3 and “Removing the Bumper Retainers” on page 3-6).
5
Remove the six bumper retainers at the rear end of the chassis.
6
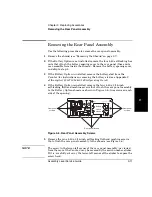
Slide the shroud off the chassis to the rear (see Figure 3-4), and place it
aside (if the shroud does not slide easily off the chassis, press on the rear
panel with one hand while pulling the shroud with the other hand).
Summary of Contents for 53147A
Page 6: ...Contents vi Assembly Level Service Guide ...
Page 13: ...1 Performance Tests Verifying Specifications ...
Page 55: ...2 Service ...
Page 88: ...Chapter 2 Service Troubleshooting the Instrument 2 34 Assembly Level Service Guide 2 ...
Page 89: ...3 Replacing Assemblies Disassembly and Reassembly ...
Page 104: ...Chapter 3 Replacing Assemblies Removing the Power Supply 3 16 Assembly Level Service Guide 3 ...
Page 105: ...4 Replaceable Parts ...
Page 116: ...Chapter 4 Replaceable Parts Parts Identification 4 12 Assembly Level Service Guide 4 ...
Page 117: ...5 Backdating ...
Page 119: ...6 Specifications ...
Page 125: ...A Rack Mounting the Instrument ...
Page 134: ...Index Index 4 Assembly Level Service Guide Index ...


