4- 12
MegaZoom Concepts and Oscilloscope Operation
To setup the Horizontal time base
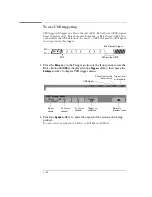
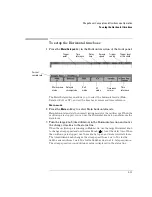
4 Press the
Vernier
softkey to turn on the time base vernier.
The
Vernier
softkey allows you to change the sweep speed in smaller increments
with the time/division knob. The sweep speed remains fully calibrated when
Vernier is on. The value is displayed in the status line at the top of the display.
When Vernier is turned off, the Horizontal sweep speed knob changes the time
base sweep speed in a 1-2-5 step sequence.
5 Note the setting of the
Time Ref
(time reference) softkey.
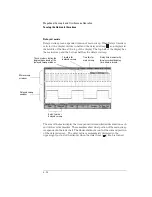
Time reference is the reference point on the display for delay time. Time
reference can be set to one graticule from the left or right edge, or to the center
of the display.
A small hollow triangle (
∇
)
at the top of the graticule marks the position of the
time reference. When delay time is set to zero, the trigger point indicator (
▼
)
overlays the time reference indicator.
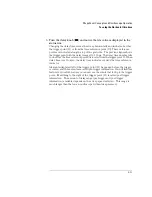
Turning the Horizontal sweep speed knob will expand or contract the waveform
about the time reference point (
∇
). Turning the Horizontal delay time (
)
knob in Main mode will move the trigger point indicator (
▼
) to the left or right
of the time reference point (
∇
).
The time reference position sets the initial position of the trigger event within
acquisition memory and on the display, with delay set to 0. The delay setting
sets the specific location of the trigger event with respect to the time reference
position. The time reference setting affects the delayed sweep as described in
the following ways:
• When the horizontal mode is set to Main, the delay positions the main
sweep relative to the trigger. This delay is a fixed number. Changing this
delay value does not affect the sweep speed.
• When the horizontal mode is set to Delayed, the delay controls the position
of the delayed sweep window inside the main sweep display. This delayed
delay value is independent of sampling interval and sweep speed.
Changing this delay value does not effect the position of the main window.
Summary of Contents for 54621A
Page 4: ...iv ...
Page 10: ...Contents 6 ...
Page 11: ...1 Getting Started ...
Page 38: ...1 28 ...
Page 39: ...2 Front Panel Overview ...
Page 63: ...3 Triggering the Oscilloscope ...
Page 117: ...4 MegaZoom Concepts and Oscilloscope Operation ...
Page 171: ...5 Making Measurements ...
Page 222: ...5 52 Making Measurements Making overshoot and preshoot measurements ...
Page 223: ...6 Utilities ...
Page 239: ...7 Performance Characteristics ...
Page 250: ...7 12 Performance Characteristics Agilent 54620 series Performance Characteristics ...
Page 260: ...7 22 ...

