background image

Safety Practices and Hazards 

Agilent 55B AA Spectrometer User’s Guide 


21 


the documentation package that accompanies the product containing a copy 

of the Declaration of Conformity. The Declaration of Conformity is the legal 

declaration by Agilent that the product complies with the directives listed 

above and shows the EN standards to which the product was tested to 

demonstrate compliance.  

Electromagnetic compatibility 

EN55011/CISPR11 

Group 1 ISM equipment:


group 1 contains all ISM equipment in which there is 

intentionally generated and/or used conductively coupled radio- frequency energy 

which is necessary for the internal functioning of the equipment itself. 
Class A equipment


is equipment suitable for use in all establishments other than 

domestic and those directly connected to a low voltage power supply network 

which supplies buildings used for domestic purposes. 
This device complies with the requirements of CISPR11, Group 1, Class A as 

radiation professional equipment. Therefore, there may be potential difficulties in 

ensuring electromagnetic compatibility in other environments, due to conducted 

as well as radiated disturbances. 
Operation is subject to the following two conditions: 

1


This device may not cause harmful interference. 

2


This device must accept any interference received, including interference that 

may cause undesired operation. 

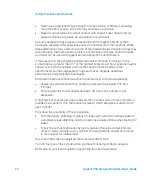
If this equipment does cause harmful interference to radio or television reception, 

which can be determined by turning the equipment off and on, the user is 

encouraged to try one or more of the following measures:


1


Relocate the radio or antenna. 

2


Move the device away from the radio or television. 

3


Plug the device into a different electrical outlet, so that the device and the 

radio or television are on separate electrical circuits. 

4


Make sure that all peripheral devices are also certified. 

Summary of Contents for 55B AA

Page 1: ...Agilent 55B AA Spectrometer User s Guide ...

Page 2: ...hould Agilent and the user have a separate written agreement with warranty terms covering the material in this document that conflict with these terms the warranty terms in the separate agreement shall control Technology Licenses The hardware and or software described in this document are furnished under a license and may be used or copied only in accordance with the terms of such license Restrict...

Page 3: ...nd fumes 13 Compressed gases and cylinders 14 Gas hoses and connections 17 Ultraviolet radiation 18 Other 18 Warning symbols 18 CE compliance 20 Electromagnetic compatibility 21 EN55011 CISPR11 21 ICES NMB 001 22 Flame operation 22 Flammable solvents 22 Burners 24 Nebulizer 25 Liquid trap 26 Heat hazards 27 Perchloric acid 27 Flashbacks 29 What to do in the event of a flashback 31 ...

Page 4: ...ntal specifications 34 3 Overview 37 Installation checklist 37 Instrument overview 37 Power 39 Gas hoses 39 Printer 39 Accessories 39 Moving your instrument 40 Lamp compartment 40 Hollow cathode lamps 40 Deuterium D2 lamp 41 Sample compartment 41 Nebulizer block assembly 42 Burner 46 Sample compartment front panel 46 Flame shield 47 Chimney 48 4 Interface 49 Front panel overview 49 ...

Page 5: ... Instrument Parameters page 58 Measurement parameters page 60 Options page 61 Optimization page 63 Calibration Parameters page 64 Results page 64 5 Operation 67 Pre analysis checklist 67 Start the system 69 Method development 69 Select the language of the interface 69 Load a method 70 Save Delete methods 71 Set the instrument parameters 72 Set the measurement parameters 72 Define the calibration s...

Page 6: ...solvents 83 Set the uptake rate for organic solvents 84 Flame types 84 Performance checks 85 Calibrate the method 86 Measure standards manually 86 Measure standards using SIPS 10 86 Display the calibration graph 87 Reslope the calibration 87 Sample measurement 88 Measure samples manually 88 Measure samples with SIPS 88 Results 89 Print the results 89 Output to LIMS system 90 Shut down the system 9...

Page 7: ...he nebulizer block 97 Impact bead 101 Spray chamber 108 Disassemble the spray chamber 108 To clean the spray chamber 109 To assemble the spray chamber 109 Assemble the spray chamber and nebulizer block 111 Attach the drain tube float liquid trap to the nebulizer block 111 Installing the spray chamber nebulizer assembly 113 Burners 116 To install a burner 116 Clean the burner 118 Gas supplies 122 L...

Page 8: ...04 LIMS port error 140 2851 SIPS comms error 140 3800 EEPROM storage error 140 5004 Signals not increasing 141 5005 Slope test failure 141 5006 Calibration fit failure 141 5008 Reslope signal out of range 141 6000 Check HC lamp selection 141 9159 EEPROM checksum zero wl 141 9160 EEPROM checksum mono correction 142 9307 RBC Mains frequency below 48Hz 142 9308 RBC Mains frequency 142 9309 RBC Mains ...

Page 9: ...HC lamp energy 145 9322 No peak high HC lamp energy 145 9323 Low emission no peak 145 9324 High emission no peak 146 9329 No peak detected 146 9330 No peak detected 146 9337 Instrument fault 310V PSU 147 9339 Mono resetting Please wait 147 9415 Instrument fault lamp code 147 9422 Instrument fault lamp current 147 9514 Instrument signal saturation 148 9517 Low HC lamp energy 148 9518 High HC lamp e...

Page 10: ...ot fitted 150 9914 No gas control unit 150 9915 Flame shield open 150 9916 Fault gas pressure sensor 151 9917 No oxidant gas pressure 151 9920 Fault flame detected 151 9921 Flame out detected 151 9922 Flame shutdown gas type 151 9923 Flame ignition timeout 152 9934 Flame shutdown host offline 152 9937 Flame pressure relief bung 152 9938 Liquid trap not ready 152 9xxx GPIB fault 152 9xxx Instrument...

Page 11: ... in a manner not specified by the manufacturer the protection provided by the equipment may be impaired Operation of an atomic absorption spectrometer can involve the use of compressed gases flames and hazardous materials including corrosive fluids and flammable liquids Unskilled improper or careless use of this instrument can create explosion hazards fire hazards or other hazards which can cause ...

Page 12: ...erating at dangerous voltages Contact with these items can cause death serious injury or painful electric shock Panels and covers that are retained by fasteners which require the use of a tool for removal may be opened only by Agilent trained and certified personnel Consult the manuals or product labels supplied with your PC monitor printer plotter water cooling system and or vacuum pump to determ...

Page 13: ...eters per minute 200 scfm Locate the exhaust fan at least 3 meters 10 feet away from the flame and as close to the outlet as possible The motor must be mounted away from the hot gases and plastic parts must not be used as they will melt Fit a back draft damper to the outlet end of the system Equip the exhaust fan power supply with a pilot light situated immediately adjacent to the instrument to in...

Page 14: ...codes and regulations Used and stored only in a vertical position Secured to an immovable structure or a properly constructed cylinder stand Stored in an adequately ventilated area to prevent toxic or explosive accumulations Moved only on a properly constructed trolley Keep cylinders cool This rule applies to every cylinder of compressed gas Cylinders have pressure relief devices that will release...

Page 15: ...tion WARNING Explosion Hazard Never use oxygen or oxygen enriched air as the oxidant because this will result in an explosion NEVER use any gas except acetylene as the fuel gas Acetylene Use acetylene at pressures lower than 105 kPa 15 psig At pressures above this level acetylene can explode spontaneously In some instances local regulations may prohibit the use of acetylene at pressures above 62 k...

Page 16: ...ter Acetone in the spectrometer can damage seals O rings and hoses degrade analytical performance and precipitate flashbacks Minimize the amount of acetone which is carried over with the acetylene by Replacing cylinders when their contents pressure drops below 700 kPa 100 psi Ensuring that the rate of acetylene drawn off from each cylinder is not excessive If high rates of consumption are observed...

Page 17: ...pply systems can be dangerous A leak can create an explosion hazard a fire hazard or can result in an oxygen deficient atmosphere Such hazards can cause death serious injury asphyxiation anesthetic effects and serious damage to equipment and property Use only approved regulators connectors and fittings If in any doubt consult your local gas supplier or your Agilent representative Ensure that all g...

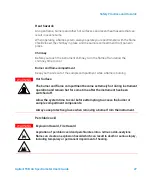
Page 18: ... your spectrometer with the flame shield closed and the sample compartment front panel and chimney in place Other Other messages appear in the manual where appropriate and detail advice information specific to the topic or helpful tips NOTE A Note message is used to give advice or information Warning symbols The following is a list of symbols that appear in conjunction with warnings in this manual...

Page 19: ...rd Fire hazard Heavy weight danger to feet Heavy weight danger to hands Hot surface Moving parts Noxious gas Toxic hazard The following symbol may be used on warning labels attached to the instrument When you see this symbol refer to the relevant operation or service manual for the correct procedure referred to by that warning label ...

Page 20: ...nsure proper grounding CE compliance Your Agilent AA instrument has been designed to comply with the requirements of the Electromagnetic Compatibility EMC Directive and the Low Voltage electrical safety Directive commonly referred to as the LVD of the European Union Agilent has confirmed that each product complies with the relevant Directives by testing a prototype against the prescribed European ...

Page 21: ... which supplies buildings used for domestic purposes This device complies with the requirements of CISPR11 Group 1 Class A as radiation professional equipment Therefore there may be potential difficulties in ensuring electromagnetic compatibility in other environments due to conducted as well as radiated disturbances Operation is subject to the following two conditions 1 This device may not cause ...

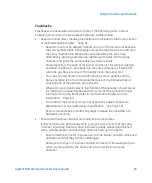
Page 22: ...r burns Always remember that the combination of a flame and flammable solvents can present a serious hazard All relevant safety practices governing the use of flammable solvents must be strictly followed To reduce the possibility of fire or explosion When initially selecting an organic solvent choose a solvent having the highest flash point consistent with your analytical requirements Never use a ...

Page 23: ...els use vessels made of a material that will not shatter in the event of a flashback Metal vessels will corrode and are difficult to determine the level of liquid in them Ensure that your waste vessel is below the instrument and located in an open well ventilated position where you can see it Never locate the vessel in a confined space When your analytical program has been completed or at the end ...

Page 24: ... remain hot for some time after the flame has been turned off Always use protective gloves to handle hot burners Burners are clearly identified by the fuel oxidant combination for which they are intended Always fit the correct burner Never attempt to use an air acetylene burner for nitrous oxide acetylene as this will cause a flashback To ensure safe operation of burners Use only acetylene as the ...

Page 25: ...s turn the flame off before attempting to clean the burner slot Never leave a flame unattended Never disassemble modify or ill treat a burner Ensure Table 9 Maximum allowable burner slot width is never exceeded see Page 121 Nebulizer Incorrect assembly and fitting of nebulizers to an atomic absorption spectrometer can create explosion hazards and fire hazards which can cause serious injury to pers...

Page 26: ...designed to provide a liquid seal under all normal conditions with solutions having a specific gravity greater than 0 75 A drainage tube must be connected to the drain outlet the lower nipple on the liquid trap and led to a suitable waste vessel The free end of the tube must remain above the liquid in the waste vessel Do not use glass waste vessels use vessels made of a material that will not shat...

Page 27: ...ep your hands out of the sample compartment while a flame is burning WARNING Hot Surface The burner and flame compartment become extremely hot during instrument operation and remain hot for some time after the instrument has been switched off Allow the system time to cool before attempting to access the burner or sample compartment components Always use protective gloves when removing a burner fro...

Page 28: ...rganic solvent residues NOTE When solvent extractions of perchloric solutions are performed some of the acid may dissolve in the organic solvent that is subsequently aspirated Also if the organic solution is aspirated while floating on the surface of the acid do not allow the capillary tube to drop below the organic layer and suck up aqueous perchloric acid Never allow the burner to clog Clean the...

Page 29: ...rbon particles during flame operation is not recommended because of the increased risk of knocking one of the particles down the slot When using an organic solvent the thimble of the nebulizer should be set in a forward or reduced uptake position to restrict the amount of liquid fuel that is fed to the flame refer to the Operation chapter for more information Page 67 The width of the burner slot m...

Page 30: ... trap It must slope downwards running parallel to the drain tube to prevent it becoming blocked should any liquid drain out The tube must be vented to an active exhaust system All of the above points must be observed because a sudden surge of waste liquid can affect the pressure in the spray chamber and result in a flashback Observe the recommendations concerning the use of Acetylene see Page 15 F...

Page 31: ...as necessary Check the burner condition and O rings for damage Check the O rings within the spray chamber especially the pressure relief bung for damage Check the nebulizer for damage Check the optical windows on either side of the flame area for damage 5 Clean up any spills in the sample introduction area or on the instrument 6 Review the previous section for detailed information on how to preven...

Page 32: ...Safety Practices and Hazards 32 Agilent 55B AA Spectrometer User s Guide This page is intentionally left bank ...

Page 33: ...ude Automatic monochromator slit width and gas selection Two fixed hollow cathode lamp positions with automatic lamp selection Universal Mark 7 spray chamber nebulizer with Mark 7 burner Deuterium background correction and wide range PMT Site preparation requirements Prior to receiving your instrument you will have been provided with an Agilent AA Systems Site Preparation Guide which describes the...

Page 34: ...ng conventions have been used throughout this manual Single quotes indicate menu options and field names e g select the Cookbook option Bold text indicates the Keypad keys on your Agilent AA instrument e g press the Read key ALL CAPITALS indicates text you must type in from the keyboard attached to an external PC Specifications Your Agilent AA instrument is designed for indoor use only See the Agi...

Page 35: ...AA lamp 1 2 Burndy circular 6 way optional WARNING Shock Hazard To maintain safety only UltrAA accessories should be used at this connection Front lamp compartment Deuterium lamp Molex 3 way connection behind lamp panel Figure 2 Deuterium lamp cover panel WARNING Shock Hazard To maintain safety only the deuterium lamp assembly should be used at this connection ...

Page 36: ...by Agilent trained and certified personnel Gas supplies Comply with the gas supply requirements on the rear of the instrument these are the most current specifications Table 2 Gas supply requirements C2H2 Acetylene Air N2O Nitrous Oxide Air purge Instrument grade 99 0 pure Clean dry free of oil Instrument grade 99 5 pure Must be clean dry Air filter to be used Allowed range 65 100 kPa 245 455 kPa ...

Page 37: ... Installation checklist Before operating the equipment complete the following tasks Connect the system components Connect the equipment to the power supply and check the setting of the two voltage selection switches see Power Page 39 Install the hardware components Lamps Nebulizer Spray chamber Burner Sample compartment front panel Flame shield Chimney Provide a suitable waste vessel Instrument ov...

Page 38: ... view Figure 4 Agilent 55B AA flame atomic absorption spectrometer rear view Your Agilent AA instrument is supplied with a country kit that includes a set of gas hose fittings and a mains cable which suits the common utility standard of the local region NOTE The country kit must be ordered with the Agilent AA instrument ...

Page 39: ...nto the mains power supply Gas hoses Three rubber hoses are permanently attached to the instrument Each hose is two meters long and is color coded for air black nitrous oxide blue and acetylene red Each hose is fitted with female fittings suitable for USA standard regulators NOTE For gas hose connection details refer to the Agilent AA Site Preparation Guide Printer If you are using a printer it sh...

Page 40: ... carrying the instrument into position Lamp compartment Figure 5 Lamp compartment The lamp compartment contains positions for two hollow cathode lamps The D2 lamp module is located within the lamp compartment on the lower left side and is interlocked to prevent inadvertent exposure to hazardous UV radiation Power to the lamp is removed when the deuterium lamp panel is removed Hollow cathode lamps ...

Page 41: ...enance section Page 122 Deuterium D2 lamp You will need to replace the D2 lamp approximately every 1000 hours of operation For instructions on how to change a D2 lamp refer to the Maintenance chapter Page 124 Sample compartment Figure 6 Sample compartment The major components in the Sample Compartment includes Nebulizer block assembly Nebulizer Spray chamber Burner Sample compartment front panel F...

Page 42: ...emoved Nebulizer block assembly The nebulizer block connects the following components Nebulizer Impact bead Liquid trap Drain tube Spray chamber Figure 8 Nebulizer block assembly for products with serial numbers 0110xxxx and later Burner Nebulizer block Drain outlet Vapor outlet Burner adjustment Thimble Liquid trap ...

Page 43: ...e capillary hits the glass impact bead and forms a fine mist of the sample solution Instructions on replacing the Impact bead are in the Maintenance section see Page 101 Liquid trap The liquid trap enables excess solution to be drained from the nebulizer assembly The trap is designed to provide a gas seal under all normal gas flows when using solutions having a specific gravity greater than 0 75 C...

Page 44: ...filled to the correct Fill the liquid trap with the solvent Page 68 a magnet in the float triggers an interlock which enables the burner to ignite For instructions on how to set up the nebulizer to suit your analytical requirements refer to Nebulizer setup see Page 81 Spray chamber Figure 9 Nebulizer spray chamber components The spray chamber attaches to the rear of the nebulizer block via a bayon...

Page 45: ... 11 Back of the mixing paddles When installing the mixing paddles the front end of the paddle is inserted into the front of the spray chamber the end further away from the nebulizer Pressure relief bung A pressure relief bung is located at the rear of the spray chamber In the event of a flashback occurring this bung is ejected to relieve excess pressure For safety the bung points away from the ope...

Page 46: ...length Instructions on how to Nebulizer burners are in the Maintenance section see Page 93 CAUTION Only Mark VI A or Mark 7 burners should be used with this system Previous versions should not be installed WARNING Explosion Hazard Fire Hazard Hot Surface Improper or careless use of burners can create explosion hazards and fire hazards which can cause death serious injury to personnel and damage to...

Page 47: ...zards from the flame An interlock prevents you from igniting the flame unless the flame shield is closed Always fit the flame shield before using your instrument and leave it closed unless you need access to the burner WARNING Eye Hazard Some flames emit hazardous levels of UV radiation which can cause cataracts and skin cancer Always keep the flame shield sample compartment front panel and chimne...

Page 48: ...action hood of your exhaust system This distance should be increased when operating a nitrous oxide flame due to the higher flame height To fit the chimney 1 Hold the chimney over the sample compartment with the warning information facing towards the front of the instrument 2 Lower the chimney onto the sample compartment NOTE A distinct click sound can be heard from the micro switches within the i...

Page 49: ...es an overview of the Agilent 55B AA user interface Read through this chapter while exploring the interface Figure 13 Front panel interface Front panel overview The front panel of the Agilent 55B AA consists of the following Liquid Crystal Display LCD Keypad Speaker to provide audible prompts or warnings Memory for storage of up to 30 customized methods ...

Page 50: ...tus area The status area displays the method details and solution results Method details include settings relating to the method currently loaded such as method number and element Solution results include The mean value in absorbance Abs or transmittance T if the method is uncalibrated or Concentration if calibrated and Precision in RSD or Pr depending on the measurement mode Method details are di...

Page 51: ... specific information such as input fields text or graphics Refer to Display pages on Page 58 for details on the different pages in the system Message line The message line displays information warning error messages This information may be the permissible range of the current parameter or a warning or error message Refer to Troubleshooting Page 135 for a detailed description of possible error mes...

Page 52: ...acetylene burner and ignition sequence N2O acetylene burner showing narrower slit and ignition sequence Gas type and oxidant pressure status icons are as follows Table 4 Gas type and oxidant pressure icons and their meaning Icon Meaning Air acetylene oxidant pressure present Air acetylene no oxidant pressure Air only oxidant pressure present Air only no oxidant pressure Nitrous oxide acetylene oxi...

Page 53: ...Page keys There are seven page keys each of which take you to a specific page in the system These keys are Load Method Instrument Parameters Options Optimization Measurement Parameters Calibrate and Results For a description of the function of each page refer to Display pages on Page 58 The Calibrate key is also used in conjunction with the Alt key to view the calibration graph There are other dia...

Page 54: ...Left and Right They are used to move around the display The Enter key is used to update the parameter setting with the new value NOTE If the cursor is moved out of a field without Enter being pressed the field s contents returns to its previous value Enter is also used on the Optimization page to perform a Rescale command Alt key Figure 19 Alt key Alt is used in conjunction with other keys to modi...

Page 55: ... ALT 54 SIPS arm pressure page Anywhere ALT 59 Keyboard diagnostic Anywhere ALT Calibrate Exit keyboard diagnostics Keyboard diagnostic page ALT Results Exit keyboard diagnostics Keyboard diagnostic page ALT Left Menu scroll text Any menu ALT Right Menu scroll text Any menu ALT Read Instrument zero Optimization Results or Calibrate page Read Read next standard Calibrate page Reslope Perform reslop...

Page 56: ...n a given page are only downloaded and executed when another page is selected The exception to this is when changing back and forth between the Load Method page and the Instrument Parameters page The parameters are not downloaded at this time allowing you to load a method and edit the instrument parameters simultaneously Open another page for the Load Method and Instrument Parameter page changes t...

Page 57: ...y on the required menu option to access the available sub menu In the example below to change the Instrument mode to Emission 1 Press Right arrow 2 Press Down 3 Exit the Instrument Parameters page for the changes to be incorporated Figure 22 An example of a Parameter menu NOTE An arrow appearing in the frame around a menu indicates there are additional options available Use the Up Down arrow keys ...

Page 58: ... pressed the cursor moves to the next field providing the value is valid If the value entered is invalid the cursor remains on the entry field and the value is not accepted Display pages The system consists of seven pages each accessed by pressing its corresponding key The pages are as follows Load Method page The Load Method page is used to load either a user method or a cookbook method You shoul...

Page 59: ...tting is the recommended current for the lamp of the selected element Standby current Defines the current for the standby lamp default is 0 0 D2 correction Defines whether D2 correction is to be used or not default is No Gas type Defines the flame type to be used for the analysis default is the recommended gas type for the selected element Wavelength Defines the wavelength to be used for the curre...

Page 60: ...surement parameters to be used NOTE The Measurement mode is located on the Options page see Page 61 This parameter must be set prior to setting the remaining measurement parameters Batch no Next sample Identifies the next sample to be measured This has no effect on the reading Pre read delay Defines the time allowed for the sample to reach the light path and for the signal to stabilize Read time D...

Page 61: ...ad time for the set number of replicates PROMT PRecision Optimized Measurement Time The signal is averaged until the desired precision RSD is achieved or until the end of the Read time NOTE When SIPS is being used in a PROMPT set this value to 0 3 Integrate repeat Replicates are read continuously without being initiated by the Read key Pressing the Read key takes the most recent replicate as the s...

Page 62: ...ion factor to be used Primarily intended for where the majority of samples are suspected over range This will prevent unnecessary dilution factor changes thus speeding up sample throughput Prime time Defines the SIPS pre read delay which is the time required to pump solutions introduced with SIPS through the pump tubing from the solution vessel to the T piece Pump delay time Defines the time taken...

Page 63: ...face default is English Refer to Select the language of the interface Page 69 for instructions on how to change the language of the interface Optimization page The Optimization page is used to set up the hollow cathode lamps the D2 lamp and the signal In Absorbance mode there are up to three options present on the page HC lamp default position 1 D2 lamp and Signal In Emission mode only Signal is a...

Page 64: ...ing a value of zero will delete the current and subsequent standards The reslope standard is set by selecting the desired standard and pressing the Reslope key The standard selected will be marked with an asterisk beside it to indicate it is the Reslope standard See Reslope the calibration on Page 87 for more information Results page The Results page displays the solution results in tabular format...

Page 65: ...Pr in PROMT mode and Remains blank in Integrate Repeat mode with the heading Pr Mean The mean of the cumulated readings for each solution DF dilution factor The dilution of the solution Range available is 1 000 200 0 Only includes values if SIPS is enabled Reps last replicate value The value of each replicateas it is calculated Only used for Integration mode Each value is used to calculate the mea...

Page 66: ...Interface 66 Agilent 55B AA Spectrometer User s Guide This page is intentionally left blank ...

Page 67: ...ncluding How to develop methods Optimize the system Perform measurements and Print the results It is assumed that the appropriate hardware has been correctly installed and that you are familiar with the interface Pre analysis checklist To prepare for analysis 1 Check that all the required hardware including SIPS and printer if necessary is correctly installed 2 Turn on the instrument and any perip...

Page 68: ...5 4 Inspect the gas hoses for damage replacing any damaged hoses Turn on the gas supplies to your instrument and test all hoses and connections for leaks If a leak is found turn off the gas supplies immediately and rectify the problem 5 Fill the liquid trap with the solvent being used until the float just starts to move If the liquid trap has not been filled to the correct level or if the drain tu...

Page 69: ...ion tests When the initialization setup is complete the Load Method page is displayed For instructions on how to start any accessories refer to the manuals supplied with the accessories Method development A method stores the parameters to be used for analysis such as instrument measurement and calibration settings You must have a method loaded in order to run samples There are two types of methods...

Page 70: ... available for supported languages Load a method You can Load a cookbook method Customize your own user method or Load an existing user method To load a cookbook method 1 Press the Load Method button 2 Select Cookbook 3 Select the appropriate element group 4 Select the required element from the list 5 Press Enter The cookbook parameters will load Element Method number Instrument mode Active lamp c...

Page 71: ...omized methods Slots that are occupied are displayed on the Load Method page A method can be saved into any slot even if the slot is already occupied by an existing method The existing method will be overwritten by the new method without a request for confirmation To save a method 1 Press the Instrument Parameters button 2 Move the highlight to the Save Method option and press Enter 3 Select an em...

Page 72: ...e width of the Slit Set the measurement parameters All measurement parameters are set on the Measurement Parameters page with the exception of the Measurement mode and the use of SIPS which are set on the Options page To set the measurement parameters 1 Select the Options page and specify The Measurement mode Whether SIPS is enabled or not If you choose to enable SIPS you will also need to set the...

Page 73: ... bulk standard and the Reslope standard is set at 3 For more information about Reslope the calibration see Page 87 To enter the calibration information 1 Press the Calibrate button The Calibration Parameters page appears 2 Move the highlight to the Conc1 field and enter the concentration of standard The number of decimal places entered will set the number of decimal places used for the remaining s...

Page 74: ...n previously used for a non Agilent lamp NOTE Lamps are not used in Emission mode Models that use this mode do not require lamp alignment Signal optimization is performed while aspirating the top bulk standard to carry out the wavelength peaking procedure To align a hollow cathode lamp 1 Load a Method 2 Ensure the required lamp is installed in the correct position This is defined on the Instrument...

Page 75: ...have the correct lamp for the current method If the correct lamp is installed press Enter to Rescale This will bring the signal back into range for the display 7 Repeat the previous step with the other adjustment knob D2 lamp The D2 lamp only needs aligning after a new D2 lamp has been installed To align a D2 lamp 1 On the Optimize page select the D2 lamp option 2 Maximize the signal a Watch the l...

Page 76: ... Rescale This will bring the signal back into range for display A signal that becomes too large should also be rescaled 3 Repeat the previous step with the second D2 lamp adjustment knob Align the burner 1 Allow approximately 10 15 minutes for the hollow cathode lamp to warm up and ensure nothing is in the optical path 2 Rotate the burner by squeezing the prongs of the rotation handle until the sl...

Page 77: ...dditional burner cleaning and alignment strips are available from Agilent 4 Place the alignment card halfway along the burner slot Position the card with the vertical line perpendicular to the slot Figure 33 Card with vertical line perpendicular to the slot 5 Rotate the burner adjustment knobs Figure 34 below to position the burner horizontally and vertically with the light beam in the target area...

Page 78: ...vent Fill the liquid trap with the solvent being used until the float just starts to move If the liquid trap has not been filled to the correct level or if the drain tube has been left out an interlock in the float prevents the ignition of the burner The interlock will also shut down the flame if the liquid level falls below the required minimum during operation The drain tube is positioned slopin...

Page 79: ...distilled water and the bung has been installed correctly The exhaust system has been checked and the Gas supplies are sufficient for the analysis Refer Page 36 To light the flame 1 Press and hold the Flame on button until the flame ignites Figure 35 Flame on button If the ignition sequence times out before the flame ignites release the button wait about five seconds and restart the sequence CAUTI...

Page 80: ...0 mL of the appropriate solvent Optimize the flame signal To optimize the flame signal 1 Press the Optimize key and select the Signal option 2 Aspirate the blank and press the Alt and Read keys together to perform an Instrument Zero 3 Aspirate a standard solution that will give an absorbance of at least 0 2 If you are in emission mode aspirate the bulk standard or the highest concentration standar...

Page 81: ...imized You can now take readings measure your calibration standards or perform a reslope as described in the following sections Nebulizer setup This section assumes you have correctly assembled the nebulizer and installed the nebulizer spray chamber assembly in the sample compartment The nebulizer is fully adjustable allowing you to change the position of the internal capillary to vary the uptake ...

Page 82: ... Take one length of the narrow bore 0 38 mm ID plastic capillary tubing supplied with your nebulizer 2 Fit the flared end of this tubing to the nebulizer capillary trying to fit the other end will damage the tubing 3 Set up the instrument to measure absorbance using an easily atomized element such as copper in an air acetylene flame Since the uptake rate will be low the initial sensitivity will be...

Page 83: ...ndard containers To set the nebulizer to low vacuum mode 1 Fit the wide bore 0 64 mm ID tubing to the capillary 2 Loosen the locking ring and turn the thimble and ring fully clockwise The nebulizer is now ready for use NOTE At this setting the uptake rate will be sensitive to the hydrostatic head of the liquid in the sample container thus care is required to minimize variations in liquid levels in...

Page 84: ... previous section 3 Slowly rotate the thimble clockwise until the flame is beginning to turn fuel rich Some yellow may be seen 4 Tighten the locking ring against the nebulizer block to prevent movement of the thimble during normal operation 5 Measure and record the uptake rate This should be between 3 and 6 5 mL min The nebulizer is now ready for use If you have just installed the nebulizer you sh...

Page 85: ...bulizer to maximum uptake rate thimble fully clockwise 2 Prepare an aqueous solution of copper with a concentration of 5 mg mL 3 Set the instrument up to measure the absorbance of copper in an air acetylene flame 4 With the system fully optimized as described in Optimization on Page 74 aspirate distilled water from a 10 mL calibrated cylinder for a carefully timed period and calculate the uptake r...

Page 86: ...or number and refer to Troubleshooting see page 135 for a description of the problem Measure standards manually To measure the calibration standards manually 1 Define the standards to be used for the calibration 2 Select the Cal Blank by moving the focus to the Conc0 field aspirate the blank and press the Read key 3 Select Conc1 aspirate the first standard and press the Read key 4 Repeat Step 3 fo...

Page 87: ...the Arrow keys to move the cross hairs on the graph The numbers displayed indicate the current signal and concentration at the location of the cross hairs Reslope the calibration Reslopes are a quick way of adjusting the slope of the current calibration The nominated standard indicated on the Calibration Parameters page by an asterisk is remeasured a concentration calculated for the Reslope standa...

Page 88: ...ple the sample highlighted on the Results page and press the Read key 4 Repeat the previous step for the remaining samples Measure samples with SIPS You can use SIPS 10 to perform automatic dilution of over range samples If the sample is over range SIPS automatically dilutes the sample being tested and measurement continues The dilution factor used is given on the Results page and the final diluti...

Page 89: ...tion results to an external printer using the RS 232 9 pin cable to connect the instrument to your PC or printer Figure 40 RS 232 9 pin socket located on the rear of the instrument If the printer is not a serial printer use a serial to parallel converter To print the results 1 Go to Options page Printer Text 2 Set the required Baud rate and Lines per page 3 Ensure the instrument is connected to th...

Page 90: ... data is output the layout is as follows Calibration Standard ID Concentration Background Absorbance Mean Absorbance Replicates Absorbances Batch Number Sample Number Concentration Background Absorbance Mean Absorbance Replicates Absorbances Shut down the system Prior to shutting down the system at the end of the working day you should aspirate pure solvent for 10 minutes To shut down the system 1...

Page 91: ...22 Lamps 122 Fuses 126 This chapter describes how to maintain your Agilent 55B AA system You should keep a record in your Instrument Log Book of all maintenance carried out CAUTION Before you remove any hardware you must shut down the instrument Maintenance schedule general Daily Check the exhaust system has positive extraction Check the gas supplies Check all hoses and connections for damage leak...

Page 92: ...sembly thoroughly at the end of every working day by aspirating at least 50 mL of the appropriate solvent through the system Test all connections for leaks with a brush and soap solution or a proprietary leak detecting solution Never use a naked flame when testing for leaks Rectify all leaks before lighting the flame Test the nebulizer for leaks If any leakage is detected replace the internal O ri...

Page 93: ...gent to clean the cover When analyzing biological samples wipe the instrument with chlorhexidine in 95 ethanol Windows Clean the windows 1 Clean the sample compartment window and the lamp compartment windows with a gentle stream of filtered air or inert gas or a brush similar to those used to clean camera lenses 2 If the windows are dirty wipe them using an optical tissue held in plastic tweezers ...

Page 94: ... the liquid trap drain outlet If fitted detach the length of tubing from the liquid trap vapor outlet 7 Unscrew both knurled retaining screws on the side of the nebulizer block 8 Pull the complete nebulizer spray chamber assembly sideways until it is clear of the mounting and remove the assembly from the sample compartment 9 Remove the liquid trap Hold the nebulizer spray chamber assembly firmly i...

Page 95: ...de 10 O ring 3 16 ID x 5 16 OD x 1 16 11 Venturi Figure 42 Nebulizer block and specialized tools 1 Venturi extraction tool 2 Nebulizer tool 3 Nebulizer block front face To disassemble the nebulizer 1 Hold the nebulizer block front face up 2 Unscrew the thimble in a counter clockwise direction and remove the thimble and locking ring Use the large end of the nebulizer tool to unscrew the white plast...

Page 96: ...he impact bead in the adjuster block and move the Remove the impact bead to the side see Page 101 6 Insert the small end of the venturi extraction tool into the venturi Figure 43 Insert the extraction tool into the venturi 7 Push down on the extraction tool and both the venturi and capillary guide are removed 8 Carefully inspect all components for wear and corrosion Replace all faulty items Instru...

Page 97: ...7 Check for a blockage at the junction between the plastic capillary tubing and the capillary assembly If a blockage is evident either cut off the clogged section of plastic capillary or fit a new piece Ensure the plastic capillary tubing fits tightly on the nebulizer capillary Cut off only the required amount of the plastic tubing that is required to remove the blockage Reassemble the nebulizer b...

Page 98: ...ssemble the components of the nebulizer 1 Hold the nebulizer block front end up 2 Place the venturi in the nebulizer body thin end first Figure 44 Insert Venturi into Nebulizer Block Place the capillary guide into the nebulizer body with the O ring end up Figure 45 Insert Capillary Guide into the Nebulizer Block 3 Place the large end of the venturi extraction tool over the capillary guide 4 Push d...

Page 99: ...7 Insert spring over the capillary assembly 1 Spring 2 O ring 3 Capillary assembly 6 Insert the capillary assembly and spring into the capillary guide Figure 48 Capillary assembly and spring being inserted into the capillary guide 7 Screw the white plastic insert into the nebulizer block using the large end of the Nebulizer tool Figure 49 Screw the white plastic insert into the Nebulizer block ...

Page 100: ...o the Nebulizer block 9 Screw the clamp bush guide into the white plastic insert using the small end of the Nebulizer tool Do not over tighten 10 Check the spring is operational by pushing the capillary assembly with a screw driver The assembly should move in and out freely Figure 51 Check spring function 11 Thread the thimble and locking ring over the capillary 12 Screw the thimble onto the nebul...

Page 101: ...t effect on the sensitivity and noise performance of the instrument This section describes how to remove and replace the impact bead Figure 52 Impact bead components 1 Impact bead 2 Impact bead adjustment block 3 Impact bead locking screw 4 Impact bead adjustment screw 5 O ring 6 Trapping screw 7 Clamping screw 8 O ring 3 16 ID Check the impact bead for erosion or other damage If the bead is damag...

Page 102: ...crew driver 4 Using a slight twisting motion remove the impact bead from the nebulizer block Figure 54 Glass Impact Bead removed from the back of the Nebulizer Block NOTE You should only perform the remainder of this procedure if the bead is broken and trapped in the adjuster block 5 Loosen the Trapping screw 3 4 turns The Trapping screw retains the Impact bead adjustment screw in the nebulizer bl...

Page 103: ...56 Remove the impact bead adjustment screw front of the nebulizer 7 Loosen the Clamping screw to remove the Impact bead adjustment block Figure 57 Loosen the clamping screw side of nebulizer 8 Remove the Impact bead adjustment block from the nebulizer block it should drop out once the Clamping screw is sufficiently loosened WARNING Eye Hazard This procedure may dislodge small fragments of glass To...

Page 104: ...Insert the Impact bead adjustment block into the bottom of the nebulizer block Ensure the hole in the Impact bead adjustment block is aligned with the opening in the nebulizer block This enables the assembly of the Impact bead adjustment screw Figure 59 Align holes to enable assembly with the Impact bead adjustment screw 2 Replace the Impact bead adjustment screw by gently pushing past the O ring ...

Page 105: ...e of the nebulizer 5 Loosen the Trapping screw one turn This enables free movement of the Impact bead adjustment screw 6 Tighten the Clamping screw clockwise until it gently touches the Impact bead adjustment block Do not over tighten Figure 62 Tighten the clamping screw side of nebulizer 7 Loosen the Clamping screw one eighth of a turn This restricts the horizontal movement of the Impact bead adj...

Page 106: ...bead for pitting cracks or breaks The efficiency of the impact bead can be degraded by surface cracks pitting and the accumulation of solid material The reduction in bead efficiency can cause lower absorbance readings and noisy signals Ensure the Impact bead adjustment screw operates properly 12 If necessary remove the old impact bead as described in the previous section 13 Carefully insert the ta...

Page 107: ...hat there is a small even gap of approximately 0 5 mm between the impact bead and the venturi throat Figure 66 Even gap of around 0 5mm between the impact bead and the venturi throat 16 Carefully tighten the Impact bead locking screw Check that the impact bead will not rotate under gentle pressure 17 Turn the impact bead adjustment screw counter clockwise until the block appears midway in the cuto...

Page 108: ...ble 8 Spray chamber cleaning schedule Test material Frequency Cleaning method Organic or hazardous After each analysis Disassemble and clean Inorganic non hazardous or aqueous solutions End of each day Aspirate 0 1 detergent solution for 10 minutes Inorganic non hazardous or aqueous solutions Every 1 4 weeks depending on use Disassemble and clean At the end of every working day by aspirating at le...

Page 109: ...ings are lubricated with distilled water 7 Re assemble the spray chamber according to the instructions below To assemble the spray chamber NOTE Touching or otherwise contaminating any part of the mixing paddles will degrade the performance of the spray chamber For cleaning instructions see To clean the spray chamber Page 109 1 Position the front boss end of the mixing paddles in the opening at the...

Page 110: ...ddle is about to enter the spray chamber 4 Check that the paddles are still positioned with the vertical blade edges and then carefully push the back paddle into the spray chamber using a blunt inert and clean object for example a plastic stirring rod until the front paddle is against the shoulder at the front of the spray chamber 5 Lubricate the O ring of the pressure relief bung with distilled w...

Page 111: ...mber into the rear end of the nebulizer block Twist the spray chamber turn clockwise to lock the bayonet mount Attach the drain tube float liquid trap to the nebulizer block This applies to products with serial numbers 0110xxxx and later 1 Hold the nebulizer block spray chamber assembly upside down so that the float falls clear of the hand and screw the new drain tube into the nebulizer block see ...

Page 112: ...e into the trap ensuring that the float drops into the space between the two ribs that are opposite the two vent nipples see Figure 71 below Figure 71 Lower the drain tube and float into the trap 3 Push the trap home and then twist it 1 4 turn clockwise to lock it into position see Figure 72 below Figure 72 Lock the trap into position ...

Page 113: ...t or laboratory NEVER attempt to light a flame unless the liquid trap is filled with solvent so that the float just starts to move Figure 73 Complete nebulizer spray chamber assembly The complete spray chamber nebulizer assembly refer Figure 73 above is ready to be installed in the sample compartment of the instrument Installing the spray chamber nebulizer assembly CAUTION Always check the assembl...

Page 114: ... time so that the assembly is pulled up evenly into place see Figure 75 above Tighten both screws firmly with the fingers only 3 Place a suitable wide necked waste vessel in a convenient position at floor level The waste vessel must be made of a non glass material which will not shatter in the event of a flashback or fire Locate your waste vessel in an open well ventilated area where you can see i...

Page 115: ...sels made of a material that will not shatter in the event of a flashback Do not use glass vessels 4 If you are using materials that produce hazardous or flammable vapors attach a convenient length of 9 mm ID tubing to the upper outlet of the liquid trap 5 Lead the free end of the tubing out from the sample compartment parallel to the drain tubing The tubing must slope downwards for its entire len...

Page 116: ...e disassembled modified or mistreated ALWAYS use the correct procedure to clean the burner slot since the use of a burner with an oversize slot can cause a flashback Failure to follow correct procedures can cause death injury or property damage To install a burner 1 Check the O ring on the burner It must be supple and free from nicks or cracks to ensure that the burner makes a gas tight seal with ...

Page 117: ...tion push the burner down as far as it will go Do not touch the burner slot 6 Ensure the neck and O ring are fully inserted into the spray chamber 7 Position the burner in the sample compartment with the slot in the burner aligned along the optical path Figure 78 below and the plate with the warning towards the front of the instrument 8 Squeeze the prongs of the rotation handle together to move th...

Page 118: ...osive and can cause severe burns when they contact the skin Preparation of acid soak solutions and any soaking should be done under an extraction fume hood It is essential that appropriate protective clothing be worn at all times when handling acids If acid contacts the skin wash off with copious amounts of water and seek medical attention immediately To clean the burner 1 Extinguish the flame 2 A...

Page 119: ...nverted burner in an ultrasonic bath containing dilute laboratory detergent for approximately 10 minutes 10 Rinse with distilled water and allow to dry TIP To speed up drying dry the burner with a paper or lint free towel and then use compressed oil free air or inert gas NOTE In the following the steps ensure the card does not tear or disintegrate This may clog the burner slot causing uneven atomi...

Page 120: ...ure 82 Slide the burner cleaning card in and out of the slot NOTE If the deposits are baked on hard their removal may require some effort and several cards may be required CAUTION Under no circumstances should a metal strip or implement be used on or in the burner slot as it will scratch the surface and promote the rapid buildup of carbon or other solids 14 Place some metal polishing liquid on the...

Page 121: ...p of the burner slot should be clean and shiny to indicate that all deposits have been cleaned off 18 If necessary repeat some or all the previous steps until the burner slot is clean Table 9 Maximum allowable burner slot width N2O Air Mark VIA 0 47 mm 0 0185 in Mark 7 0 46 mm 0 0181 in 0 54 mm 0 021 in Burners cannot be refurbished and must be replaced when the maximum slot widths are exceeded NO...

Page 122: ...on of all regulators 3 Ensure that shut off valves are functioning correctly Lamps CAUTION Care must be taken when handling lamps Always hold the lamp by its base Do not touch the quartz window at the end of the lamp Touching the glass envelope will reduce the lamps efficiency To install a hollow cathode lamp 1 Open the lamp compartment door 2 Ensure that the required lamp position is turned off T...

Page 123: ...uartz window at the end of the lamp Removing hollow cathode lamps To remove a hollow cathode lamp 1 Open the lamp compartment door 2 Ensure that the lamp is turned off This is controlled from the Instrument Parameters page of the LCD display Set the Active current field to zero for more information see Instrument Parameters page Page 58 WARNING Hot Surface The lamp will become very hot during oper...

Page 124: ...fied personnel for advice WARNING Hot Surface The D2 lamp and its cover become very hot during operation To prevent skin burns allow the assembly to cool down before removing CAUTION Do not handle the D2 lamp or hollow cathode lamp optical surfaces with bare hands To change a D2 lamp 1 Turn the instrument off and unplug the instrument from the power source 2 Allow time for the D2 lamp and housing ...

Page 125: ...mp aperture 3 shown in Figure 87 Figure 87 D2 lamp alignment top view 9 Rotate the lamp so that the face with the aperture 4 is parallel with the top edge of the bracket 5 see Figure 88 below Figure 88 D2 lamp alignment end view 10 Tighten the Philips head screw to secure the lamp in the holder 11 Reconnect the D2 lamp plug 12 Replace the lamp assembly in the lamp compartment 13 Replace the thumbs...

Page 126: ...ent rating in amperes the breaking capacity H heavy L low and the voltage rating in volts This code must correspond to the code appearing next to the fuse holders WARNING Shock Hazard Fire Hazard Hot Surface To prevent reduced safety protection or unwanted fusing ALWAYS ensure that the code on the fuse cap matches the printed information shown adjacent to the fuse holders To check a fuse 1 Disconn...

Page 127: ...t the fuses are the correct type and are not damaged Replace if necessary 6 Replace the fuse holder in the instrument and reconnect the instrument to the mains power supply NOTE If a fuse blows repeatedly it may indicate other problems with the instrument Contact your local Agilent sales office and arrange a service call ...

Page 128: ...Maintenance 128 Agilent 55B AA Spectrometer User s Guide This page is intentionally left blank ...

Page 129: ...ed See the Agilent website for part number and ordering information at www agilent com Sample lists Figure 90 Nebulizer components 1 Thimble capillary adjuster 2 Locking ring 3 Clamp bush guide 4 Ertalyte bush bearing 5 Capillary assembly 6 O ring 1 32 in ID x 3 32 in OD x 1 32 in nitrile 7 Spring 8 Capillary guide 9 Venturi 10 O ring 3 16 in ID x 5 16 in OD x 1 16 in nitrile O ring 3 16 in ID x 5...

Page 130: ...in tube float liquid trap 12 Kit nebulizer block Mark 7 13 Kit liquid trap system integrated comprising float liquid trap and drain tube 14 O ring nitrile O ring organics 15 Spray chamber molding fluorinated 16 Mixing paddles 17 Pressure relief bung 18 O ring pressure relief bung nitrile O ring pressure relief bung organics 19 Air acetylene burner Mark 7 N20 acetylene burner Mark 7 12 14 15 16 17 ...

Page 131: ...ssembly showing new drain tube float liquid trap Figure 93 Various components from the nebulizer block 20 Impact bead glass or PTFE packet of 5 21 Clamp bead adjuster 22 Impact bead locking screw PEEK 23 Trapping screw stainless steel 24 Plug grey PEEK 25 O ring 3 16 in ID 13 23 24 25 20 21 22 ...

Page 132: ...mber bung and liquid trap Aqueous o ring kit Organics o ring kit Capillary tubing standard Capillary tubing Hi vac Nebulizer tool capillary extraction Nebulizer tool venture extraction Burner cleaning and alignment strip packet of 100 Nebulizer cleaning wire Covers doors Flame shield Sample compartment front panel lower Flame shield window only Fuses T4 A H 250 V ...

Page 133: ...ser s Guide 133 Miscellaneous Drip tray Chimney Serial to parallel converter 240 V 110 V SpectrAA mouse mat Kit Agilent AA keyboard overlays Includes overlays in French German Italian and Spanish Kit spray chamber stand Remote read footswitch ...

Page 134: ...Spare Parts 134 Agilent 55B AA Spectrometer User s Guide This page is intentionally left blank ...

Page 135: ...um mono correction 142 9307 RBC Mains frequency below 48Hz 142 9308 RBC Mains frequency 142 9309 RBC Mains frequency above 62Hz 142 9310 Optical RBC frequency 143 9311 Instrument fault 12V PSU 143 9312 Instrument fault 12V PSU 143 9313 Instrument fault 5V PSU 143 9316 Wavelength out of range 143 9317 No peak low HC lamp energy 143 9318 No peak high HC lamp energy 144 9319 No peak low BC lamp energ...

Page 136: ...149 9529 Background lamp interlock 149 9530 Instrument fault signal diagnostics 149 9531 No lamp current detected 150 9602 Instrument fault mono datum 150 9911 No burner fitted 150 9912 N2O burner not fitted 150 9914 No gas control unit 150 9915 Flame shield open 150 9916 Fault gas pressure sensor 151 9917 No oxidant gas pressure 151 9920 Fault flame detected 151 9921 Flame out detected 151 9922 F...

Page 137: ...f the liquid trap interlock in the burner adjuster 4 Spray chamber bung fault a Check pressure relief bung is correctly installed in the spray chamber b Check operation of pressure relief bung interlock 5 Lack of control of gas flows a Check as for 1a b Check for blockages in gas supply lines 6 High oxidant flow a Check O rings in nebulizer block b Check nebulizer is correctly assembled and adjust...

Page 138: ... operation of Ignite push button d If flame sensed error message displayed check as for fault 7 e Check flame shield interlock 11 Poor light throughput a Check lamp alignment b Clean lamp windows 12 High gain readings a Check PMT supply b Change HC lamp c Check as for fault 11 13 Low sensitivity with flame a Check nebulizer uptake rate b Check nebulizer capillary is not blocked c Check impact bead...

Page 139: ... acetone has not been allowed to enter the instrument 15 When using SIPS the high standards curve excessively a Check nebulizer uptake rate is faster than fastest SIPS pump rate 16 No peak found a Check as for fault 11 b Check correct wavelength selected c For flame emission check sufficient concentration of solution and the high standard is used to optimize d Check that the correct hollow cathode...

Page 140: ...er to perform some action W Warning Provides information about a system difficulty or potential difficulty which the user should be aware of E Error A message relating to a condition that will terminate the current operation The system will continue to run but the operation will have failed 0804 LIMS port error A communication error or problem has been identified with the LIMS Laboratory Informati...

Page 141: ...and press Read 5005 Slope test failure The calibration has failed The slope of the calibration curve changes too much between successive standard signal readings 5006 Calibration fit failure The calibration has failed A calibration curve could not be fitted to the measured standards Effective calibration is indicated by the symbol Cal in the bottom right of the display screen area 5008 Reslope sig...

Page 142: ...ble beam instruments only Faulty Mains Supply to the instrument If the error persists a service call may be required 9308 RBC Mains frequency The instrument detected a power mains supply fault Mains frequency out of range Possible causes include Power supply failure Faulty RBC Rotating Beam Combiner on double beam instruments only Faulty Mains Supply to the instrument If the error persists a servi...

Page 143: ...may be required 9313 Instrument fault 5V PSU Instrument Fault The instrument detected a problem with the 5 volt supply A service call may be required 9316 Wavelength out of range The Instrument is reporting that the current method has specified a wavelength that is out of range for the Photomultiplier Tube PMT Possible causes include A method wavelength suitable for a Wide Range PMT was specified ...

Page 144: ...een set to its lowest value but the hollow cathode lamp signal was too high Possible causes include Hollow cathode lamp misaligned Faulty hollow cathode lamp Faulty PMT or related circuits 9319 No peak low BC lamp energy Low Background Corrector D2 lamp energy Possible causes include D2 lamp misaligned The light path has been obstructed Faulty D2 lamp or circuits 9320 No peak high BC lamp energy H...

Page 145: ...etry the peaking 9322 No peak high HC lamp energy High hollow cathode lamp energy Monochromator reference wavelength not found The instrument Gain had been set to its lowest value but the hollow cathode lamp signal was too high Possible causes include Hollow cathode lamp misaligned Faulty hollow cathode lamp Faulty EHT circuit 9323 Low emission no peak The instrument failed to peak at the selected...

Page 146: ... low Incorrect or noisy readings will result if the instrument is not optimized again Possible causes include Wrong hollow cathode lamp for this element Hollow cathode lamp misaligned or the light path is blocked Faulty hollow cathode lamp The lamp current has been set to zero or too low The lamp position in the method is incorrect Suggested action Check that the optical light path is not obstruct...

Page 147: ... message is for information only It can only occur when the instrument is just switched on If this message appears then the instrument will take several minutes to find its wavelength reference The instrument will function correctly after the delay If this message continues to occur and the startup delay is a problem then a service call will be required 9415 Instrument fault lamp code The instrume...

Page 148: ...sed to its highest value but the hollow cathode lamp signal was too low Possible causes include Hollow cathode lamp misaligned The light path is obstructed Faulty hollow cathode lamp The lamp position in the method is incorrect 9518 High HC lamp energy High hollow cathode lamp energy The instrument Gain had been set to its lowest value but the hollow cathode lamp signal was too high Possible cause...

Page 149: ...The instrument detected a problem with the Background Corrector D2 lamp No lamp current has been detected and the D2 lamp has been presumed faulty Change the D2 lamp as described in Chapter 6 If the problem persists a service call may be required 9529 Background lamp interlock Instrument Fault The instrument detected a problem with the Background Corrector D2 lamp The safety interlock switch sugge...

Page 150: ...start the instrument If the problem persists a service call will be required 9911 No burner fitted An attempt was made to ignite the flame without any burner installed in the sample compartment 9912 N2O burner not fitted Wrong burner fitted Change to N2O acetylene burner Possible causes include Wrong burner fitted The burner fitted is an air acetylene type but an N2O acetylene flame is requested B...

Page 151: ...on 9920 Fault flame detected When the Ignite button was pressed the flame detector sensed that a flame is present prior to the ignition sequence For safety reasons this error will prevent the flame from being lit Possible causes include Excessive light in the sample compartment A faulty flame sensor The flame override service switch is in the Flame Sense position 9921 Flame out detected After the ...

Page 152: ...n the sample compartment 9938 Liquid trap not ready The liquid trap connected to the bottom of the nebulizer assembly has insufficient liquid Possible causes include Insufficient liquid in the trap The float in the liquid trap has jammed or been inserted incorrectly Faulty sensor 9xxx GPIB fault This is an internal instrument fault If a SIPS unit is attached check that the cable is correctly insta...

Page 153: ......

Page 154: ...Specifications Software and Hardware Installation Operation of Hardware and Software Maintenance Procedures Instrument Cleaning Spare Parts Troubleshooting www agilent com Agilent Technologies Inc 1997 2000 2002 2009 2010 2012 2013 2016 2017 2019 Edition 14 4 19 8510154100 8510154100 ...

Reviews: