DC Subsystem Functional Verification Test
B
Installation and User’s Guide
121
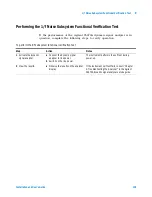
Performing the DC Subsystem Functional Verification Test
Complete these steps to run the self- test and verify the operation the DC
subsystem.
For Agilent 4156C subsystems:
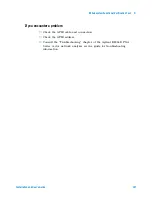
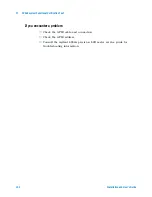
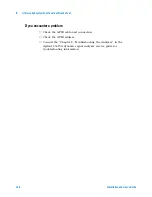
If you encounter a problem
✔
Refer to the Agilent 4156C precision semiconductor parameter analyzer
manual titled, “If You Have a Problem” for an explanation of the error
codes. See the chapter titled, “If Errors Occur When You Perform
Self- Calibration or Diagnostics.”
✔
Refer to the troubleshooting information in the service manual for the
Agilent 4156C precision semiconductor parameter analyzer.
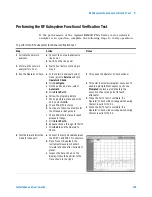
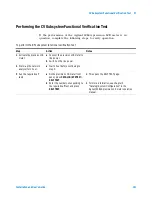
To perform the Agilent 4156C precision semiconductor parameter analyzer self-test
Step
Notes
1 Disconnect all cables from the
measurement terminals on the
4156C rear panel.
2 Connect the 4156C to line power.
3 Switch on the instrument line
power switch.
4 Wait 1 hour before continuing to
step 5
.
5 Press System > [CALIB/DIAG].
•
The analyzer displays the SYSTEM:
SELF-CALIBRATION/DIAGNOSTICS
screen.
6 Press [DIAG SELFTST ALL].
•
This begins the calibration and
self-test process.
•
PASS, FAIL, or DONE appear in the
STATUS column.
•
If a failure occurs, an error code is
displayed in the ERROR column. See
“If you encounter a problem
.”
•
If no errors occur, DIAG SELF-TEST
ALL: PASS appears in the lower
left-hand corner of the display.
Summary of Contents for 85225F
Page 1: ...Agilent Technologies Agilent 85225F PerformanceModelingSystem Installation and User s Guide ...
Page 90: ...90 Installation and User s Guide 2 Installing the System ...
Page 102: ...102 Installation and User s Guide 3 Verifying System Functionality ...
Page 110: ...110 Installation and User s Guide 4 Servicing the System ...
Page 118: ...118 Installation and User s Guide A Enhancing Measurement Accuracy ...
Page 128: ...128 Installation and User s Guide C RF Subsystem Functional Verification Test ...

