7-48
Chapter 7
Programming Examples
Measurement Calibration Examples
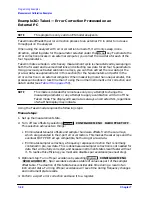
Example 2G: Take4 — Error Correction Processed on an
External PC
NOTE
This program is only valid on ES model analyzers.
Take4 mode offloads the error correction process to an external PC in order to increase
throughput on the analyzer.
When using the analyzer with error correction turned off, it will only sweep in one
direction, collecting data for the parameter selected under the
key. To emulate the
error correction process in an external computer, you collect the raw data for each of the
four S-parameters.
Take4 initiates a mode in which every measurement cycle is characterized by sweeping in
both the forward and reverse directions and collecting raw data for all four S-parameters.
Using previously extracted calibration arrays, you can then extract the raw data (or the
pre-raw data, as explained later in this section) for the S-parameters and perform the
error correction in an external computer. When measuring more than one parameter, this
process can be done in less time than if using the normal instrument error correction and
data transfer (see
NOTE
This mode is intended for remote use only. Any attempt to change the
measured parameter or any attempt to apply a calibration will turn off the
Take4 mode. The displayed trace data is always uncorrected S11, regardless
of what the display may indicate.
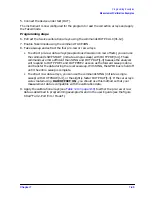
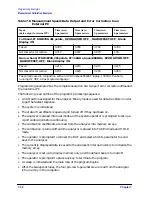
Using the Take4 mode requires the following steps:
Manual steps:
1. Set up the measurement state.
2. Turn off raw offsets by selecting
.
This selection achieves two things:
• Eliminates attenuator offsets and sampler hardware offsets from the cal arrays,
which are generated in the 2-port error correction. This makes the cal arrays and the
eventual OUTPPRE arrays compatible, both using pre-raw data.
• Eliminates sampler correction, a frequency response correction that is normally
contained in pre-raw data. This is done because sampler correction is not needed for
data that will be fully corrected, and because instrument states recall faster without
it. To realize this efficiency, you must also disable spur avoidance (see next step).
3. Optional step: Turn off spur avoidance by selecting
. Spur avoidance creates a table of values as part of the sampler
offset table. The creation of this table takes considerable time during a recall of an
instrument state. Turning off spur avoidance will save time during frequency changes
and instrument state recalls.
4. Perform a 2-port error correction and save it to a register.
Meas
System
CONFIGURE MENU RAW OFFSET OFF
System
CONFIGURE MENU
SPUR AVOID OFF
Summary of Contents for 8719ES
Page 15: ...1 1 1 Alphabetical Command Reference ...
Page 293: ...2 1 2 Introduction to Instrument Control ...
Page 310: ...3 1 3 GPIB Programming ...
Page 334: ...4 1 4 Reading Analyzer Data ...
Page 343: ...5 1 5 Data Processing Chain ...
Page 350: ...6 1 6 Error Reporting ...
Page 364: ...7 1 7 Programming Examples ...
Page 502: ...A 1 A Preset Conditions ...
Page 517: ...B 1 B Command Listings ...

