Chapter 10
10-29
Service Key Menus and Error Messages
Service Key Menus
Node 9
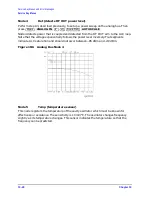
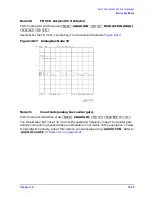
+0.37 V (+0.37 V reference)
Perform step A10, above, and then press
.
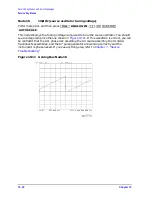
Check for a flat line at approxi0.37 V. This is used as the voltage reference in
“Analog Bus Correction Constants (Test 46)” on page 3-9
. The voltage level should be the
same in high and low resolution; the absolute level is not critical.
Node 10
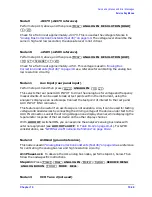
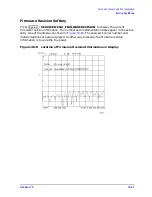
+2.50 V (+2.50 V reference)
Perform step A10, above, and then press
.
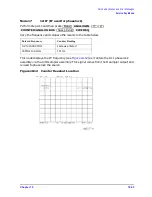
Check for a flat line at approxi2.5 V. This voltage is used in
Correction Constants (Test 46)” on page 3-9
as a reference for calibrating the analog bus
low resolution circuitry.
Node 11
Aux Input (rear panel input)
Perform step A10 and then press
.
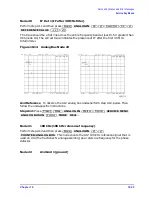
This selects the rear panel AUX INPUT to drive the analog bus for voltage and frequency
measurements. It can be used to look at test points within the instrument, using the
analyzer's display as an oscilloscope. Connect the test point of interest to the rear panel
AUX INPUT BNC connector.
This feature can be useful if an oscilloscope is not available. Also, it can be used for testing
voltage-controlled devices by connecting the driving voltage of the device under test to the
AUX IN connector. Look at the driving voltage on one display channel, while displaying the
S-parameter response of the test device on the other display channel.
With
switched ON, you can examine the analyzer's analog bus nodes with
external equipment (see
in
). For GPIB
considerations, see
“GPIB Service Mnemonic Definitions” on page 10-42
Node 12
A10 Gnd (ground reference)
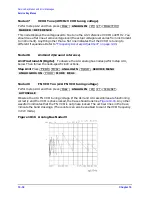
This node is used in
“Analog Bus Correction Constants (Test 46)” on page 3-9
as a reference
for calibrating the analog bus low and high resolution circuitry.
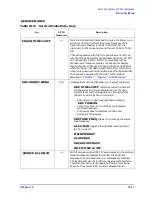
A11 Phase Lock To observe the A11 analog bus nodes, perform step A11, below. Then
follow the node-specific instructions.
Step A11: Press
.
Node 13
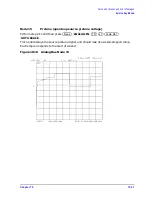
VCO Tune 2 (not used)
Meas
ANALOG IN RESOLUTION [HIGH]
9
x1
Meas
ANALOG IN RESOLUTION [LOW]
10
x1
Scale Ref
1
x1
Meas
ANALOG IN
11
x1
AUX OUT
AUX OUT on OFF
Preset
Meas
ANALOG IN
Marker
System
SERVICE MENU
ANALOG BUS ON
Format
MORE REAL
Summary of Contents for 8753ES
Page 14: ...Contents xiv Contents ...
Page 15: ...1 1 1 Service Equipment and Analyzer Options ...
Page 26: ...1 12 Chapter1 Service Equipment and Analyzer Options Service and Support Options ...
Page 27: ...2 1 2 System Verification and Performance Tests ...
Page 203: ...3 1 3 Adjustments and Correction Constants ...
Page 262: ...3 60 Chapter3 Adjustments and Correction Constants Sequences for Mechanical Adjustments ...
Page 263: ...4 1 4 Start Troubleshooting Here ...
Page 297: ...5 1 5 Power Supply Troubleshooting ...
Page 317: ......
Page 318: ...6 1 6 Digital Control Troubleshooting ...
Page 337: ...6 20 Chapter6 Digital Control Troubleshooting GPIB Failures ...
Page 338: ...7 1 7 Source Troubleshooting ...
Page 369: ...7 32 Chapter7 Source Troubleshooting Source Group Troubleshooting Appendix ...
Page 370: ...8 1 8 Receiver Troubleshooting ...
Page 381: ...8 12 Chapter8 Receiver Troubleshooting Troubleshooting When One or More Inputs Look Good ...
Page 382: ...9 1 9 Accessories Troubleshooting ...
Page 389: ...9 8 Chapter9 Accessories Troubleshooting Inspect the Error Terms ...
Page 390: ...10 1 10 Service Key Menus and Error Messages ...
Page 439: ...10 50 Chapter10 Service Key Menus and Error Messages Error Messages ...
Page 440: ...11 1 11 Error Terms ...
Page 451: ...11 12 Chapter11 Error Terms Error Correction ...
Page 452: ...12 1 12 Theory of Operation ...
Page 482: ...13 1 13 Replaceable Parts ...
Page 487: ...13 6 Chapter13 Replaceable Parts Ordering Information Figure 13 1 Module Exchange Procedure ...
Page 500: ...Chapter 13 13 19 Replaceable Parts Replaceable Part Listings Figure 13 7 8753ET Cables Top ...
Page 502: ...Chapter 13 13 21 Replaceable Parts Replaceable Part Listings Figure 13 8 8753ES Cables Top ...
Page 512: ...Chapter 13 13 31 Replaceable Parts Replaceable Part Listings Figure 13 13 8753ES Cables Front ...
Page 544: ...14 1 14 Assembly Replacement and Post Repair Procedures ...
Page 550: ...Chapter 14 14 7 Assembly Replacement and Post Repair Procedures Covers Figure 14 2 Covers ...
Page 597: ...14 54 Chapter14 Assembly Replacement and Post Repair Procedures Post Repair Procedures ...


