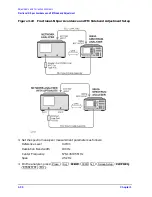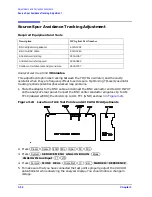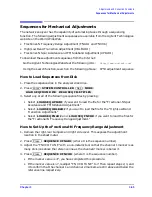
3-40
Chapter 3
Adjustments and Correction Constants
Fractional-N Frequency Range Adjustment
Fractional-N Frequency Range Adjustment
Required Equipment and Tools
Analyzer warm-up time: 30 minutes
This procedure centers the fractional-N VCO (voltage controlled oscillator) in its tuning
range to insure reliable operation of the instrument.
1. Remove the right-rear bumpers and right side cover.
2. Press
.
3. Press
to observe the “FN VCO Tun”
voltage.
4. Press
to set and scale channel 1. Press
to set the marker to the far right of the
graticule.
5. Press
to observe the “FN VCO Tun” voltage.
6. Press
to set channel 2 and its marker.
7. Adjust the “FN VCO TUNE” (see
) with a non-metallic tool so that the
channel 1 marker is as many divisions above the reference line as the channel 2 marker
is below it. (See
.)
8. To fine-tune this adjustment, press
to set
“FRAC N TUNE” to 29.2 MHz.
Description
HP/Agilent Part Number
Non-metallic adjustment tool
8830-0024
Antistatic wrist strap
9300-1367
Antistatic wrist strap cord
9300-0980
Static-control table mat and ground wire
9300-0797
Preset
Display
DUAL|QUAD SETUP DUAL CHAN ON
System
SERVICE MENU ANALOG BUS ON
Sweep Setup
NUMBER OF POINTS
11
x1
COUPLED CH OFF
Start
36
M/
µ
Stop
60.75
M/
µ
Sweep Setup
SWEEP TIME
12.5
k/m
Meas
ANALOG IN Aux Input
29
x1
Format
MORE REAL
Scale Ref
.6
x1
REFERENCE VALUE
−
7
x1
Marker
Chan 2
Sweep Setup
CW FREQ
31.0001
M/
µ
SWEEP TIME
12.375
k/m
Meas
ANALOG IN Aux Input
29
x1
Format
MORE REAL
Scale Ref
.2
x1
REFERENCE VALUE
6.77
x1
Marker
6
k/m
Preset
Sweep Setup
CW FREQ
System
SERVICE MENU ANALOG BUS ON SERVICE MODES FRACN TUNE ON
Summary of Contents for 8753ES
Page 14: ...Contents xiv Contents ...
Page 15: ...1 1 1 Service Equipment and Analyzer Options ...
Page 26: ...1 12 Chapter1 Service Equipment and Analyzer Options Service and Support Options ...
Page 27: ...2 1 2 System Verification and Performance Tests ...
Page 203: ...3 1 3 Adjustments and Correction Constants ...
Page 262: ...3 60 Chapter3 Adjustments and Correction Constants Sequences for Mechanical Adjustments ...
Page 263: ...4 1 4 Start Troubleshooting Here ...
Page 297: ...5 1 5 Power Supply Troubleshooting ...
Page 317: ......
Page 318: ...6 1 6 Digital Control Troubleshooting ...
Page 337: ...6 20 Chapter6 Digital Control Troubleshooting GPIB Failures ...
Page 338: ...7 1 7 Source Troubleshooting ...
Page 369: ...7 32 Chapter7 Source Troubleshooting Source Group Troubleshooting Appendix ...
Page 370: ...8 1 8 Receiver Troubleshooting ...
Page 381: ...8 12 Chapter8 Receiver Troubleshooting Troubleshooting When One or More Inputs Look Good ...
Page 382: ...9 1 9 Accessories Troubleshooting ...
Page 389: ...9 8 Chapter9 Accessories Troubleshooting Inspect the Error Terms ...
Page 390: ...10 1 10 Service Key Menus and Error Messages ...
Page 439: ...10 50 Chapter10 Service Key Menus and Error Messages Error Messages ...
Page 440: ...11 1 11 Error Terms ...
Page 451: ...11 12 Chapter11 Error Terms Error Correction ...
Page 452: ...12 1 12 Theory of Operation ...
Page 482: ...13 1 13 Replaceable Parts ...
Page 487: ...13 6 Chapter13 Replaceable Parts Ordering Information Figure 13 1 Module Exchange Procedure ...
Page 500: ...Chapter 13 13 19 Replaceable Parts Replaceable Part Listings Figure 13 7 8753ET Cables Top ...
Page 502: ...Chapter 13 13 21 Replaceable Parts Replaceable Part Listings Figure 13 8 8753ES Cables Top ...
Page 512: ...Chapter 13 13 31 Replaceable Parts Replaceable Part Listings Figure 13 13 8753ES Cables Front ...
Page 544: ...14 1 14 Assembly Replacement and Post Repair Procedures ...
Page 550: ...Chapter 14 14 7 Assembly Replacement and Post Repair Procedures Covers Figure 14 2 Covers ...
Page 597: ...14 54 Chapter14 Assembly Replacement and Post Repair Procedures Post Repair Procedures ...


