3-52
Chapter 3
Adjustments and Correction Constants
Source Spur Avoidance Tracking Adjustment
Source Spur Avoidance Tracking Adjustment
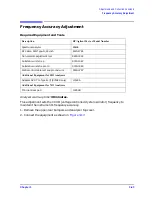
Required Equipment and Tools
Analyzer warm-up time: 30 minutes.
This adjustment optimizes tracking between the YO (YIG oscillator) and the cavity
oscillator when they are frequency offset to avoid spurs. Optimizing YO-cavity oscillator
tracking reduces potential phase-locked loop problems.
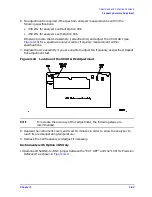
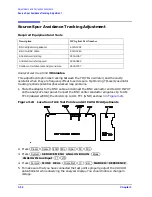
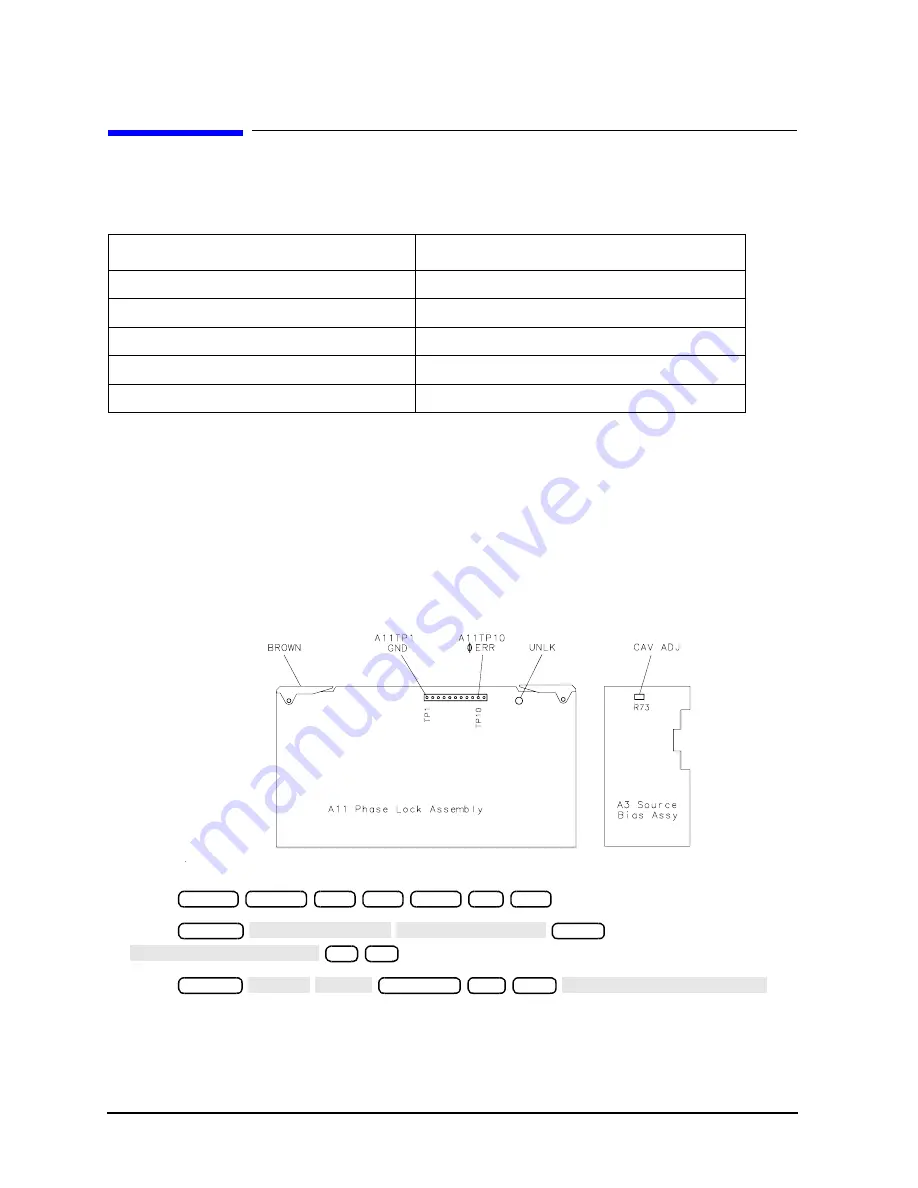
1. Mate the adapter to the BNC cable and connect the BNC connector end to AUX INPUT
on the analyzer’s rear panel. Connect the BNC center conductor alligator-clip to A11
TP10 (labeled
φ
ERR); the shield clip to A11 TP1 (GND) as shown in
Figure 3-24
Location of A11 Test Points and A3 CAV ADJ Adjustments
2. Press
.
3. Press
.
4. Press
.
5. To make sure that you have connected the test points properly, adjust the CAV ADJ
potentiometer while observing the analyzer display. You should notice a change in
voltage.
Description
HP/Agilent Part Number
BNC alligator clip adapter
8120-1292
BNC-to-BNC cable
8120-1840
Antistatic wrist strap
9300-1367
Antistatic wrist strap cord
9300-0980
Static-control table mat and ground wire
9300-0797
Preset
Center
400
M/
µ
Span
50
M/
µ
System
SERVICE MENU ANALOG BUS ON
Meas
ANALOG IN Aux Input
11
x1
Format
MORE REAL
Scale Ref
10
k/m
MARKER
→
REFERENCE
Summary of Contents for 8753ES
Page 14: ...Contents xiv Contents ...
Page 15: ...1 1 1 Service Equipment and Analyzer Options ...
Page 26: ...1 12 Chapter1 Service Equipment and Analyzer Options Service and Support Options ...
Page 27: ...2 1 2 System Verification and Performance Tests ...
Page 203: ...3 1 3 Adjustments and Correction Constants ...
Page 262: ...3 60 Chapter3 Adjustments and Correction Constants Sequences for Mechanical Adjustments ...
Page 263: ...4 1 4 Start Troubleshooting Here ...
Page 297: ...5 1 5 Power Supply Troubleshooting ...
Page 317: ......
Page 318: ...6 1 6 Digital Control Troubleshooting ...
Page 337: ...6 20 Chapter6 Digital Control Troubleshooting GPIB Failures ...
Page 338: ...7 1 7 Source Troubleshooting ...
Page 369: ...7 32 Chapter7 Source Troubleshooting Source Group Troubleshooting Appendix ...
Page 370: ...8 1 8 Receiver Troubleshooting ...
Page 381: ...8 12 Chapter8 Receiver Troubleshooting Troubleshooting When One or More Inputs Look Good ...
Page 382: ...9 1 9 Accessories Troubleshooting ...
Page 389: ...9 8 Chapter9 Accessories Troubleshooting Inspect the Error Terms ...
Page 390: ...10 1 10 Service Key Menus and Error Messages ...
Page 439: ...10 50 Chapter10 Service Key Menus and Error Messages Error Messages ...
Page 440: ...11 1 11 Error Terms ...
Page 451: ...11 12 Chapter11 Error Terms Error Correction ...
Page 452: ...12 1 12 Theory of Operation ...
Page 482: ...13 1 13 Replaceable Parts ...
Page 487: ...13 6 Chapter13 Replaceable Parts Ordering Information Figure 13 1 Module Exchange Procedure ...
Page 500: ...Chapter 13 13 19 Replaceable Parts Replaceable Part Listings Figure 13 7 8753ET Cables Top ...
Page 502: ...Chapter 13 13 21 Replaceable Parts Replaceable Part Listings Figure 13 8 8753ES Cables Top ...
Page 512: ...Chapter 13 13 31 Replaceable Parts Replaceable Part Listings Figure 13 13 8753ES Cables Front ...
Page 544: ...14 1 14 Assembly Replacement and Post Repair Procedures ...
Page 550: ...Chapter 14 14 7 Assembly Replacement and Post Repair Procedures Covers Figure 14 2 Covers ...
Page 597: ...14 54 Chapter14 Assembly Replacement and Post Repair Procedures Post Repair Procedures ...


