Chapter 10
10-21
Service Key Menus and Error Messages
Service Key Menus
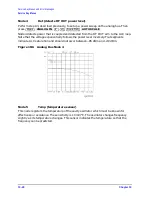
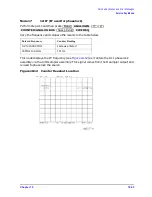
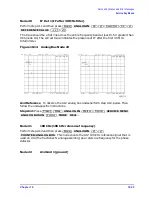
• About 0.750 MHz is a typical counter reading with no AC signal present.
• Anything occurring during bandswitches is not visible.
• Fast-moving waveforms may be sensitive to sweep time.
• The analog bus input impedance is about 50K ohms.
• Waveforms up to approximately 200 Hz can be reproduced.
Analog In Menu
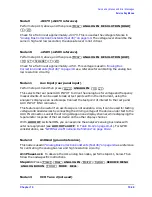
Select this menu to monitor voltage and frequency nodes, using the analog bus and
internal counter, as explained below.
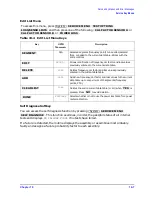
To switch on the analog bus and access the analog in menu, press:
The
key toggles between low and high resolution.
Resolution Maximum
Signal
Minimum
Signal
LOW
+0.5 V
−
0.5 V
HIGH
+10 V
−
10 V
Table 10-12
Analog In Menu Keys
Key
GPIB
Mnemonic
Description
N/A
Allows you to monitor the analog bus nodes (except
nodes 1, 2, 3, 4, 9, 10, 12) with external equipment
(oscilloscope, voltmeter, etc.). To do this, connect the
equipment to the AUX INPUT BNC connector on the
rear panel, and press
, until
is
highlighted.
CAUTION
To prevent damage to the analyzer, first
connect the signal to the rear panel AUX
INPUT, and then switch the function ON.
N/A
Switches the internal counter off and removes the counter
display from the display. The counter can be switched on with
one of the next three keys. (Note: Using the counter slows the
sweep.) The counter bandwidth is 16 MHz unless otherwise
noted for a specific node.
NOTE
OUTPCNTR
is the GPIB command to output
the counter’s frequency data.
N/A
Switches the counter to monitor the analog bus.
System
SERVICE MENU ANALOG BUS ON
Meas
ANALOG IN
RESOLUTION
AUX OUT on OFF
AUX OUT
ON
COUNTER: OFF
ANALOG BUS
Summary of Contents for 8753ES
Page 14: ...Contents xiv Contents ...
Page 15: ...1 1 1 Service Equipment and Analyzer Options ...
Page 26: ...1 12 Chapter1 Service Equipment and Analyzer Options Service and Support Options ...
Page 27: ...2 1 2 System Verification and Performance Tests ...
Page 203: ...3 1 3 Adjustments and Correction Constants ...
Page 262: ...3 60 Chapter3 Adjustments and Correction Constants Sequences for Mechanical Adjustments ...
Page 263: ...4 1 4 Start Troubleshooting Here ...
Page 297: ...5 1 5 Power Supply Troubleshooting ...
Page 317: ......
Page 318: ...6 1 6 Digital Control Troubleshooting ...
Page 337: ...6 20 Chapter6 Digital Control Troubleshooting GPIB Failures ...
Page 338: ...7 1 7 Source Troubleshooting ...
Page 369: ...7 32 Chapter7 Source Troubleshooting Source Group Troubleshooting Appendix ...
Page 370: ...8 1 8 Receiver Troubleshooting ...
Page 381: ...8 12 Chapter8 Receiver Troubleshooting Troubleshooting When One or More Inputs Look Good ...
Page 382: ...9 1 9 Accessories Troubleshooting ...
Page 389: ...9 8 Chapter9 Accessories Troubleshooting Inspect the Error Terms ...
Page 390: ...10 1 10 Service Key Menus and Error Messages ...
Page 439: ...10 50 Chapter10 Service Key Menus and Error Messages Error Messages ...
Page 440: ...11 1 11 Error Terms ...
Page 451: ...11 12 Chapter11 Error Terms Error Correction ...
Page 452: ...12 1 12 Theory of Operation ...
Page 482: ...13 1 13 Replaceable Parts ...
Page 487: ...13 6 Chapter13 Replaceable Parts Ordering Information Figure 13 1 Module Exchange Procedure ...
Page 500: ...Chapter 13 13 19 Replaceable Parts Replaceable Part Listings Figure 13 7 8753ET Cables Top ...
Page 502: ...Chapter 13 13 21 Replaceable Parts Replaceable Part Listings Figure 13 8 8753ES Cables Top ...
Page 512: ...Chapter 13 13 31 Replaceable Parts Replaceable Part Listings Figure 13 13 8753ES Cables Front ...
Page 544: ...14 1 14 Assembly Replacement and Post Repair Procedures ...
Page 550: ...Chapter 14 14 7 Assembly Replacement and Post Repair Procedures Covers Figure 14 2 Covers ...
Page 597: ...14 54 Chapter14 Assembly Replacement and Post Repair Procedures Post Repair Procedures ...

