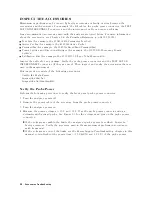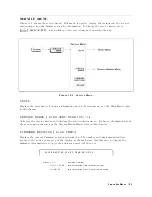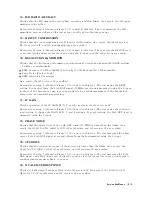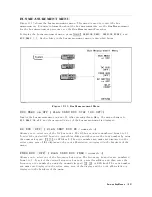
FAILED "
message
at
the
end
of
the
power
on
sequence
.
The
rst
failed
test
indicates
the
most
probable
faulty
assembly
.
Internal
T
est
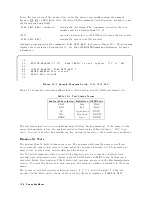
These
tests
are
completely
internal
and
self-evaluating.
They
do
not
require
external
connections
or
user
interaction.
The
analyzer
has
16
internal
tests
.
External
T
ests
These
are
additional
self-evaluating
tests
.
However
,
these
tests
require
some
user
interaction
(such
as
key
entries).
The
analyzer
has
24
external
tests
.
A
djustment
T
ests
These
tests
are
used
to
adjust
the
analyzer
.
See
the
A
djustments
and
Correction
Constants
chapter
.
The
analyzer
has
7
adjustment
tests
.
Display
T
ests
These
tests
are
used
to
adjust
and
check
for
proper
operation
of
the
display
circuits
.
See
the
A
djustments
and
Correction
Constants
chapter
.
The
analyzer
has
5
display
tests
.
ALL
EXT
T
ests
These
tests
are
used
to
perform
the
Operator's
Check.
See
the
Troubleshooting
chapter
.
The
analyzer
has
5
ALL
EXT
tests
.
MISC
T
ests
The
tests
are
used
to
evaluate
43961A
RF
Impedance
T
est
Kit.
T
est
Descriptions
This
section
describes
all
59
diagnostic
tests
.
NNNNNNNNNNNNNNNNNNNNNNNNNNNNNNNNNNNNNNNNNNNNNNNN
INTERNAL
TESTS
This
group
of
tests
run
without
external
connections
or
operator
interaction.
All
return
a
\P
ASS"
or
\F
AIL"
indication
on
the
display
.
Except
as
noted,
all
are
run
during
the
power
on
self-test
and
when
4
Preset
5
pressed.
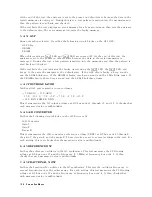
0:
ALL
INT
Runs
only
when
selected.
It
consists
of
internal
tests
1
and
4
through
16.
If
any
of
these
tests
fail,
this
test
displays
the
\F
AIL"
status
indication.
Use
the
RPG
knob
to
scroll
through
the
tests
to
see
which
test
failed.
If
all
pass
,
the
test
displays
the
\P
ASS"
status
indication.
Each
test
in
the
subset
retains
its
own
test
status
.
1:
A1
CPU
V
eries
the
following
circuit
blocks
on
the
A1
CPU:
Digital
Signal
Processor
(DSP)
System
Timer
Real
Time
Clock
Front
Key
Controller
Flexible
Disk
Drive
Controller
GPIB
Controller
EEPROM
2:
A1
V
OLA
TILE
MEMORY
Runs
only
when
selected.
It
veries
the
A1
volatile
memories:
CPU
internal
SRAM
DSP
SRAM
Dual
P
ort
SRAM
Backup
SRAM
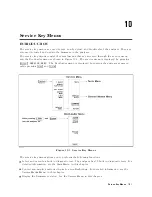
Service
K
ey
Menus
10-7
Summary of Contents for Agilent 4396B
Page 10: ......
Page 32: ......
Page 43: ...Figure 2 7 CAL OUT Level Adjustment Location Adjustments and Correction Constants 2 11 ...
Page 46: ...Figure 2 10 Comb Generator Output 2 14 Adjustments and Correction Constants ...
Page 62: ...Figure 2 26 Final Gain Adjustment Location 2 30 Adjustments and Correction Constants ...
Page 76: ...Figure 3 1 Troubleshooting Organization 3 2 T roubleshooting ...
Page 84: ......
Page 90: ...Figure 5 1 Power Supply Lines Simpli ed Block Diagram 5 2 Power Supply T roubleshooting ...
Page 107: ...Figure 5 12 Power Supply Block Diagram 1 Power Supply T roubleshooting 5 19 ...
Page 108: ...Figure 5 13 Power Supply Block Diagram 2 5 20 Power Supply T roubleshooting ...
Page 109: ...Figure 5 14 Power Supply Block Diagram 3 Power Supply T roubleshooting 5 21 ...
Page 110: ......
Page 112: ...Figure 6 1 Digital Control Group Simpli ed Block Diagram 6 2 Digital Control T roubleshooting ...
Page 124: ......
Page 126: ...Figure 7 1 Source Group Block Diagram 7 2 Source Group T roubleshooting ...
Page 160: ...Figure 8 1 Receiver Group Simpli ed Block Diagram 8 2 Receiver Group T roubleshooting ...
Page 168: ......
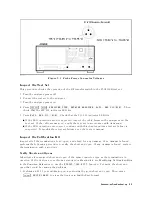
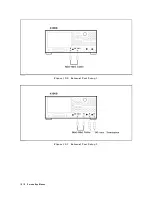
Page 184: ...Figure 10 6 External Test Setup 1 Figure 10 7 External Test Setup 2 10 10 Service Key Menus ...
Page 185: ...Figure 10 8 External Test Setup 3 Figure 10 9 External Test Setup 4 Service Key Menus 10 11 ...
Page 226: ...Figure 11 3 Power Supply Functional Group Simpli ed Block Diagram 11 6 Theory of Operation ...
Page 231: ...Figure 11 5 Digital Control Group Simpli ed Block Diagram Theory of Operation 11 11 ...
Page 235: ...Figure 11 6 Source Simpli ed Block Diagram Theory of Operation 11 15 ...
Page 244: ...Figure 11 7 Receiver Simpli ed Block Diagram 11 24 Theory of Operation ...
Page 249: ...Figure IDC5S11001 here Figure 11 8 4396B Source Group Block Diagram Theory of Operation 11 29 ...
Page 254: ...Figure 12 1 Top View Major Assemblies 12 4 Replaceable Parts ...
Page 290: ...Figure 12 36 Main Frame Assembly Parts 17 19 12 40 Replaceable Parts ...
Page 294: ......
Page 308: ......
Page 311: ...Figure C 1 Power Cable Supplied Power Requirement C 3 ...
Page 312: ......
Page 324: ......


